
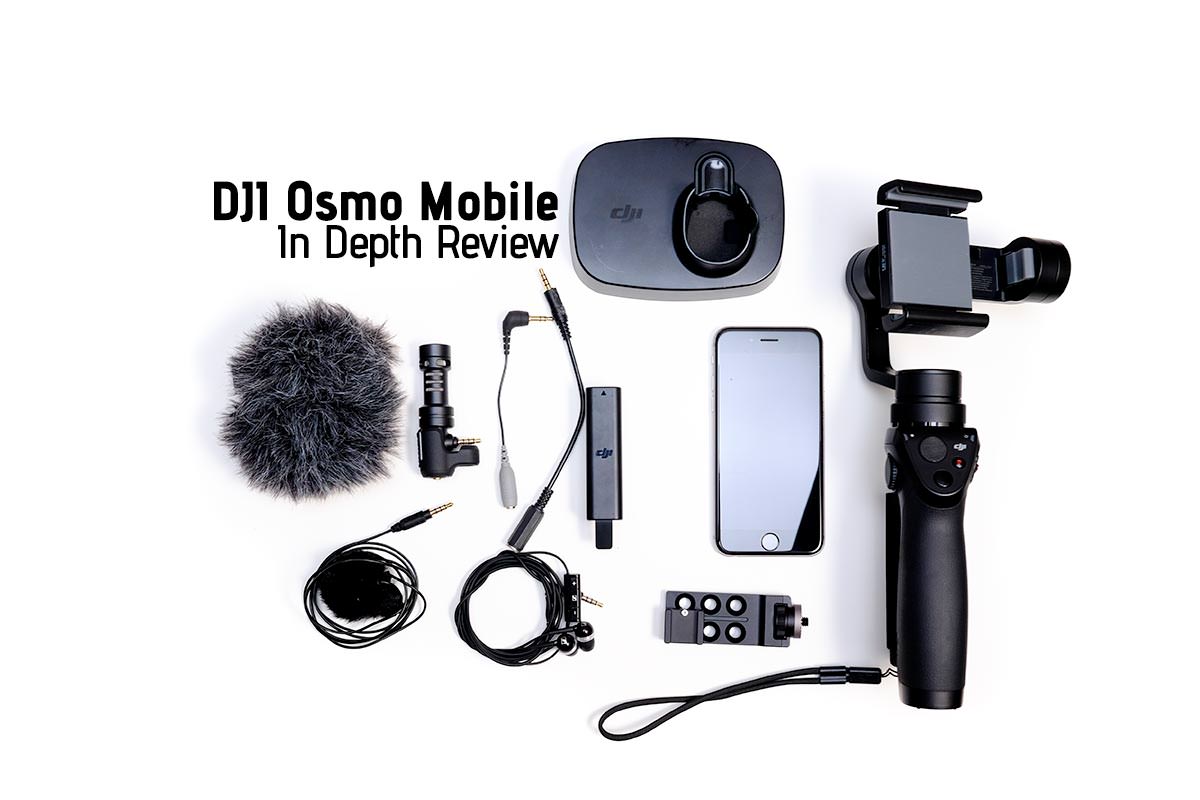
 Late September, I received my Osmo Mobile and I have been shooting more and more videos with it using iPhone 6 and iPhone 7 Plus (just a few weeks ago). My verdict is that its a worthwhile investment for the price tag it has. In this review I will share the various different usage I’ve had with the Osmo Mobile and the various options including external audio with Osmo Mobile.
So let’s start with the basics of the Osmo Mobile, connection and setup and then look at its video shooting capabilities.
Connecting to the Osmo Mobile
Connection is done via Bluetooth and your smartphone easily connects to the device. You don’t have to connect via bluetooth but the advantage is that you have integrated features available via the DJI Go App. The app let’s you record video, shoot time lapse and motion time lapse while monitoring the battery level of the device. So its definitely an advantage having the bluetooth connection.
Installing your Smart Phone
Like I talked in the initial review, balancing your phone is simple and quick. So you are up and running in no time. The adjustable adapts to support larger plus size phones so you can balance any device of width up to 3.34″ (84.8mm). So to give you perspective, you can go from iPhone 5 to iPhone 7 Plus in terms of supported sizes.


Shooting Video
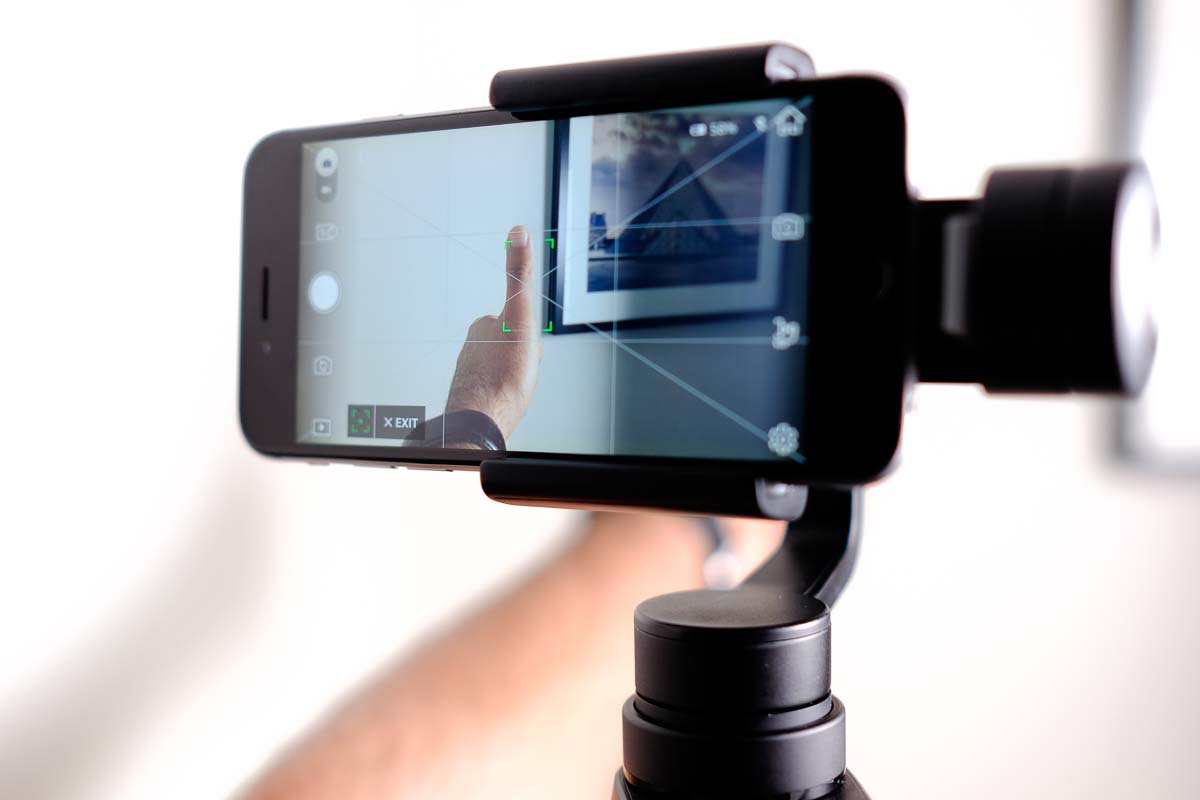
Shooting video with the Osmo Mobile, is a breeze. It shoots silky smooth video with the DJI Go app or using other apps natively. The gimbal is able to move with you and follows your movement smoothly. If you want to look down, just tilt the gimbal arm down and it will follow your movement. If you want to look up, tilt the gimbal arm up and it moves with you.
Once you master this gesture based movement, you hardly need to use the Joystick to move the gimbal. The DJI Go app, allows you to set focus and exposure, as you’d expect from any smartphone video app, you can also lock them.
Another really awesome feature of the app is the face or object tracking, in this mode (Active Track), you can have the gimbal follow a subject within its range of motion. Its really handy for video logging and one man podcast setup. Below you will see how the gimbal follows the “thumbs up” I’m giving to this cool device.


In addition to the DJI Go app, I’ve also used the native Camera app, Filmic Pro and ProCamera to shoot video with and these apps work just fine with the Osmo Mobile.
There are several shooting modes with the Osmo Mobile but there is no button to switch between the four modes. You simply move the gimbal into the desired position and it switches into the corresponding mode. As illustrated in their manual, you have four modes; Upright Mode, Underslung Mode, Flashlight Mode and Portrait Mode. Majority of my shooting was in Upright Mode and occasionally with Flashlight Mode but other modes are easy to switch to as you simply need to position gimbal as desired.
Upright Mode

Flashlight Mode

Underslung Mode

Portrait Mode

Motion Time Lapse
For this you need to mount your Osmo Mobile so it remains still for the entire sequence. You can get various accessories from DJI that will let you mount your Osmo Mobile. The easiest option is the Osmo Base, Tripod (with Extension Rod) or Universal Mount. I have got both Osmo Base and Universal Mount and these work well for shooting Motion Time Lapse. The Osmo Base has a 1/4″ thread on the base of it so you can mount it on any tripod and then attach the Osmo Mobile to it, its quite steady but the one I have had a little play so Osmo Mobile would swing left and right slightly, I simply tug the wrist strap thread into the mount and it grips the base firmly. Not sure other base have this as well.


The Universal Mount attaches to the side of the Osmo Mobile and provides a secure and firm mounting option but you have to get your standard tripod quick release plate attached to this mount. I use a 1/4″ nut and bolt which I thread through one of the wholes in the Universal Mount and that gives me a secured and steady mounting platform.

Now back onto the motion time lapse, its really cool what you can create with this little gadget. Typically you’d need really expensive motorised rotating platforms for DSLRs to achieve similar results which you can now achieve with your smartphone. You simply move the gimbal using the Joystick to the start position, take an image and then define any other points of interest where you want it to move towards before defining a finish position. Next select the interval of your images and total length of the shoot sequence and the Osmo Mobile does the math and is ready to shoot.


Time Lapse – Lyon Street Life (1080p)
Some key points to note though, are that, make sure your smartphone has enough battery to last the sequence as well as the Osmo Mobile has a fully charged battery. The Osmo Mobile battery is really good and last up to 4 hour easily. However, your smartphone will chew through the battery very quickly as its doing all the heavy lifting and putting the sequence together.
One thing I have noticed is that at the end of the sequence you will get a couple of frames in the video where the Osmo is returning to its normal balance position while it may still be shooting, so the footage appears to jump in last few frames at the end. But that’s not a big deal as it is something you can omit from the final edit.
Here’s another time lapse that was taken with the DJI Osmo Mobile, some clips are captured with the Fujifilm X-T1 but the moving and rotating head is all done with Osmo Mobile.
Audio Options
To make a great video you must have a great audio. That’s the golden rule!!
Osmo Mobile doesn’t have any audio connectivity built in and that’s by design as the audio is recorded by your device ie your Smartphone. The audio recorded on the smartphone is not going to be great, you are going to have lot of background noise and particularly during the quitter moments the microphone will amplify the surrounding noise.
External Audio can be attached to your smartphone, such as:
Standard Earphones
Standard Earphones of your smartphone (they have a built in microphone). If you plug them in and clip the microphone, or put the earphone with mic attached to it in your ear you can get much cleaner audio recorded in the video. Only draw back is in windy situations you will have some additional noise picked up in the audio.

smartLav+ by Rode
You do have to pay attention that the cable doesn’t obstruct the gimbal or causes the smartphone to be slightly crooked. I found that with iPhone 6 the smartLav+ cable was making contact with the gimbal so I shaved off the edge on the connector with a stanley knife and flatted it so it leaves some room when connected. I’ve attached a wind shield to the mic so I can get cleaner audio when outdoors.


VidoeMicMe by Rode (as shown)
VideoMicro by Rode (with SC7 cable)
I already had the VideoMicMe for use with my iPhone 6 but this can’t be attached directly to the phone as it gets in the way of the Osmo Mobile. So I have used two cables which I already had to allow me to mount the microphone on the side (to the Universal Mount).
The cables are TRRS (female) to TRS (male) and TRS (female) to TRRS (male). This give a TRRS (female) to TRRS (male) cable which can allow me to mount the VideoMicMe away from the phone itself. I secured it with a elastic band onto the Universal Mount.
Summary
To summarise I really am having fun using the DJI Osmo Mobile and its a great addition to my kit. Now I have silky smooth smartphone video that I can enjoy watching with good audio as well.

2 Comments
Trackbacks/Pingbacks
- Merry Christmas and Happy Holidays | Photo Insomnia - […] […]
- Three Sisters in Katoomba – Blue Mountains | Photo Insomnia - […] experiment involved using my DJI Osmo Mobile to house the iPhone 7 Plus and shooting some footage of this…
- FiLMiC Pro – the best Smartphone App for Video | Photo Insomnia - […] use this for vlogging along with my DJI Osmo Mobile (check out the review) however the FiLMiC Pro app…


Hey! Thanks a lot for this review. Now I know that I Will need that universal mount to use osmo with my 1/4″ tripod. 🙂
I’m glad that was helpful. I didn’t buy it initially with my Osmo Mobile but then hard to purchase after.