Autumn is a beautiful time of the year when the trees around us show us beautiful colours before they shed their leaves in preparation for Winter. So it’s an amazing opportunity to go out and shoot some of your favourite landscapes once again during this time of the year.
Once you have downloaded all your beatiful shots on your computer using some simple yet power post-processing techniques in Lightroom, you can enchnance the beauty of these images. The ‘Foliage’ is the star of such landscape images so it is only fair that we enhance this in order to make it shine.
Steps for Foliage Enhancement
Let me walk you through quickly how I do this in Adobe Lightroom. The same steps could be applied in Camera Raw if you are using Adobe Photoshop instead of Lightroom.
Step 1
Select your favourite shot and switch over to the Develop Module (press D on your Keyboard). My basic edit of the photo involves:
- Contrast +27
- Highlights -64
- Shadows +66
- Whites +26
- Blacks -41
- Clarity +11
- Vibrance +10
Of course this is only my settings for this image and will adjust each image differently but basic idea is to increase contract and clarity while ensuring the hightlights are recovered as much as possible.
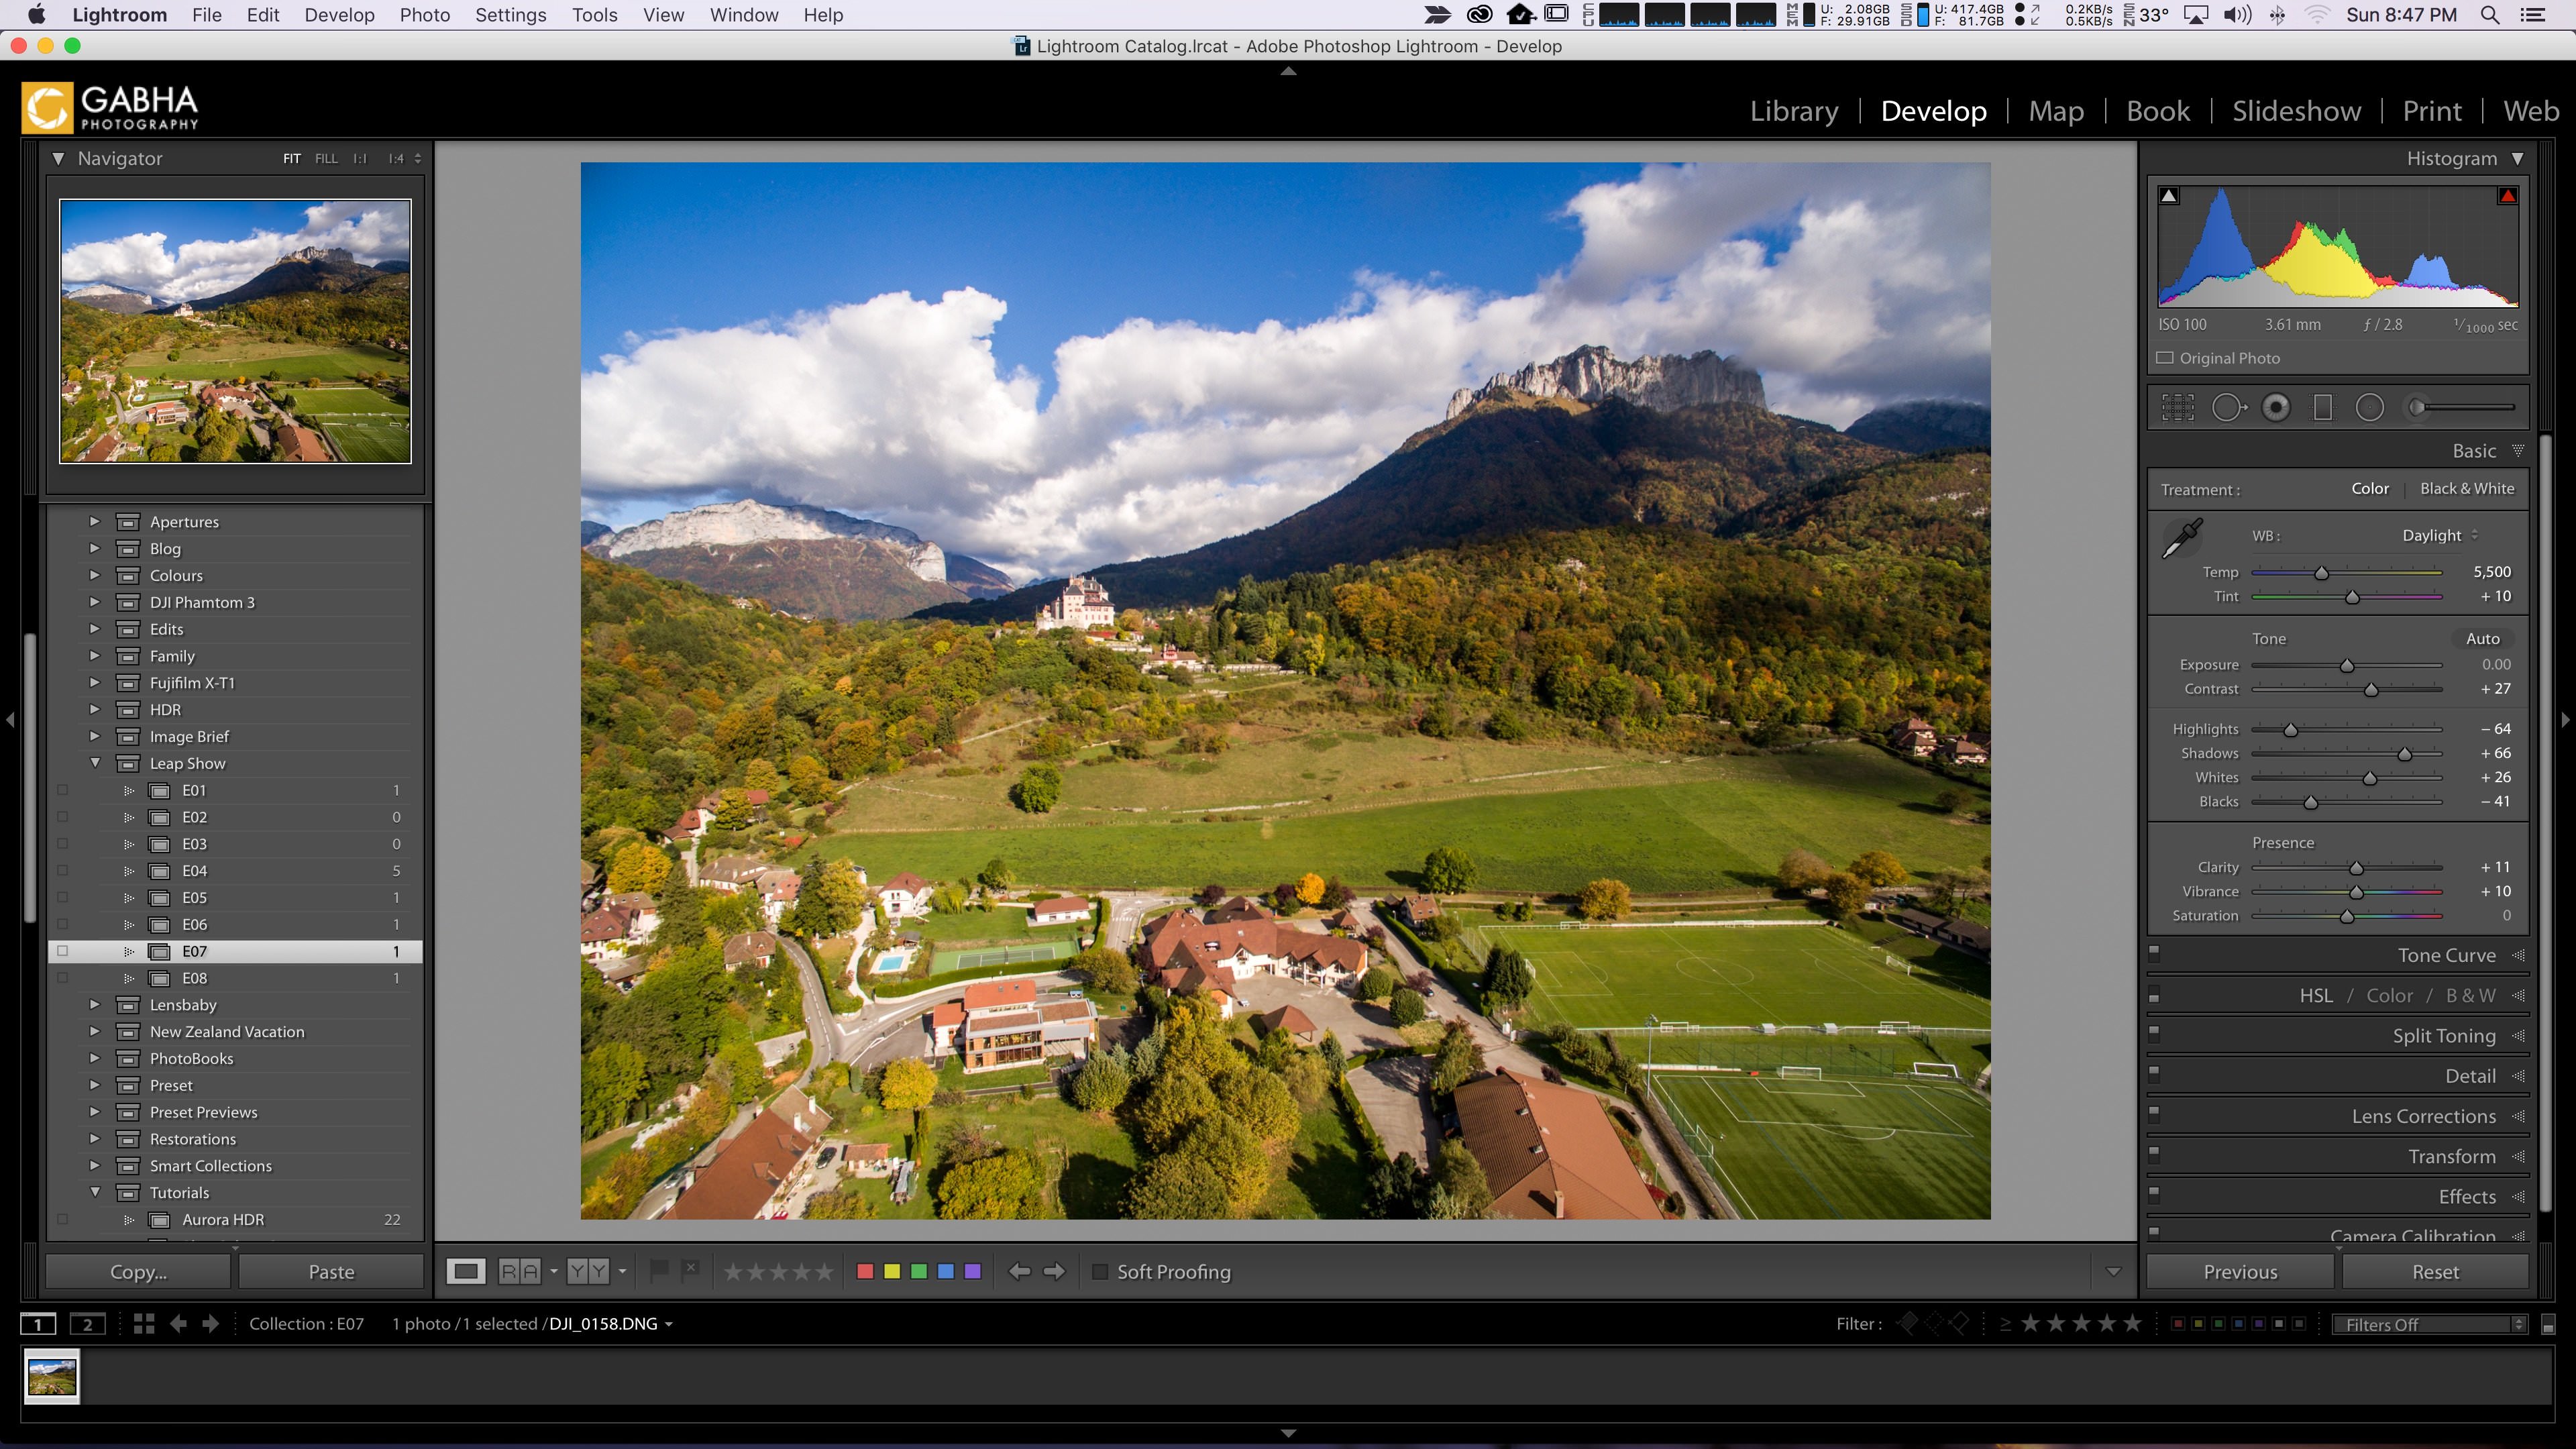

You can see that the colours and contrast already looks nice but now we will take the foliage and make it shine through the image.
Step 2
Now we must venture into a panel which is often neglected but is very powerful once you know how to use it. Its the HSL panel in the Develop module. If you haven’t read by other blog post about the HSL panel I suggest you check it out.
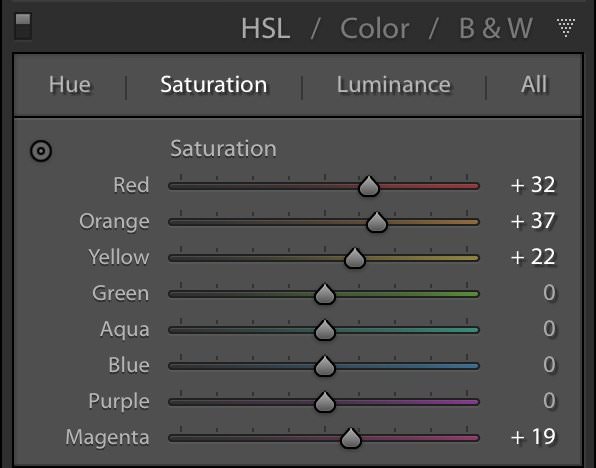
First I will edit the Saturation of certain colours. The Autumn colours will have lot of Reds, Oranges and Yellows (sometime Magentas also). So I adjust these sliders and watch the image making sure its only increase to emphasise them but not overpower them.
Step 3
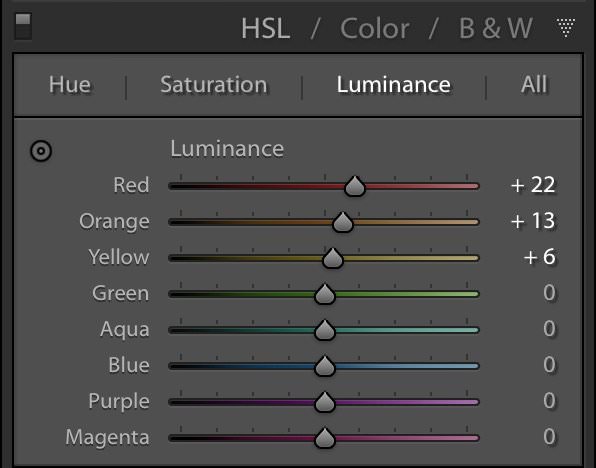
Next we move over to the Luminance section of the HSL panel. Adjusting the Luminance is going to increase the brightness of the image and again help draw the viewers eyes into the image.
Here I will adjust the same colours as I adjusted with Saturation.
Step 4
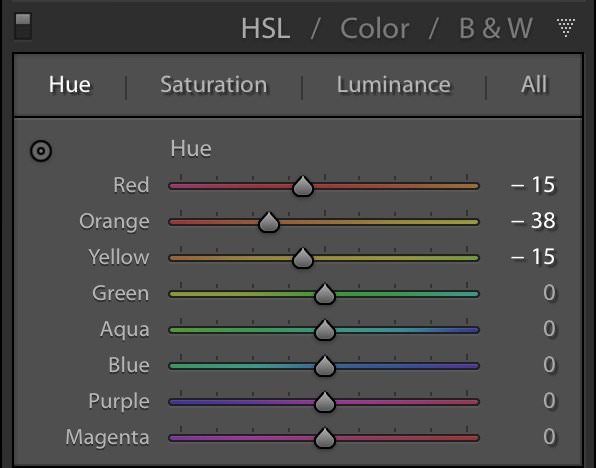
Finally, I will swap over the Hue section and here push the sliders of the same colours towards negative. This is shifting some colours in the Foliage and making them stronger. If something was part yellow…part orange becomes more orange when I move the Orange slider towards negative value.
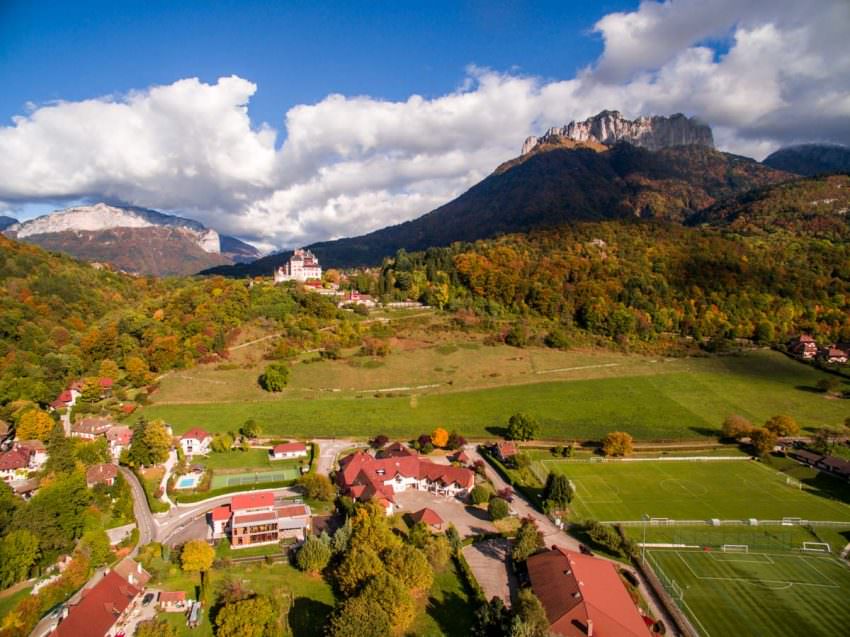
You can see now that the image is finally edited the Foliage is drawing your eyes and looking amazing in this photo.
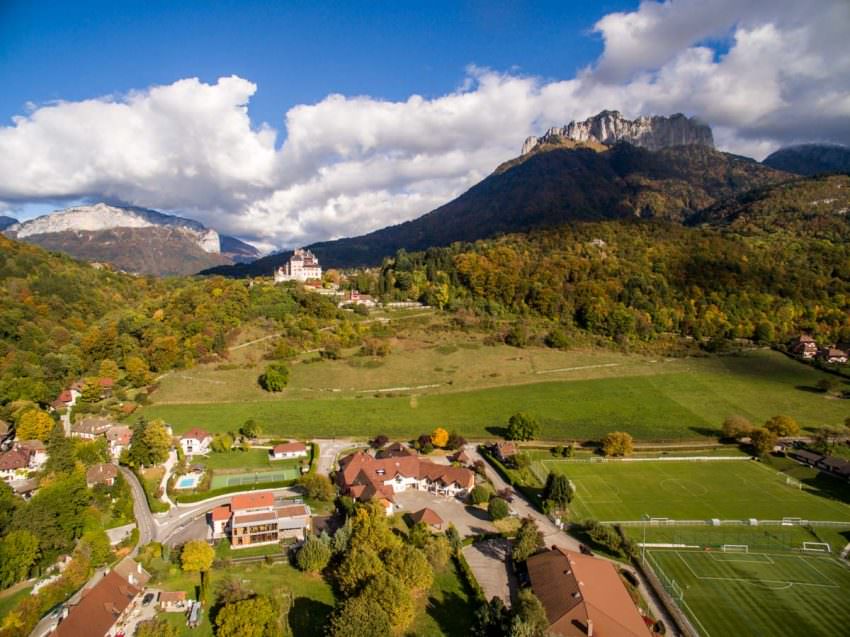
Check out the before and after below, and the final edited image. See the full size version and you will see that the difference is significant and now the standard basic edit image almost looks dull (well kind of).
If you liked this technique please share it with your friends and leave a comment below or a link to your edited image. I’d love to see your images. Cheers!!

Before and After