Recently I got a new iMac replacing my old one and therefore I had to install all of my photography apps on it. As soon as I started using Lightroom after installing it, I realised some of the configurations that I had setup was gone. And these configurations are very handy in any workflow so I decided to put together a post to help you improve your workflow by enabling the following.
Auto Advance
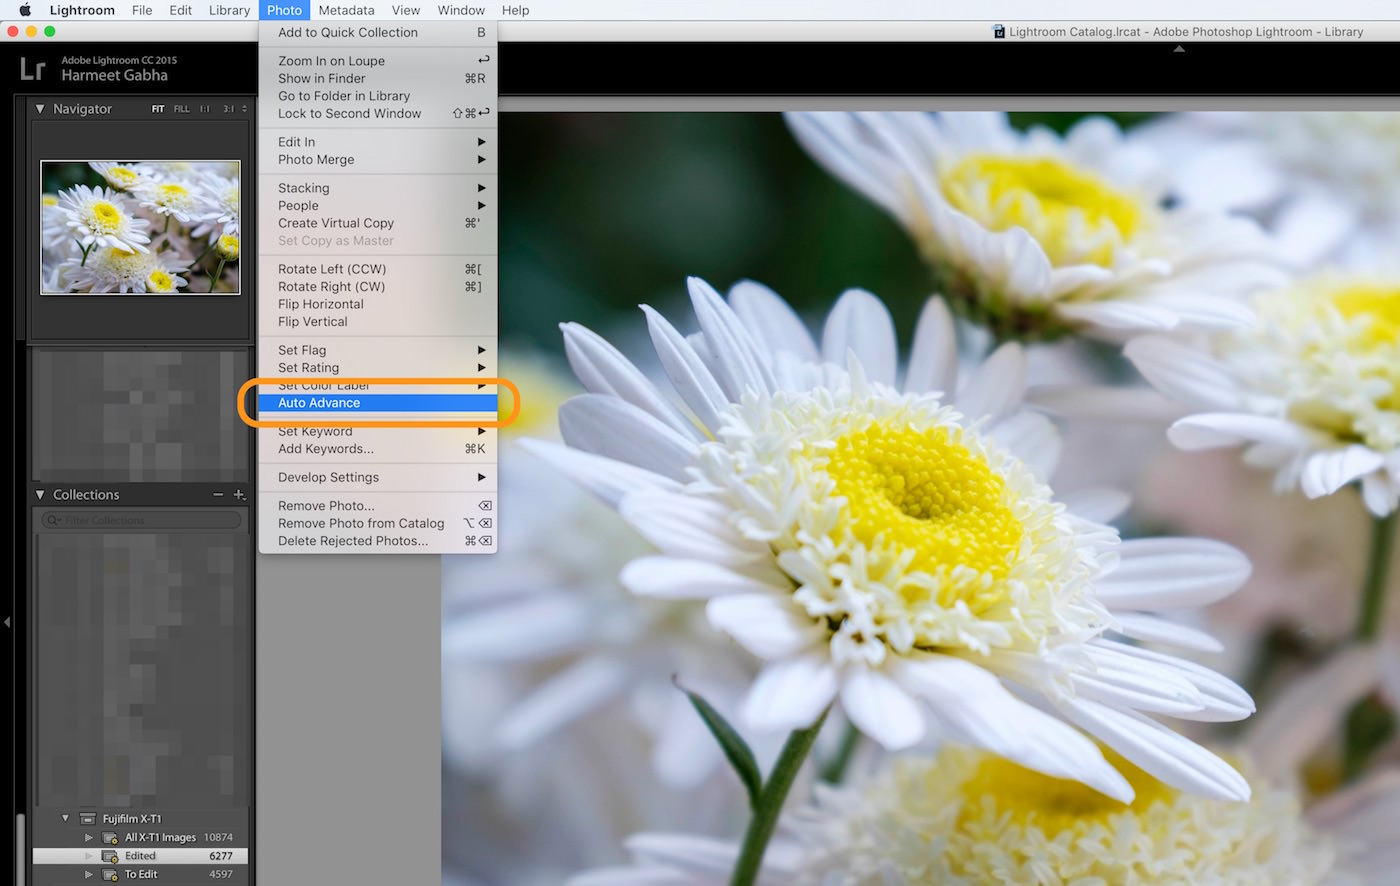
Auto advance is a setting that let’s you move from current image to the next one in the Library & Develop. This is when you are Ranking your images with Stars, Colour Labels or Picking (Rejects & Picks etc). Otherwise you need to explicitly move right using the Right Arrow key or the mouse to the next image.
To enable this feature, you need to go to the Library Module and select from the Photo menu “Auto Advance“.
Solo Mode
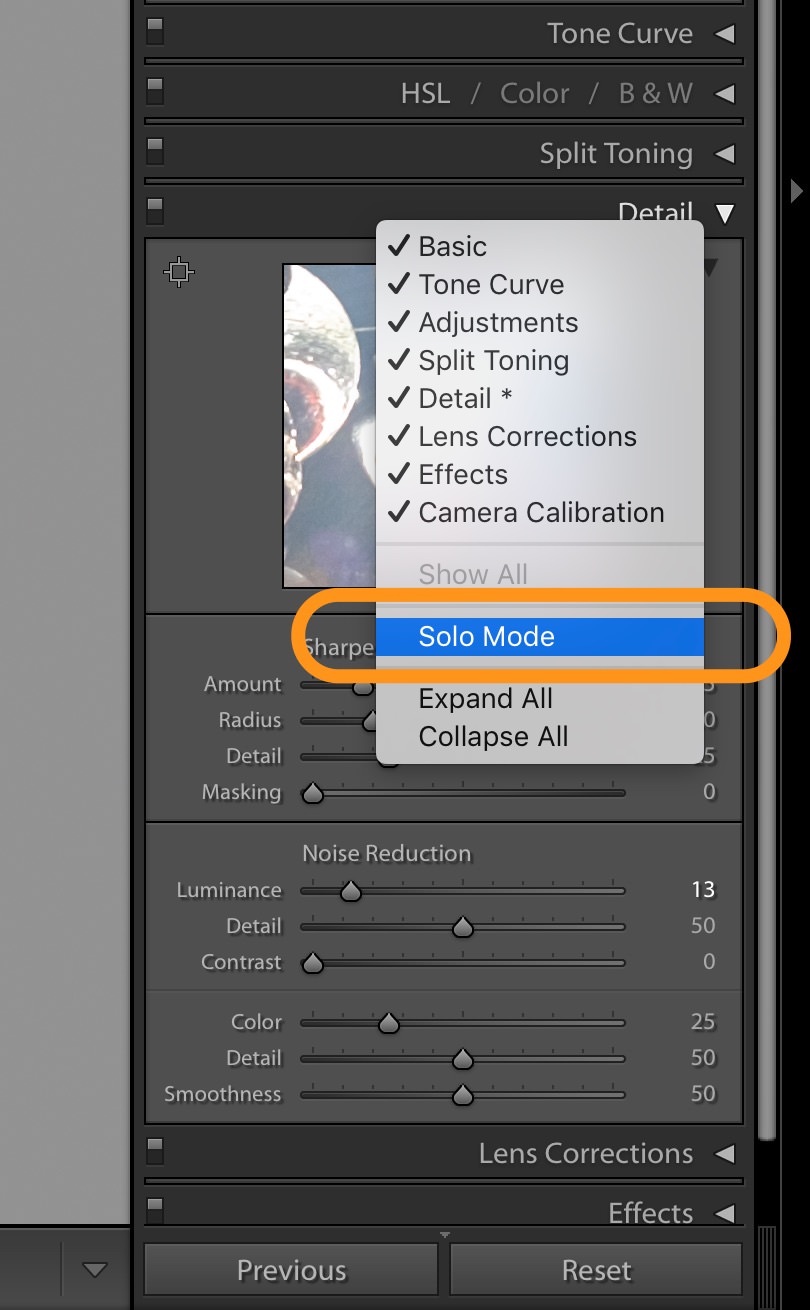
This option helps you have a clean workflow by only having one Panel open at one time. This eliminates extensive scrolling and getting lost in the site Modules. This option can be enabled in each Module eg. Library and Develop by right clicking on the panel.
To enable this feature, select the desired Module and right click on to select “Solo Mode“. I also have a separate post about this mode.
View Info
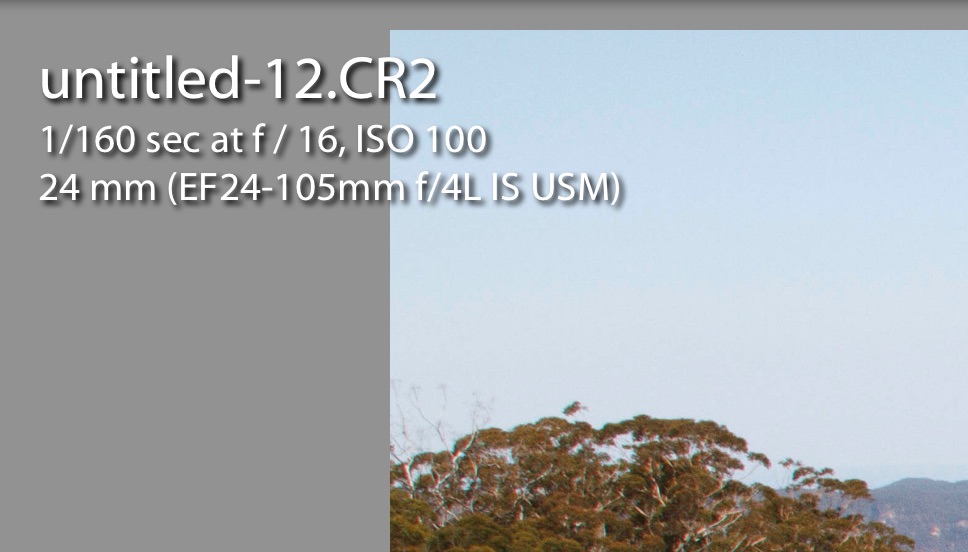
Having taken all the images, you want easy access to know what metadata the image has in any Module. View Info option gives you just this as it overlays on the top left hand side of the image the metadata about your image.
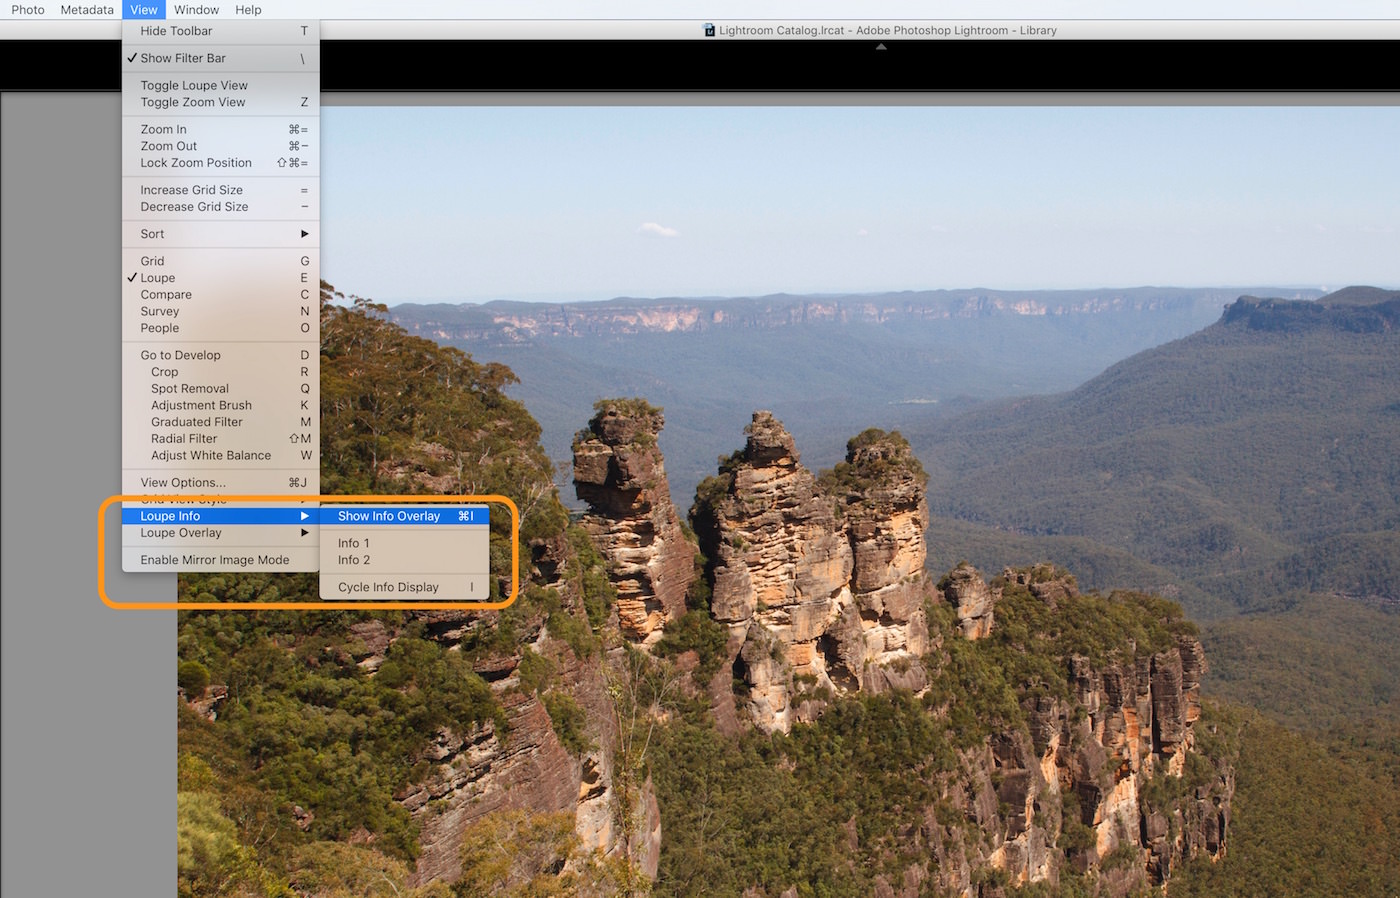
To enable this feature, you need to go to the Library or Develop Module and select from the View menu “Loupe Info > Show Info Overlay“. You can cycle through two types of settings by pressing “I”. You can even customise the information that you want to see via the View menu selection “View Options…”

Import Preset
No matter what brand camera you use, there are several things you always want to do across all images. For example:
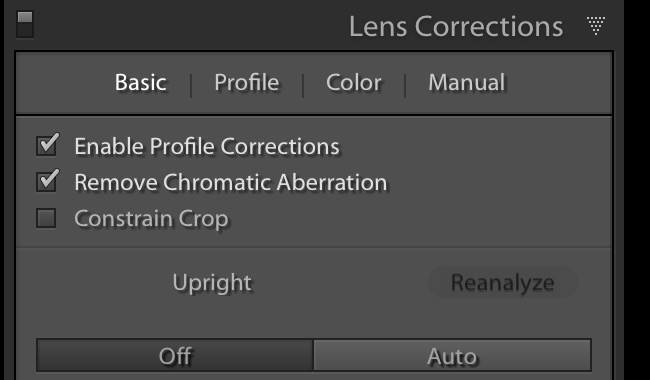
- Enable Lens Profile Correction
- Remove Chromatic Aberration
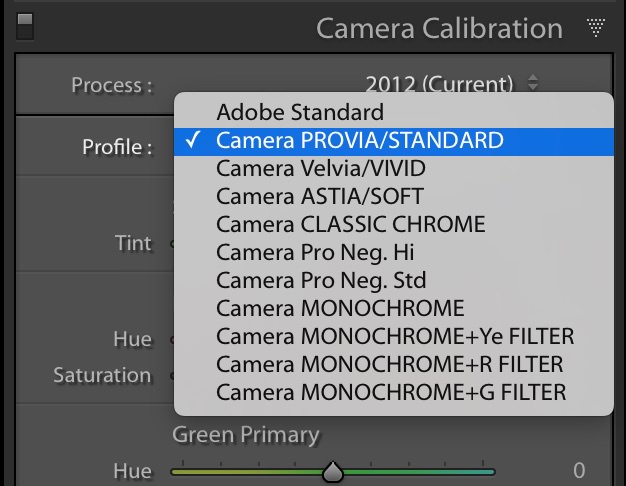
- Camera Calibration Profile (example shows Fujifilm profiles)
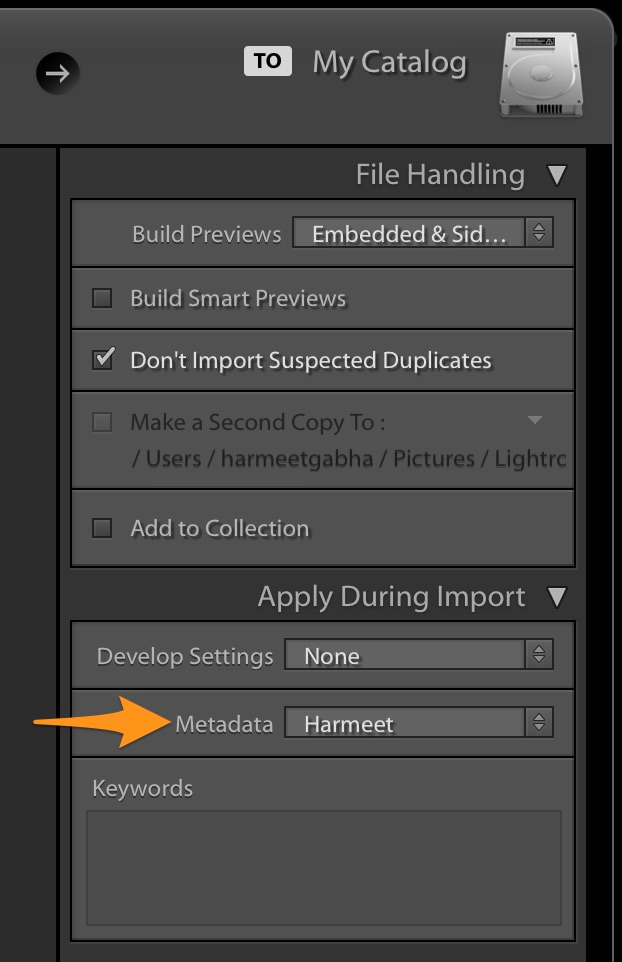
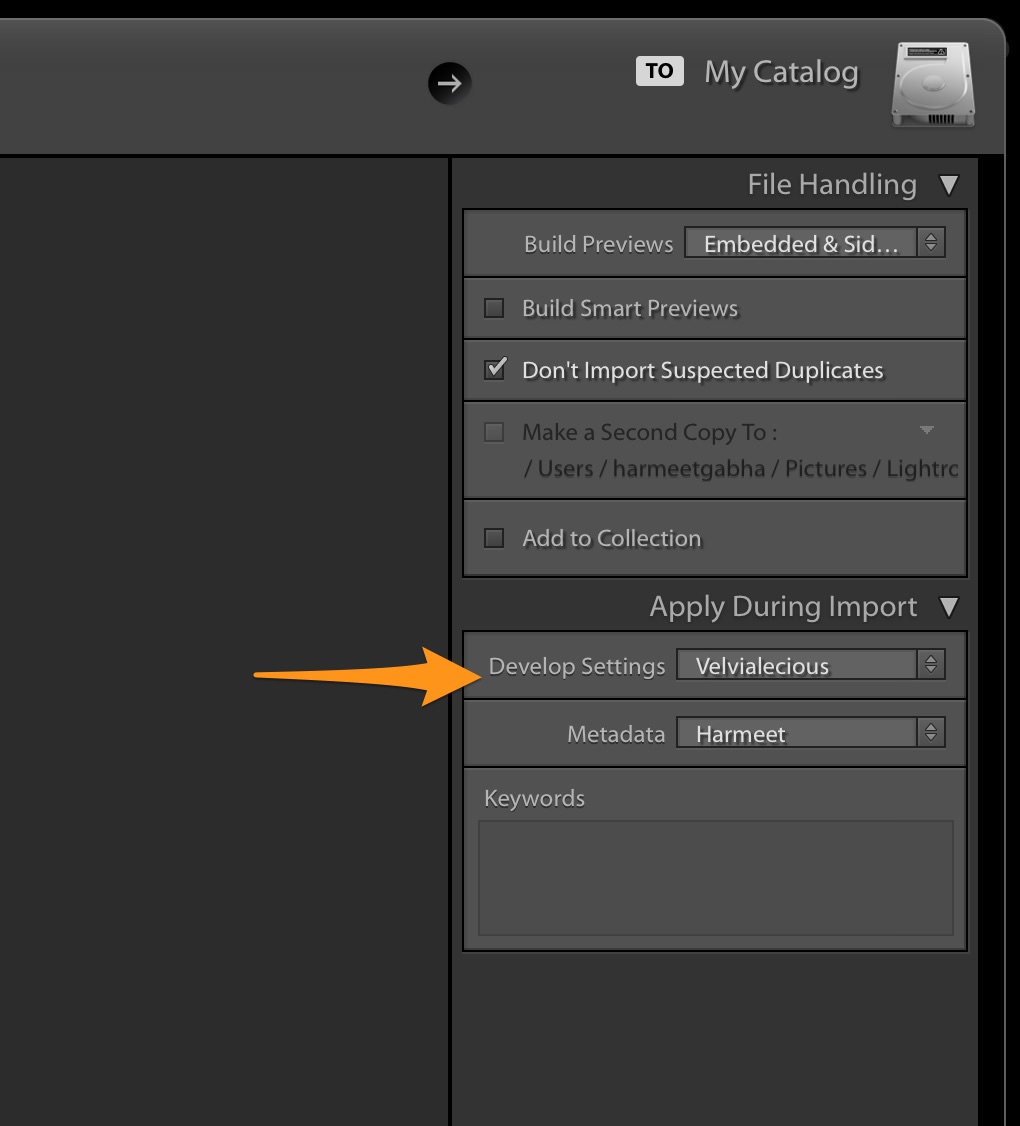
Then save this as a Presets + icon. Next time during the Import you can select this preset all the settings will be applied automatically to all the images under the Apply During Import panel.
Copyright Metadata
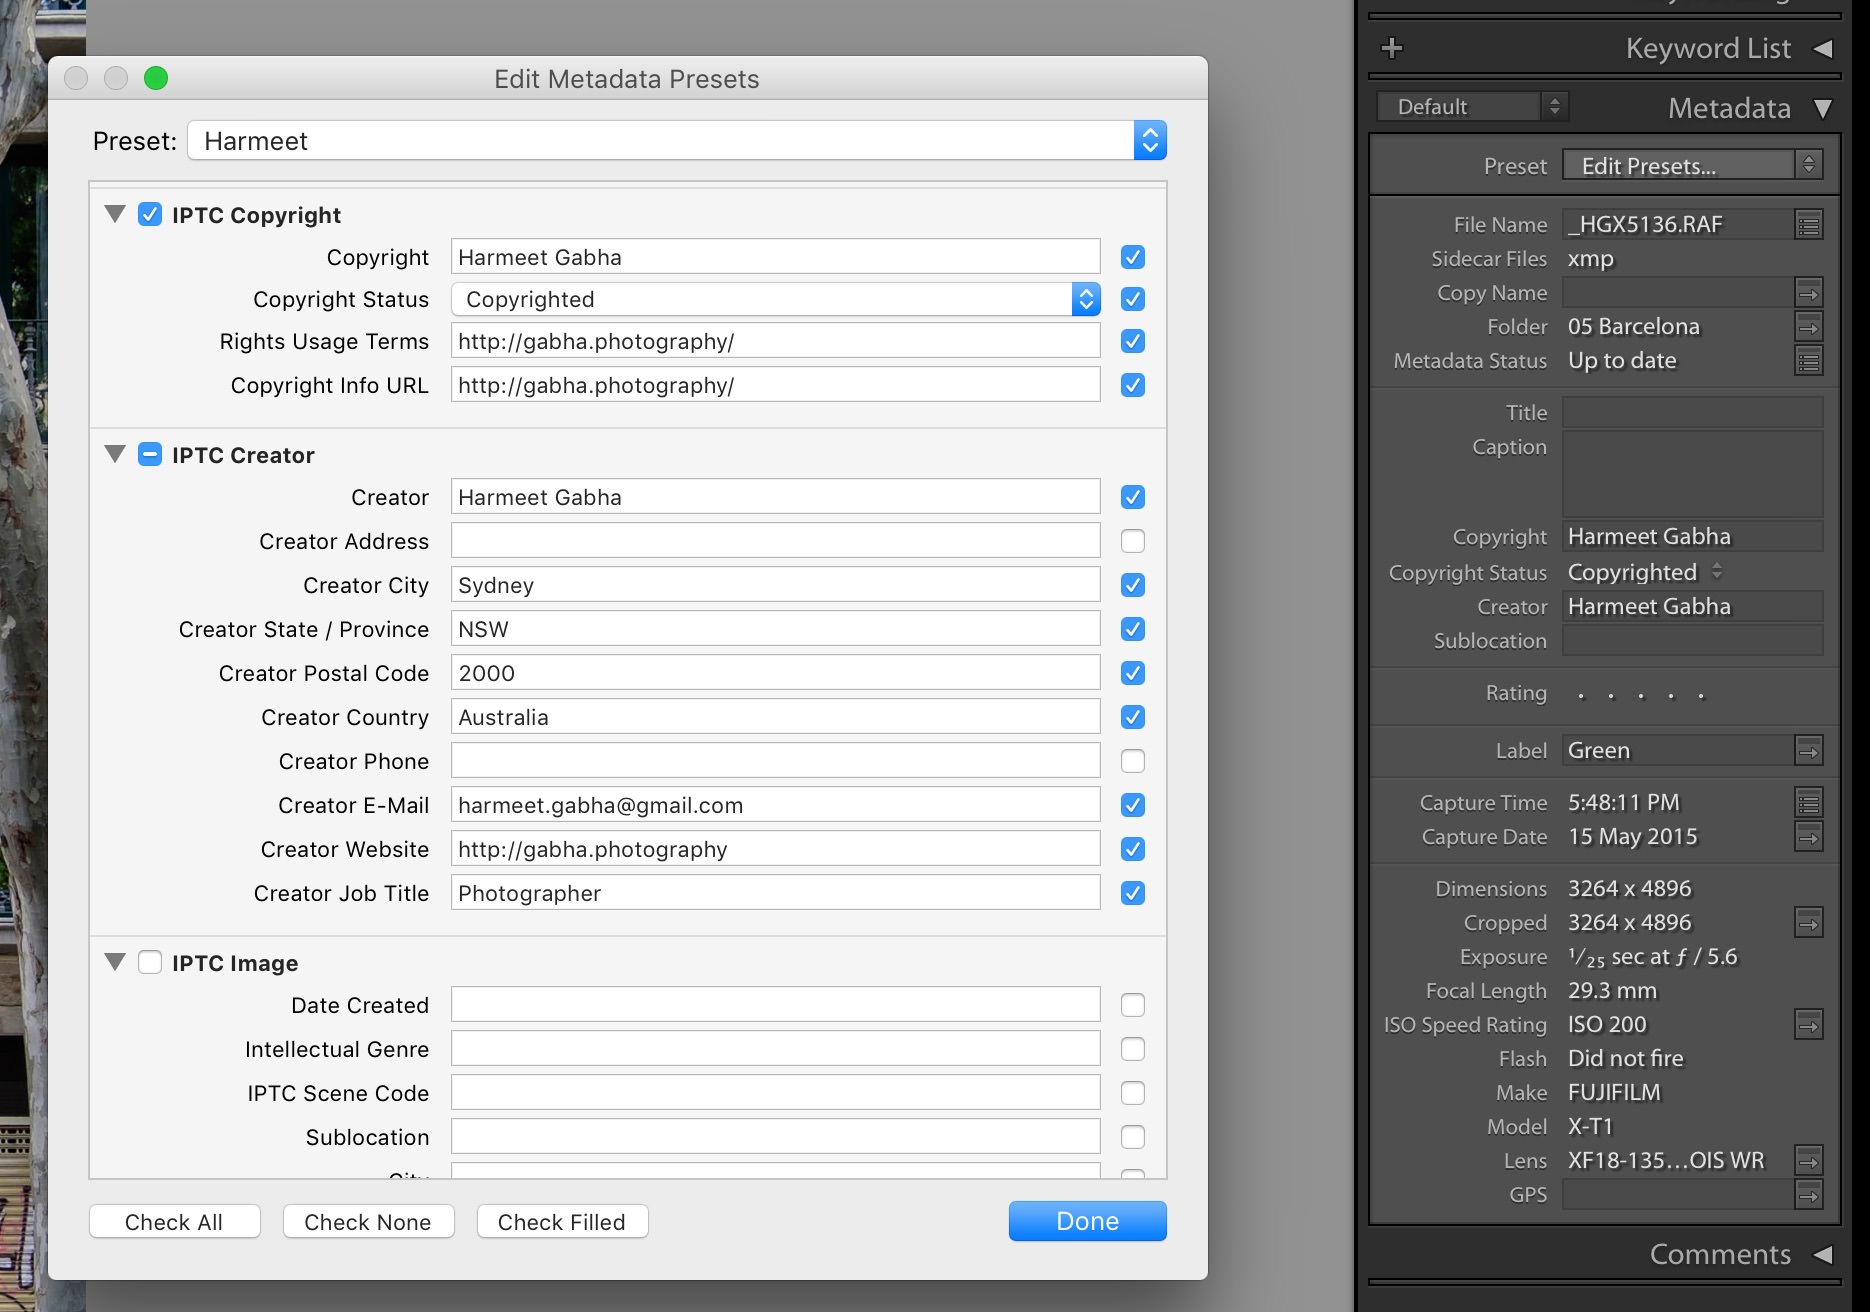
Setup your Copyright metadata so that every imported image can have your copyright information applied to it. From the Library Module, under the Metadata panel, click on Edit Preset and specify your settings as shown here (below).
Once saved, you select your Metadata preset, to apply this during Import of your images under the Apply During Import panel.
