

HDR stands for High Dynamic Range and in photography this is quite a popular way to create an image that comes close to what we see with our eyes. Its something that is not possible straight out of the camera although some of the newer cameras now come with this feature (at least they try to).
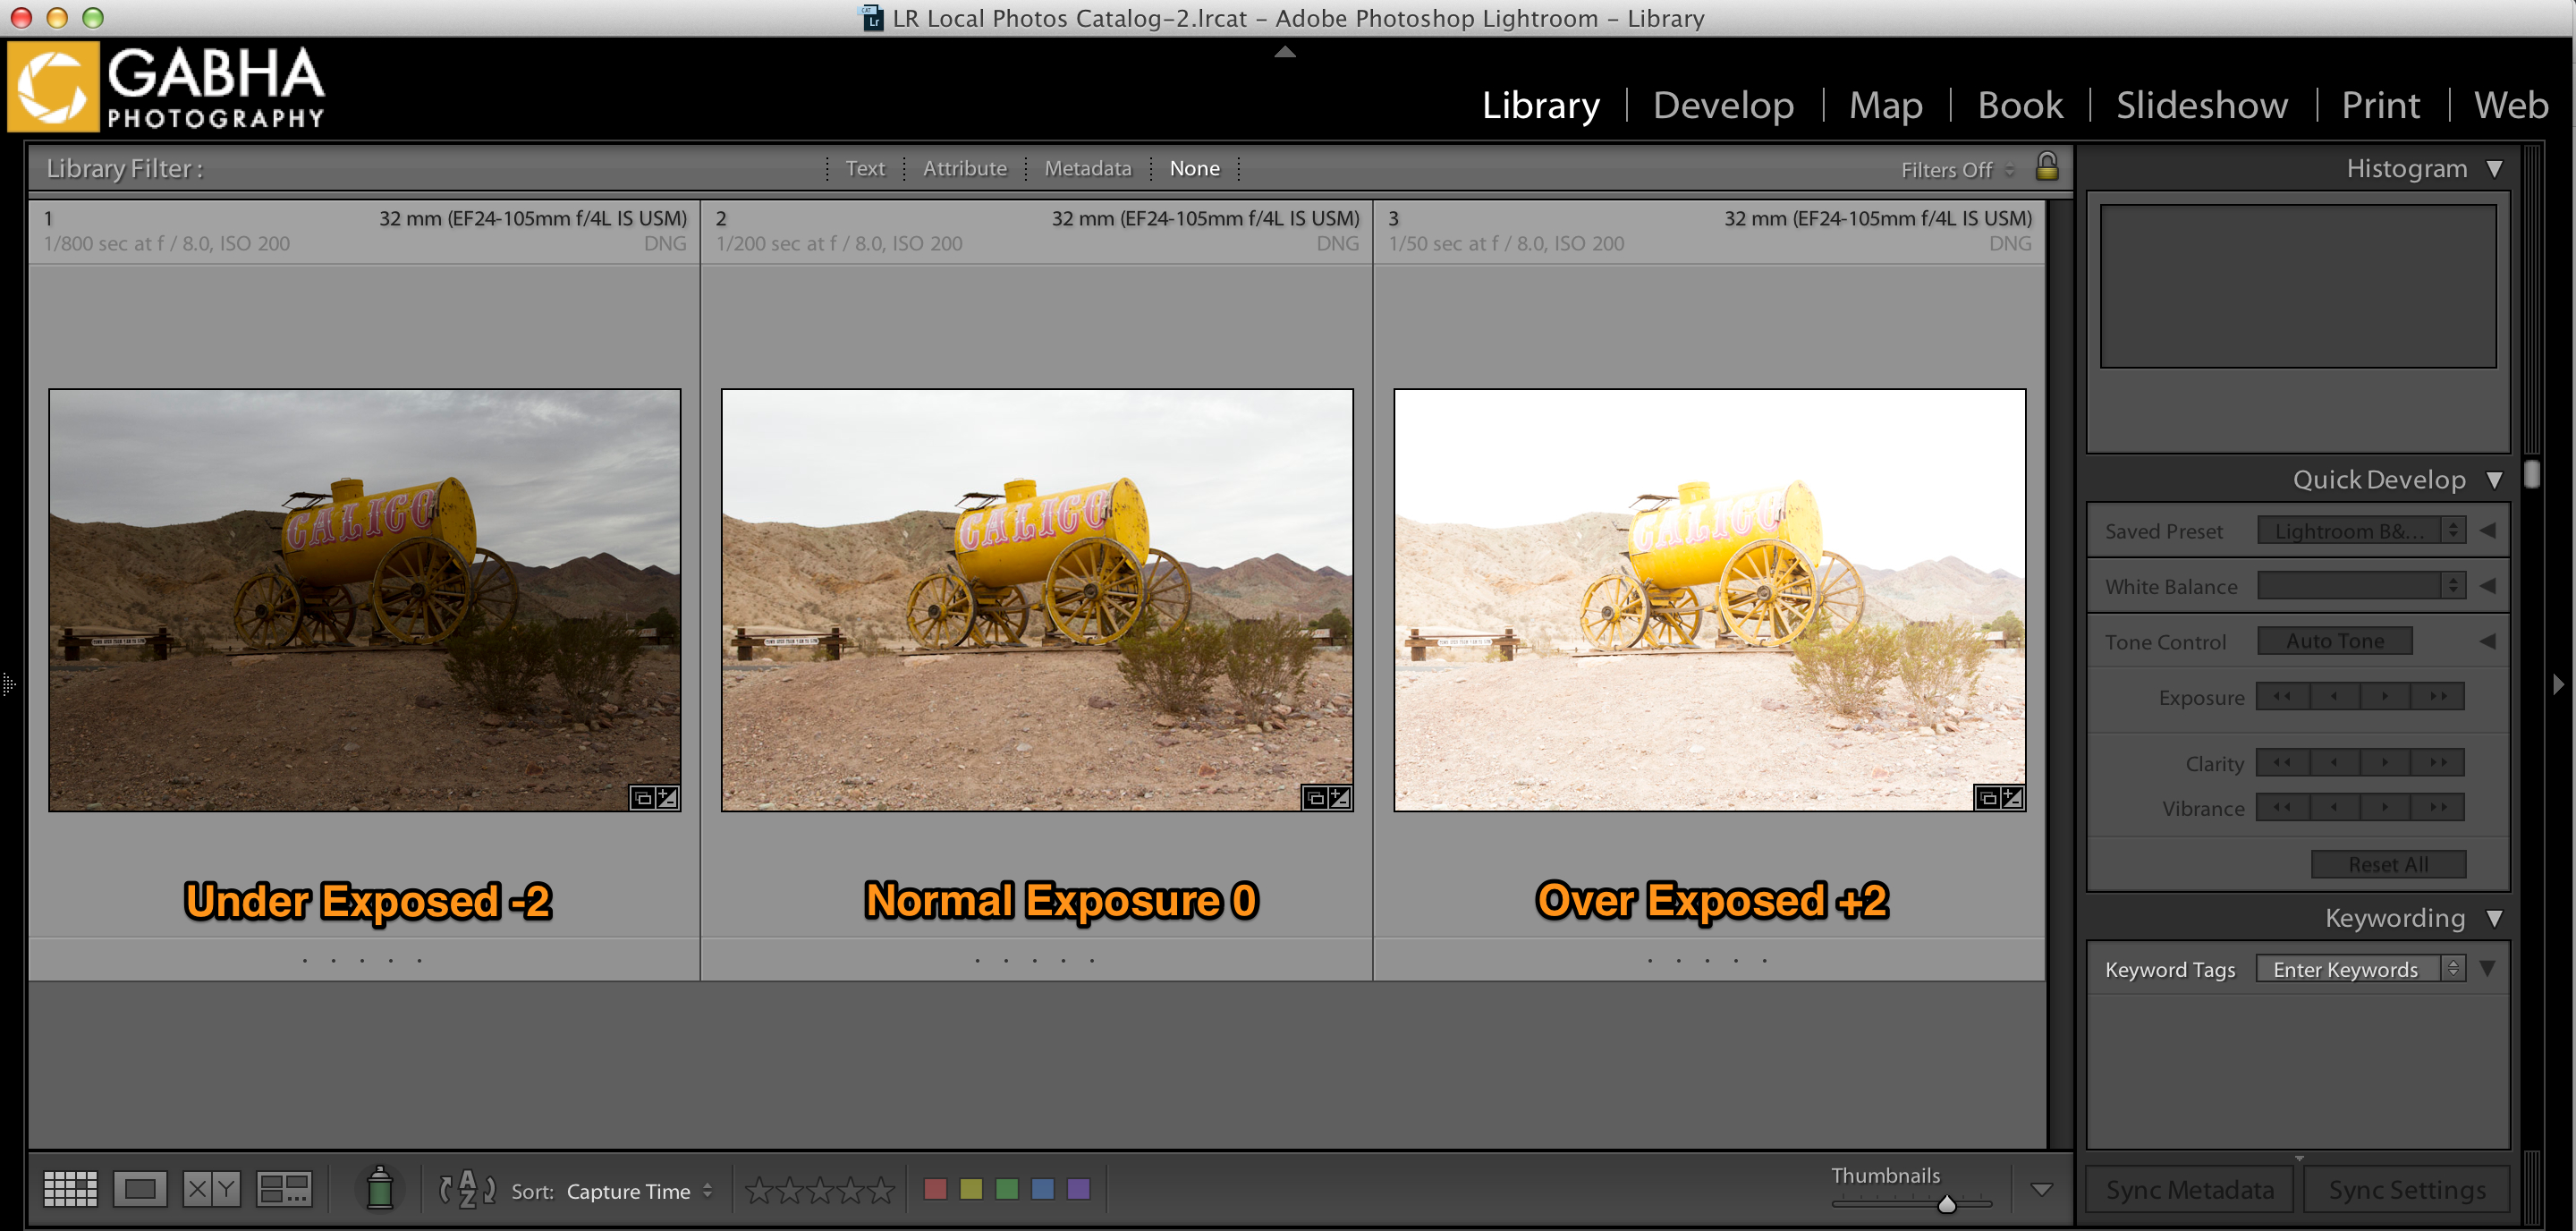
Typically in HDR image you take an at least 3 different exposures of the same image; under exposed image by 2 stops (-2), normal exposure (0) and over exposed image by 2 stops (+2). Once you’ve captured this image you can merge these three images using software like: Photomatix Pro, Adobe Photoshop and Google’s HDR Efex Pro 2. These software are very specialised tools so you not only need to buy them but also learn or posses the skills to understand the various settings.
Now over a year ago, I published my HDR presets for Lightroom. First was Punchy HDR, Afternoon HDR and then finally updated version of these presets for Lightroom 5. These presets have become very popular and people have loved them.
So, how is it possible to create HDR image straight out of Lightroom. Its not that hard actually…here is how I did it. Properties of the HDR image are:
- Details in the Highlights – these are the really really bright areas of the photo.
- Details in the Shadows – these are the shadowed or darker areas of the photo.
- Lots of Contrast and Micro Contrast – Dramatic difference between the light and dark pixels of your photo.
- Sharpness and Clarity – make the image crisp and pop.
To make this work in Lightroom, you should ideally have a RAW file and not a JPEG. A raw file is a file with extension like .NEF for Nikon, .CR2 for Canon and .RAF for FujiFilm cameras. If you like to know a simple explanation of why you should always shoot in RAW check out my earlier post – Why should I shoot in RAW?
HDR in Lightroom
Lets create an HDR image using only the Normal Exposure image which is a RAW file. I’ll provide the RAW file for you to download if you want to follow along yourself in Lightroom.
HDR in Lightroom (7450 downloads)Step 1
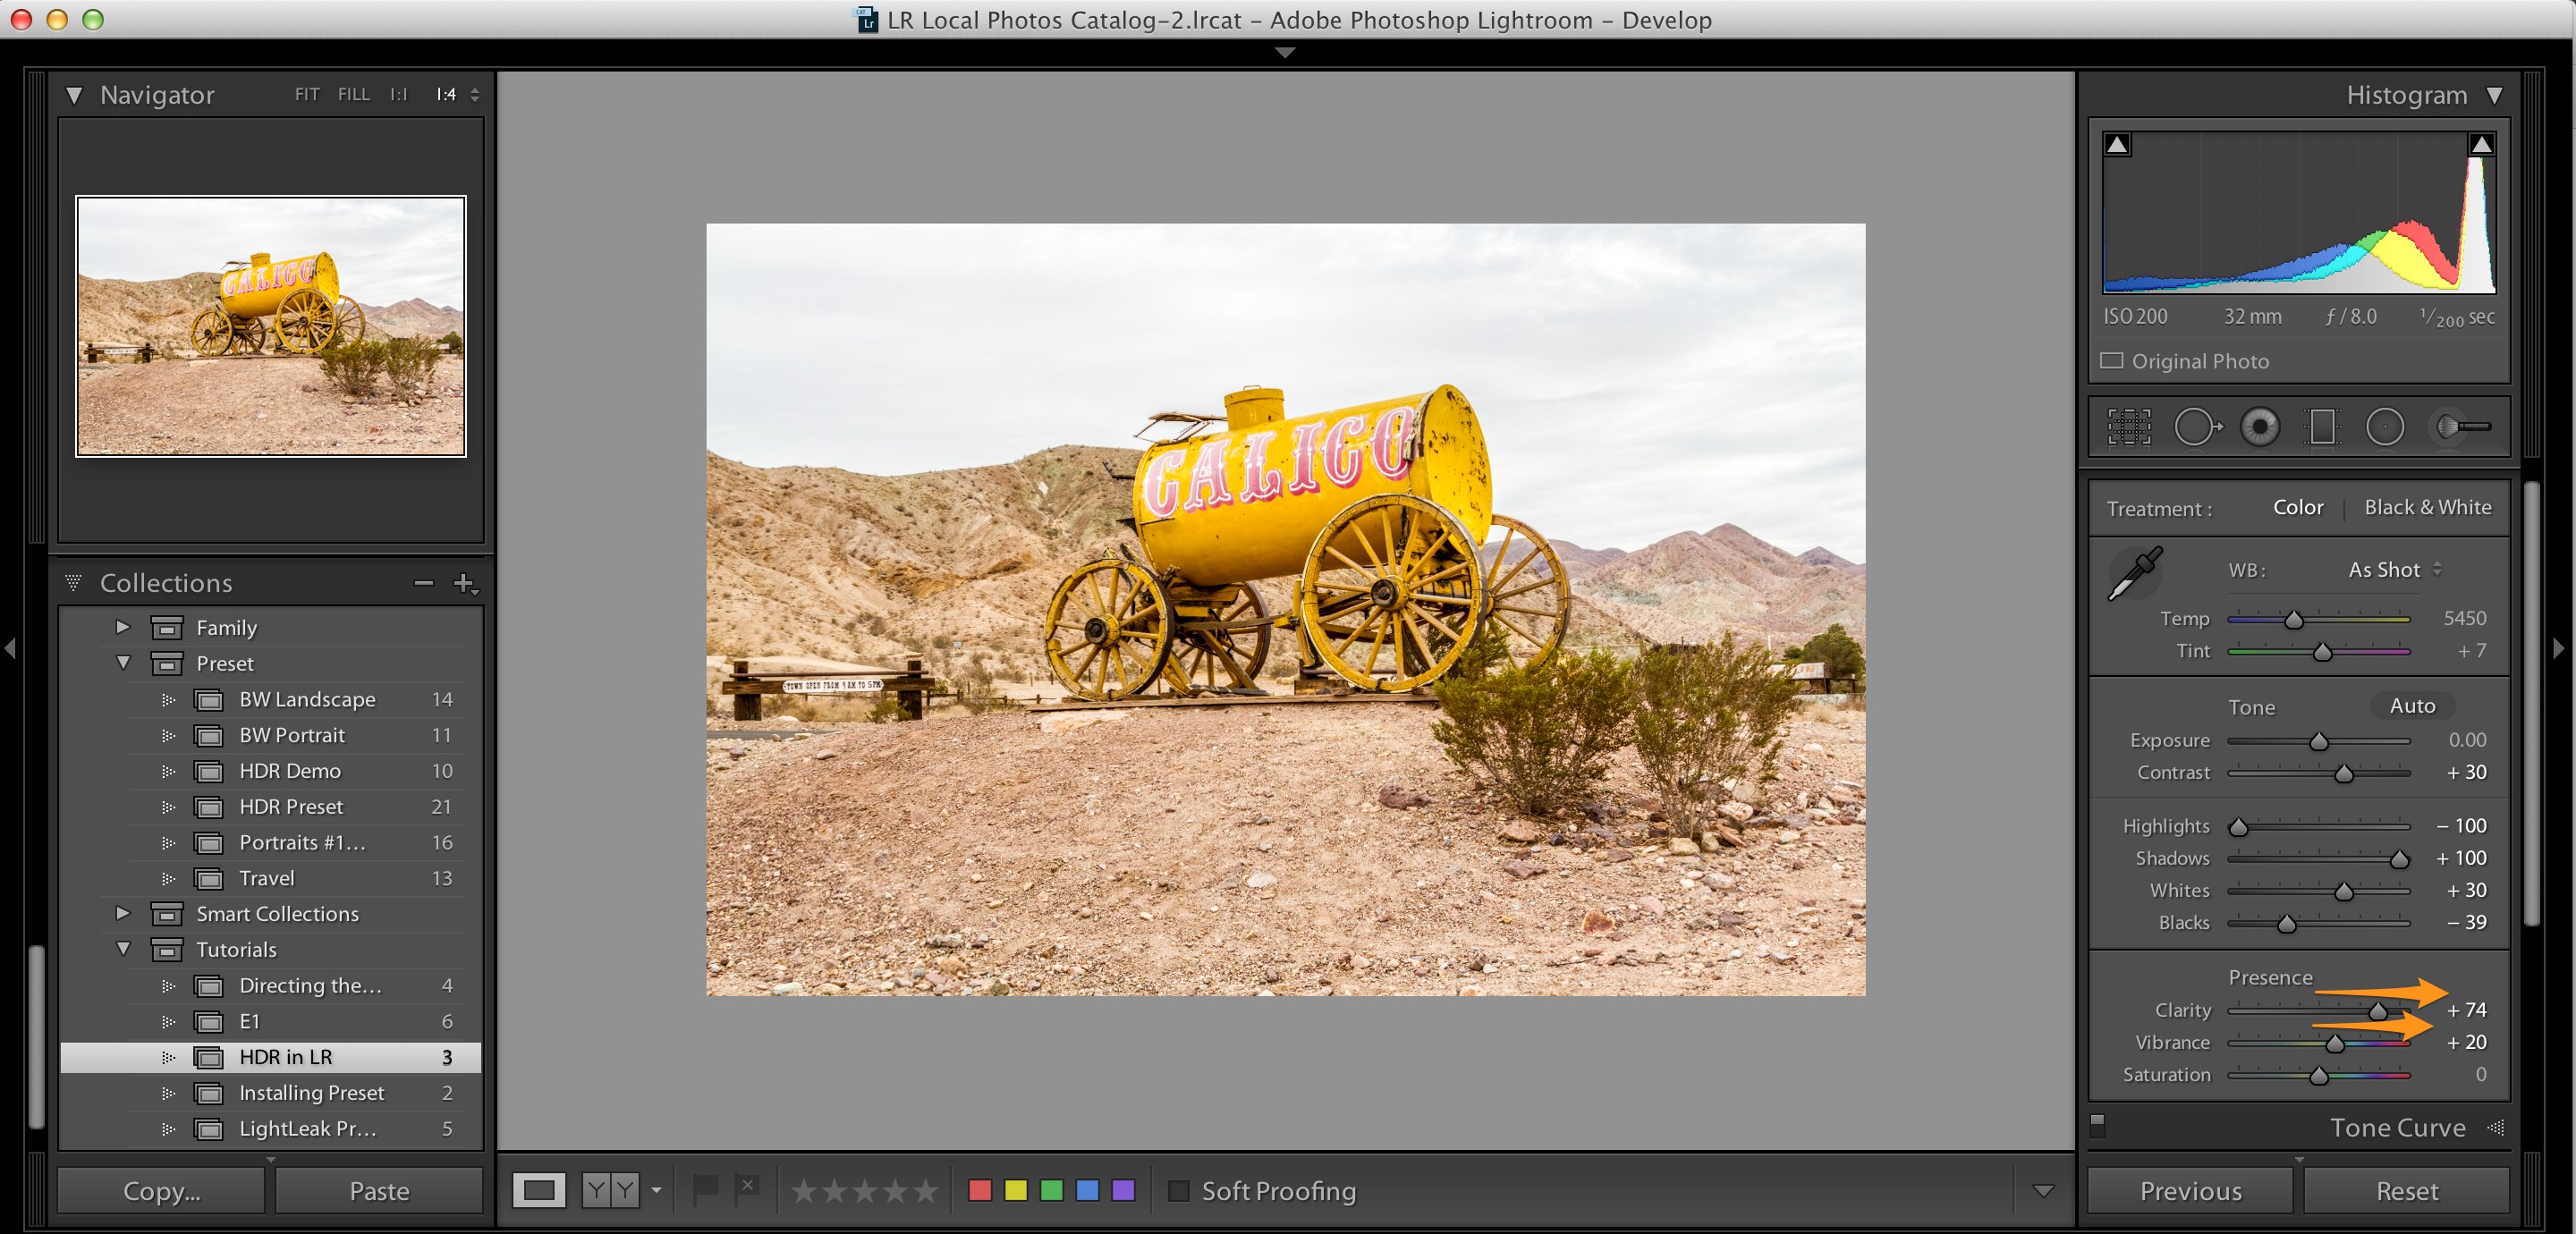
Select the image you want to work on and then go to the Develop Module in Lightroom. Bring down the Highlights slider and Pull out the Shadow slider in the Basic Panel.
 Sometimes this is enough to bring the details in the Bright and Dark areas of the image. However if this is not enough you can use the Graduated Filter in Lightroom to repeat these steps.
Add the filter in the grey area outside the image and hold down the Shift key to get it perfectly horizontal. You can zoom out on the image to create the filter quite far away from the edge of the image. This will come in handy, I’ll explain later.

Step 2
Now that we have brought out the details, the image looks flat and lacks contrast. So let’s add some contrast using first the White and Black and then the Contrast slider.
Drag the Whites slider to the right while holding the Alt key until you see something that appears white..just a few pixels. Repeat the process for Blacks slider but moving it to the left while holding the Alt key until you see some pixels that appear black. This is purely a taste thing but I normally add more Black areas than the White areas.
Finish it off by adding Contrast to the image which should improve the look already of the image.
Step 3
Next step is the final finishing touches to the image, we add some details and make the image pop out. For this we will use Clarity slider, Vibrance slider in the Basic panel and then move down to the Sharpening sliders in the Detail panel.
Adjust the Clarity slider until you are happy with the detail and micro contrast it brings to the image. This slider is a MUST when you are wanting to add detail, grunge, texture to the image. Next tune the Vibrance slider to bring some colour pop to your image.
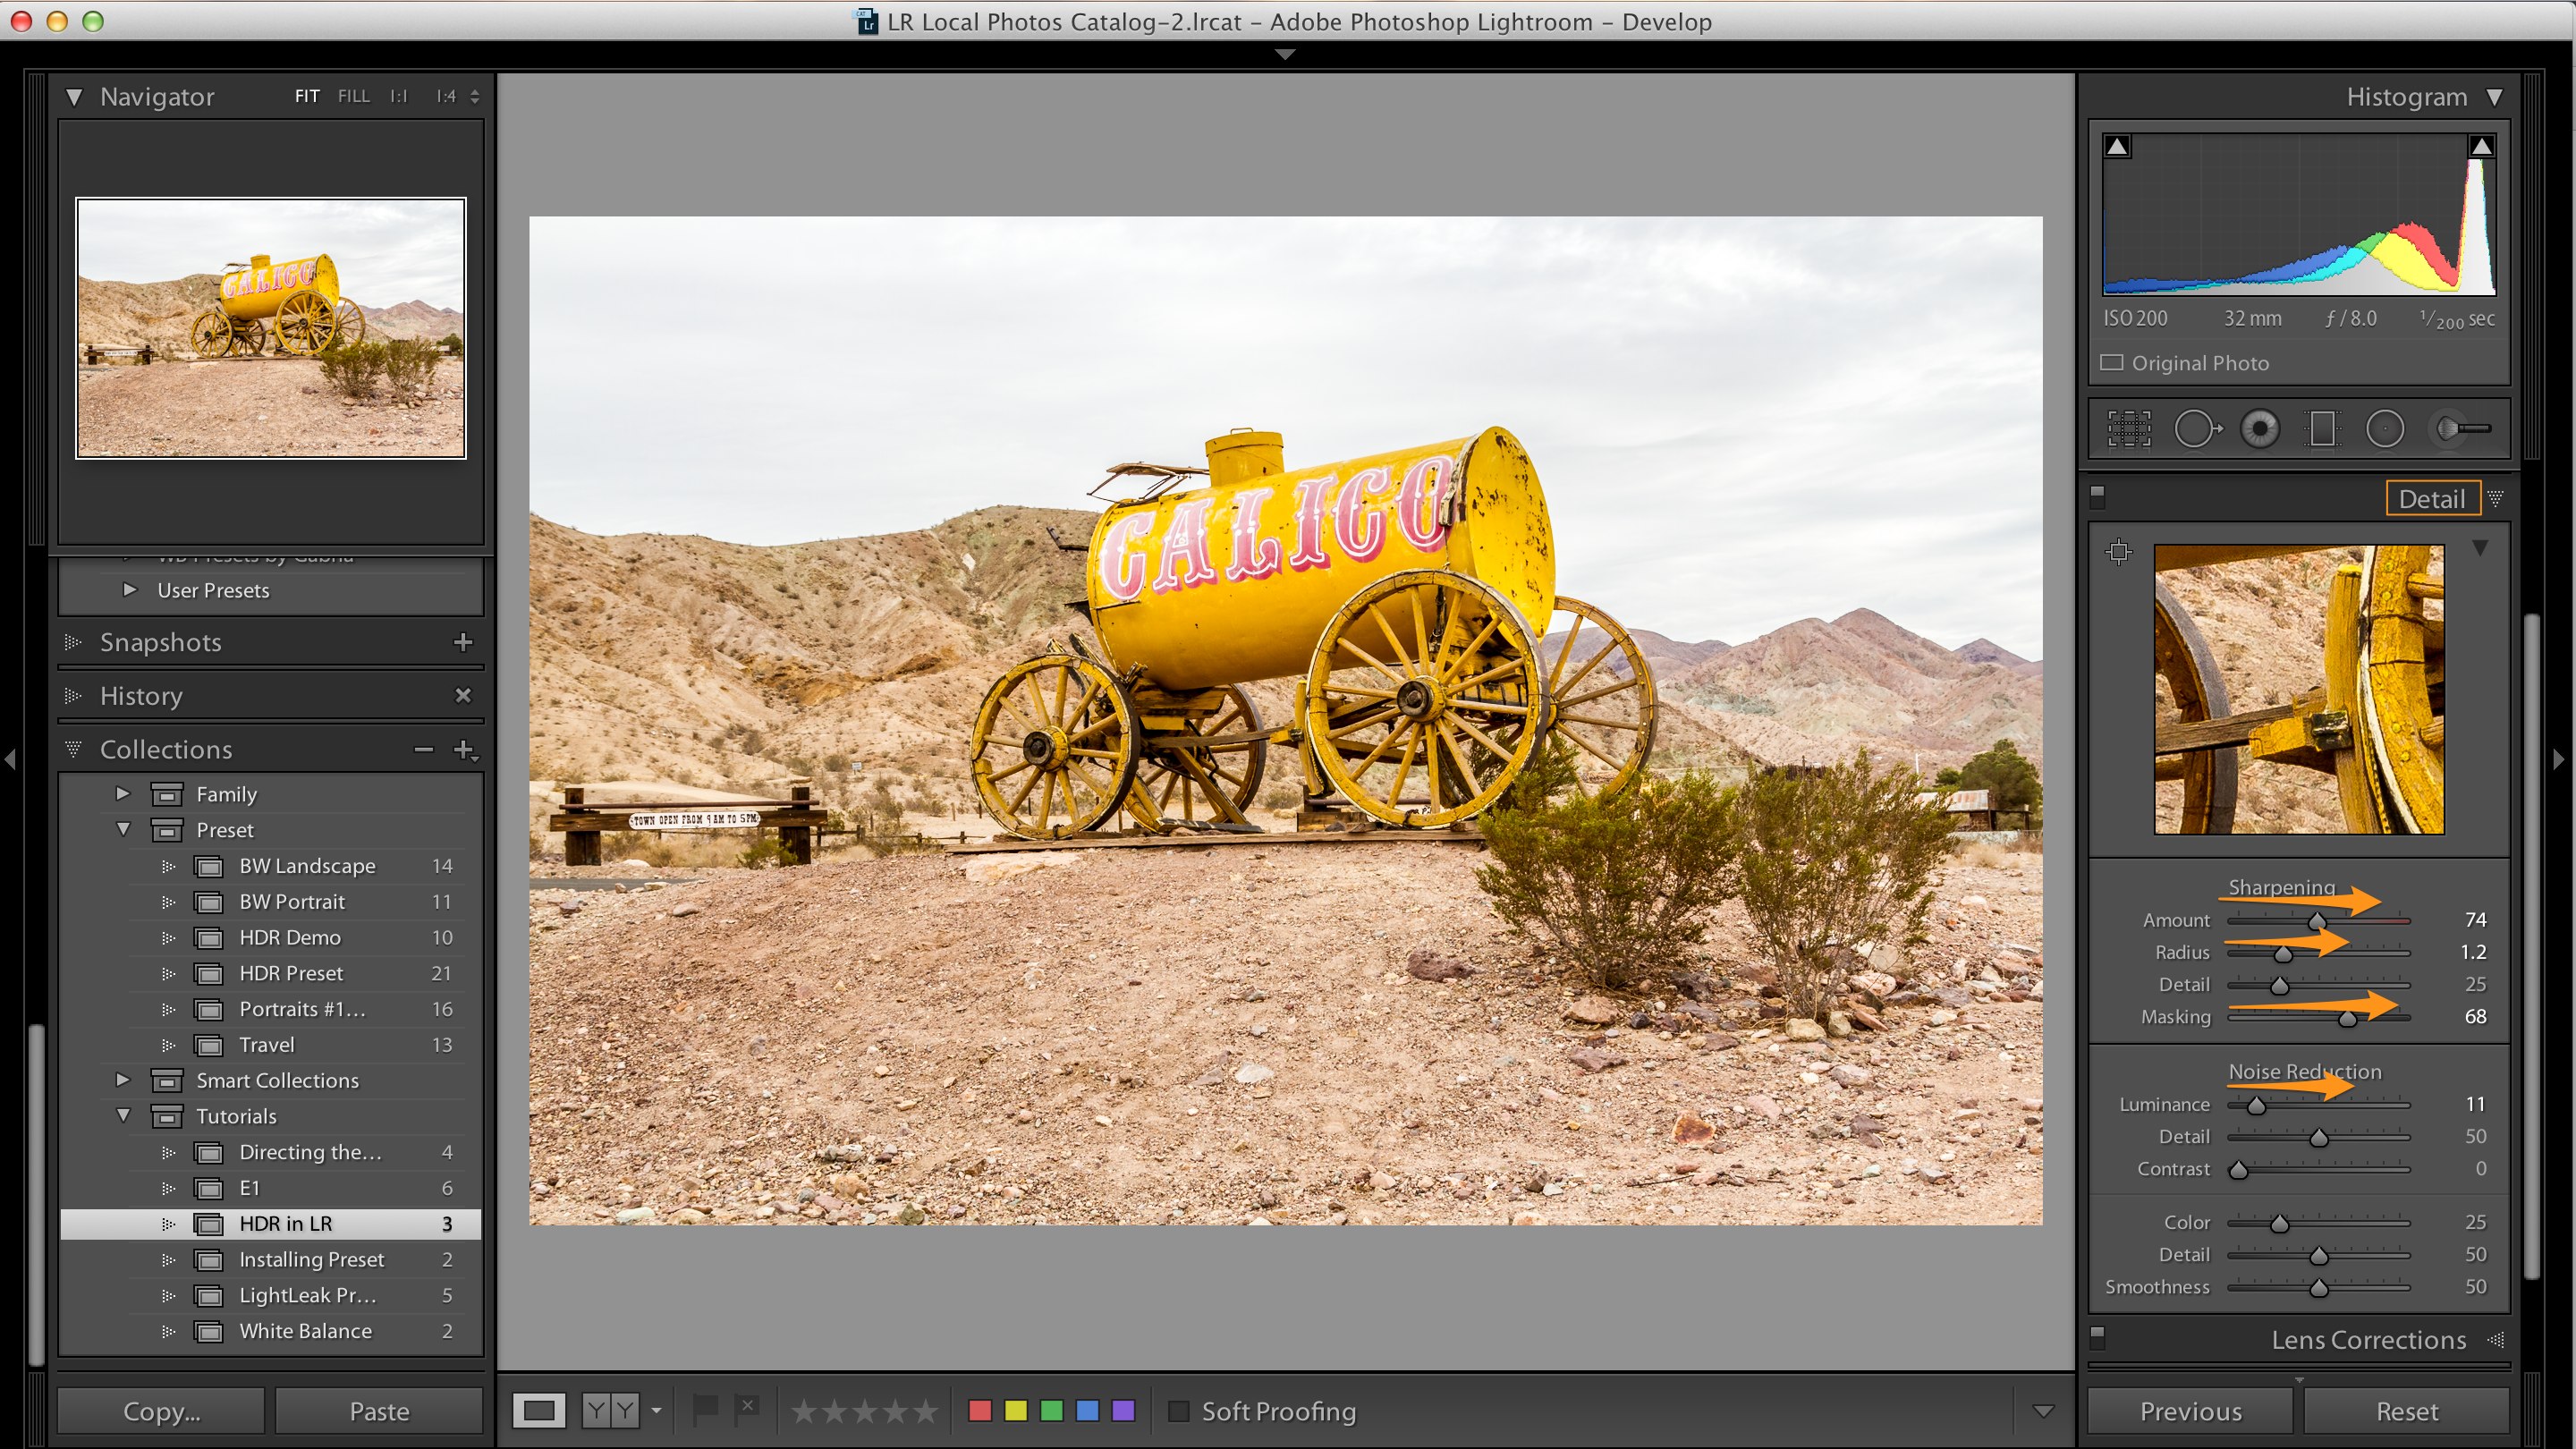
 One of the crucial elements when sharpening any image is to make sure you apply a mask to it. In the Detail panel under the Sharpening sliders there is a Masking option, after you add the Sharpening strength and maybe increase the Radius then hold down the Alt key and drag the Masking slider. Your image will become black and white and the area that is black will have no sharpening and the area where you have white the sharpening will be applied.
In this example I moved the Masking slider until the clouds were completely black in the mask. Usually I avoid adding sharpness to the clouds, they should remain nice and soft
Optional
You can additionally adjust the Luminance noise reduction slider to reduce some noise in the image, even though you may have shot this at the lowest possible ISO setting in your camera it still makes sense to reduce some of the noise. That’s because all this processing can accentuate some noise in the image and create it even though it was not there.
Save it as a Preset
On the left side in Lightroom open the Preset panel and click on the (+) plus button. Let’s save all these edits as a Preset in the User Presets folder. Check only the boxes for the items that we modified in the image, however you must keep the Process Version always ticked.

If you recall that I mentioned that you put the Gradient filter far away from the edge of the image, if you did this, this means that no matter what orientation your next image is Landscape or Portrait, you can now apply the Preset to it without needing to make any changes.
This is basically how you create a HDR in Lightroom and my HDR presets are based on the same logic but have been optimised by processing many different kinds of images through them.
Final Result
Here is the final result that was created using the above steps.

HDR in Lightroom – Final Result


Thanks for posting both the presets and the youtube video that describes what needs to be done to utilize a preset. Being a complete newby, this was very helpful.