

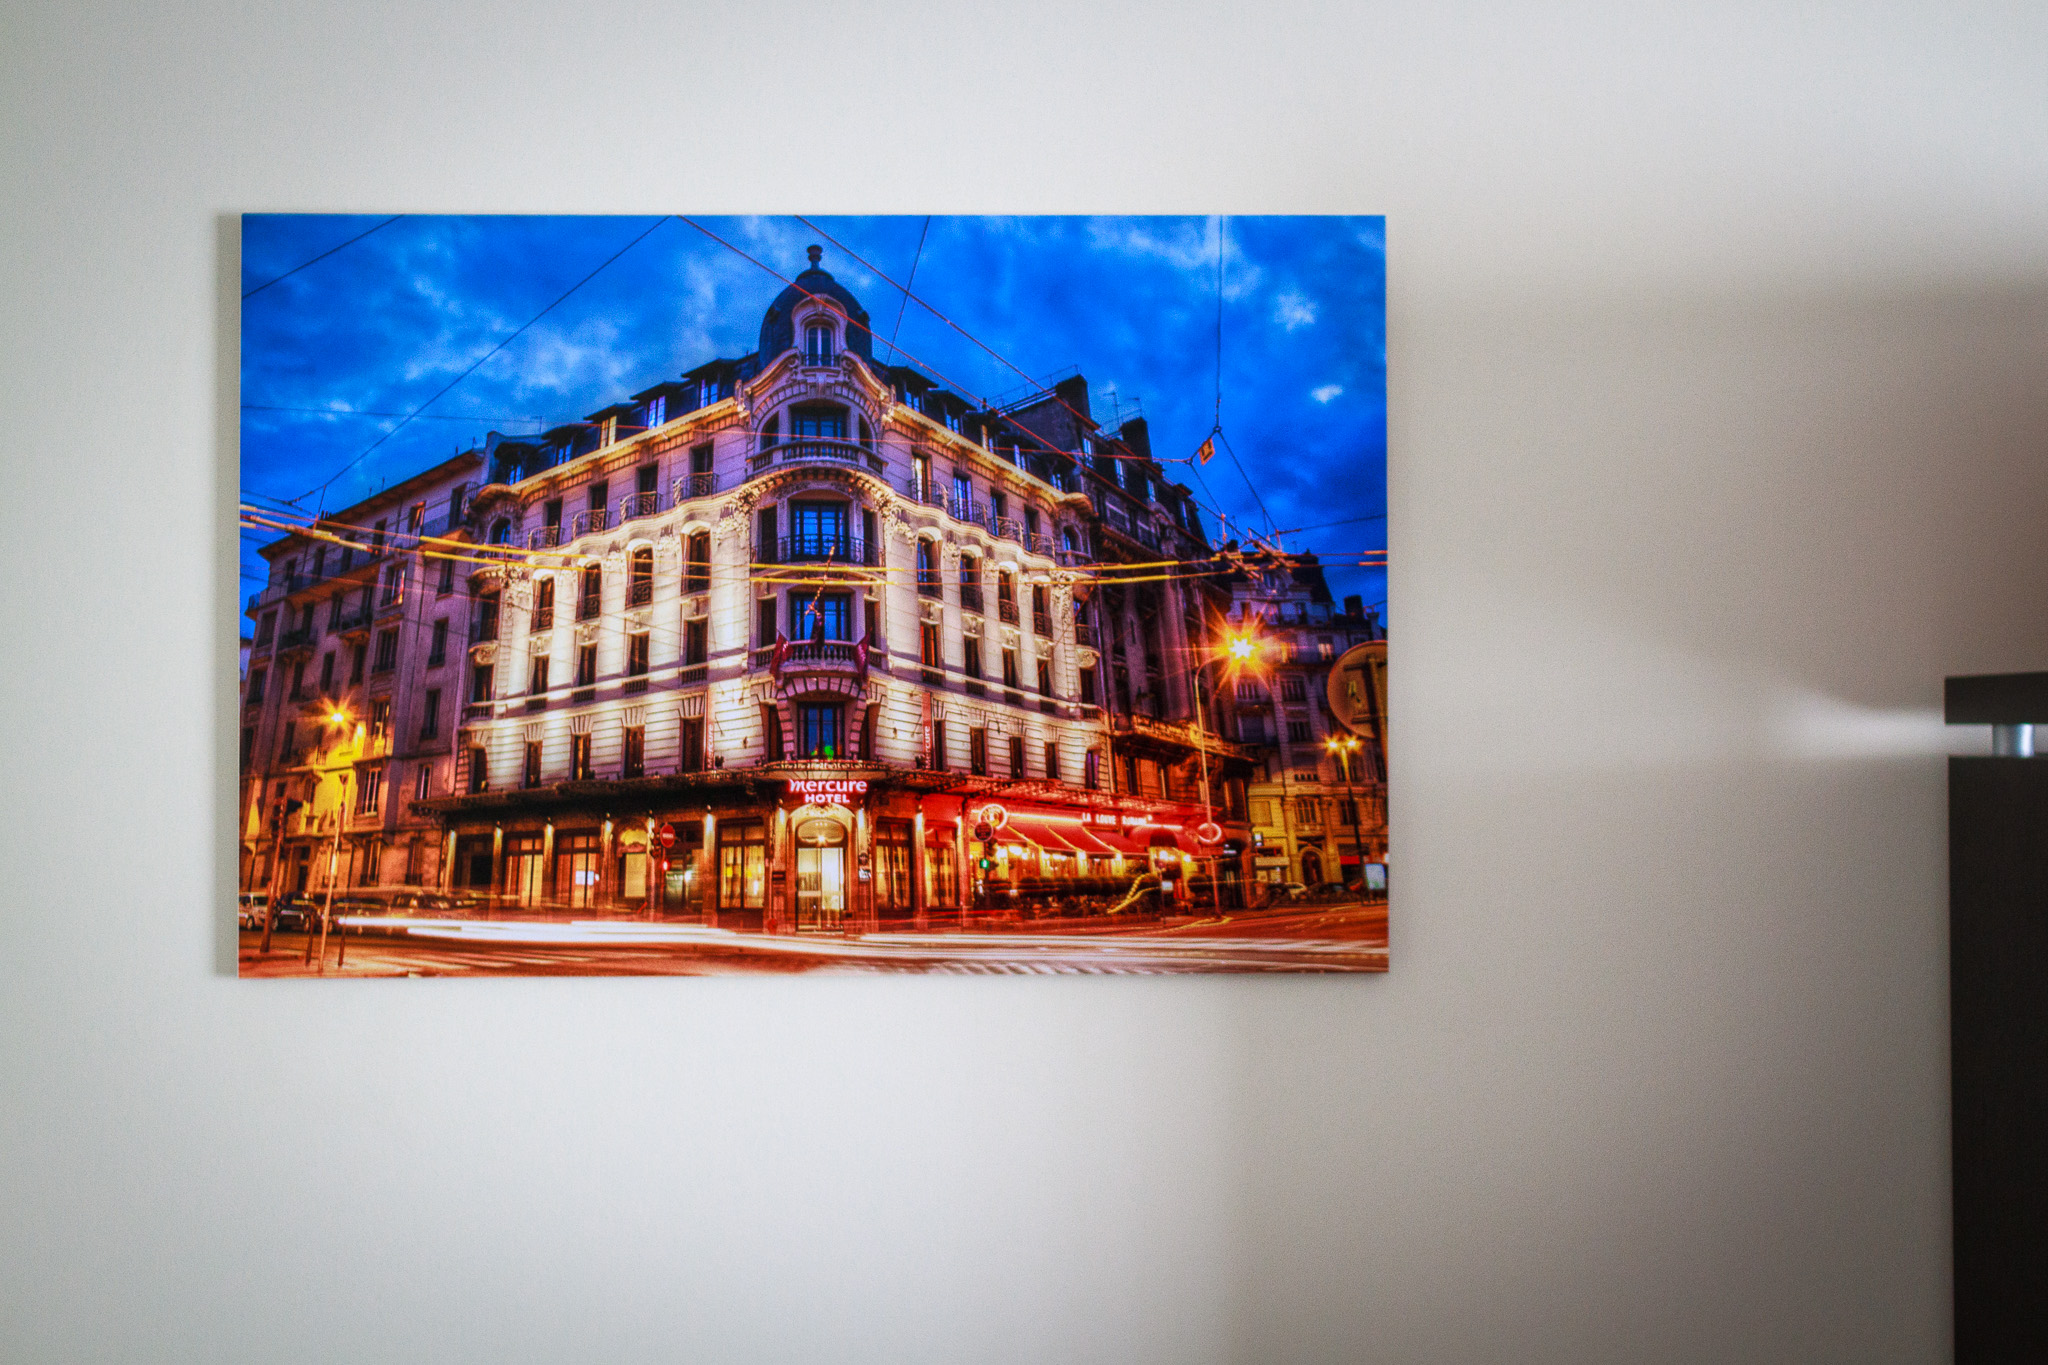
Getting some of your favourite photographs printed is a great feeling, there is nothing better than having your photograph in your hand. Most of the Professional Labs (not your local Harvey Norman or Ted..unless you have spare cash) these days will print and mount or frame your photographs. The only thing you need to do is put them up on the wall when you get them.
In the blog post, I am going to explain a great non-destructive (no nails, hooks and hammers needed) way to mount your photos on the wall. No more nails, hooks and using hammers. While there are several options available I am only going to explain the one I’m using.
The solution is 3M product which I love, its the 3M Command™ Picture Hanging Strips.

The design is quite innovative, it has this riveted design and the strips lock into each other very tightly. Kind of looks like a zipper interlocking. I’m surprised how much weight some of these strips can support. When you wish to remove them, simply pull the mounted picture away from the wall and it snaps off.

Interlocking 3M Strip design
Step 1
Pick up the pack that supports your frame or foam core board from your local hardware store like Bunnings, Mitre 10 and Home hardware etc. For other countries (other than Australia) you should find them at your local hardware store. Everybody keeps 3M products these days (I think..).
Step 2
Affix the strips on the edge of the frame or foam core board, like you see below. If the frame is heave or quite big (such as a Panoramic print) you might wish to stick a few more strips in the middle.
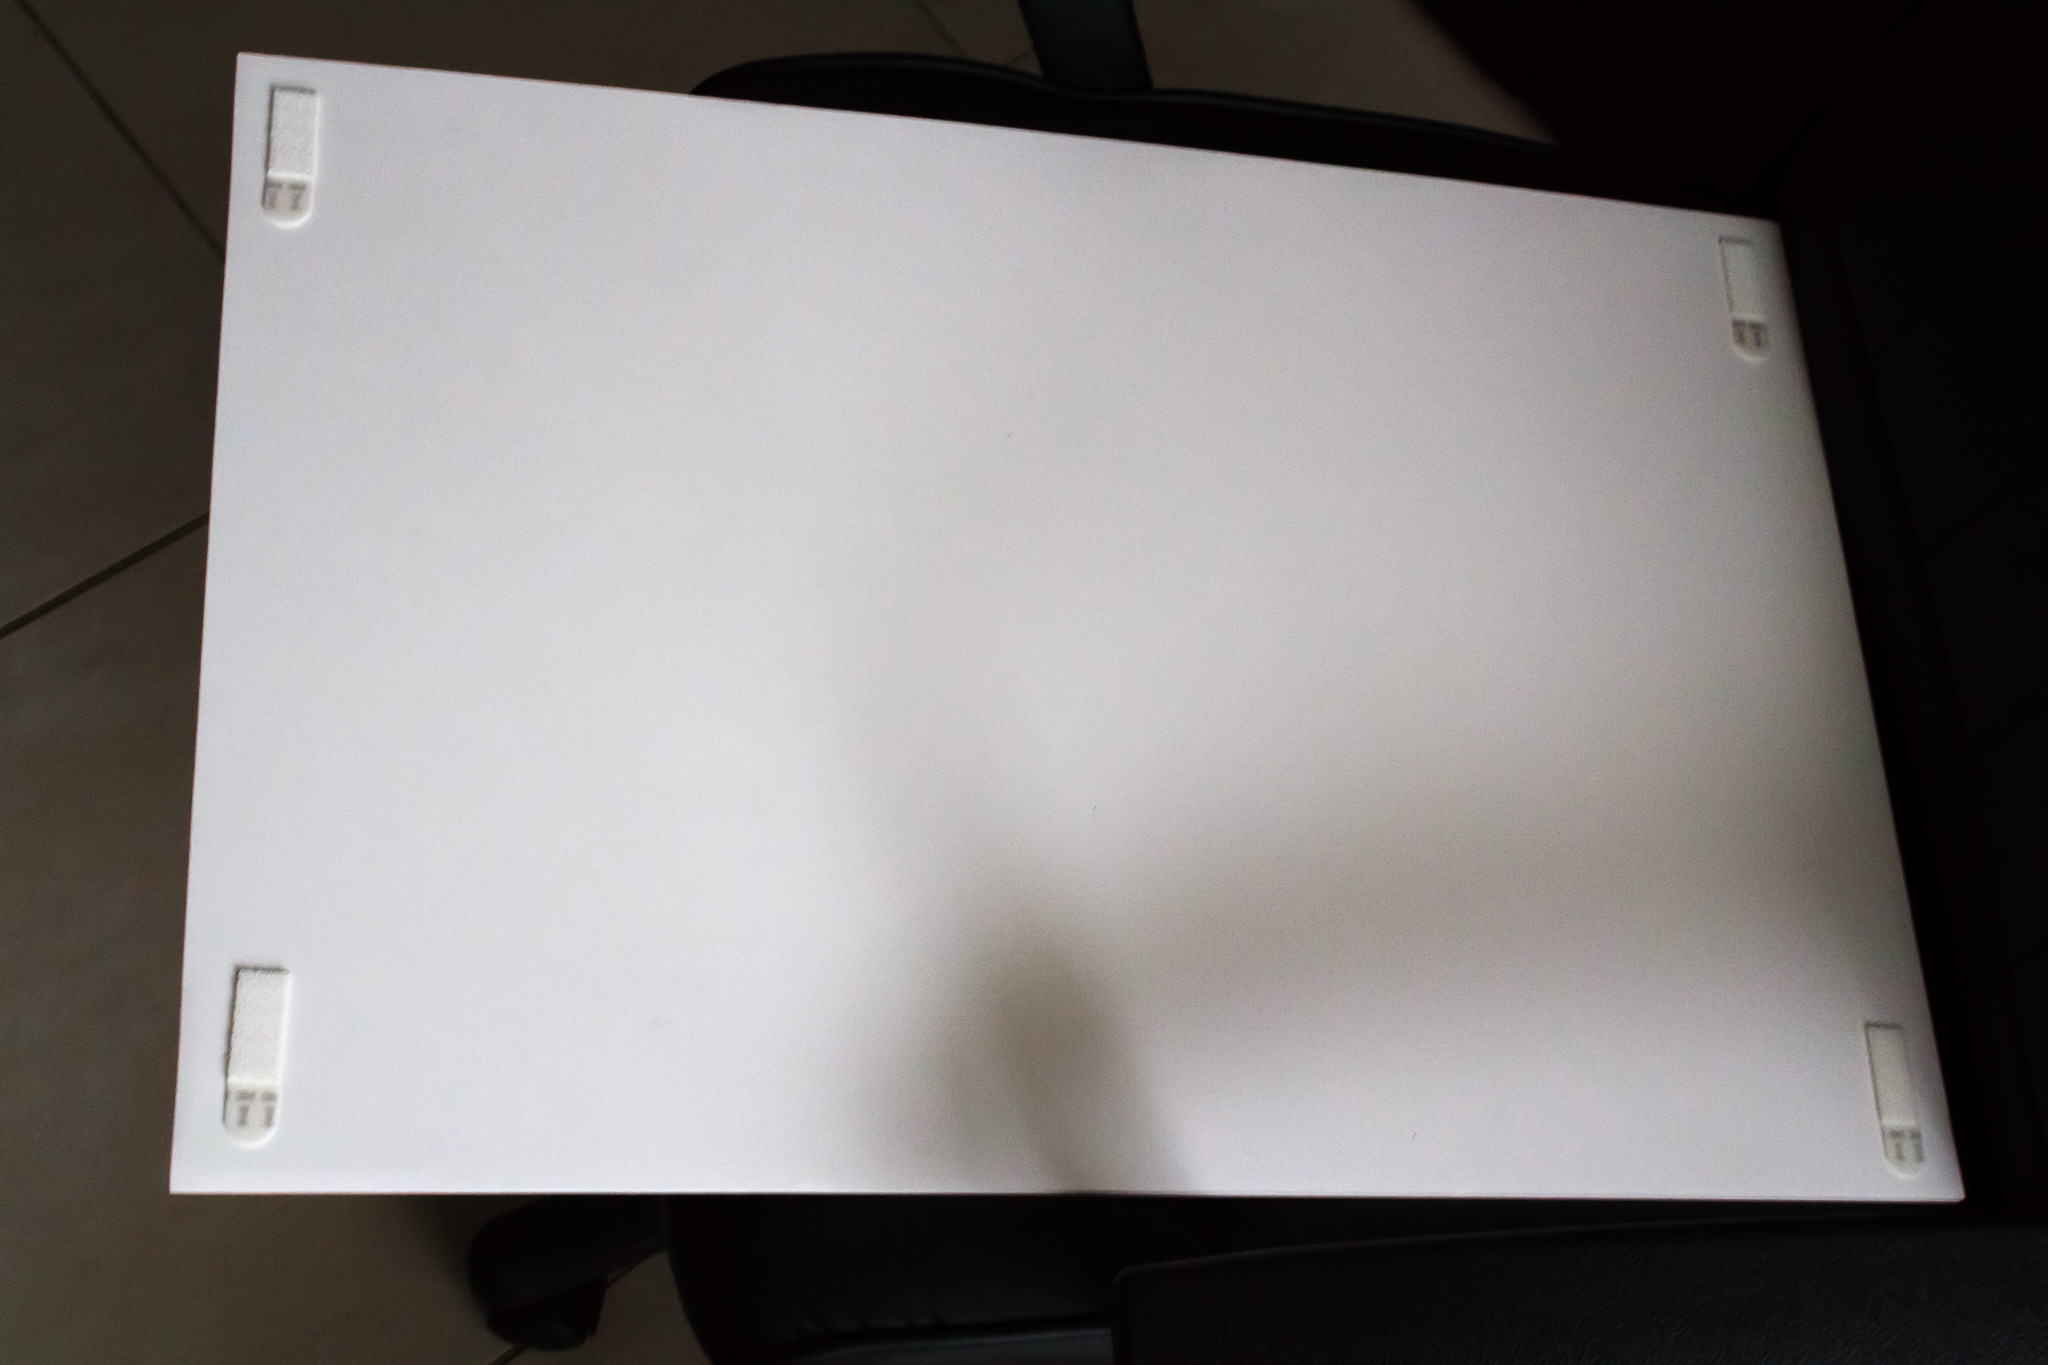
Fix the 3M Strip on the back of Photo Frame
Step 3
Make sure the wall surface is clean so that the strip will stick to it firmly and not come off. Now you can stick another set of the strips on the wall directly but that means they need to be correctly distanced so they will snap into the ones on the frame.

Strips affixed on the Wall
Now carefully take the frame and line them up on the wall and push the frame firmly onto the wall. You should snapping to the tabs together as you push them.
What I prefer to do is snap the wall strips into the ones stuck on the frame and then remove the backing from the adhesive of the strip. Align the photo on the wall and press it down so the adhesive will make firm contact with the wall. Hold for 5-10 seconds and you are done.

Firmly push and attach the frame
And when you want to want to take them off, simply pull the little tab on the bottom of the strip and the strip comes off clean from the wall and the frame. No sticky residue or marks to clean up.
Getting Prints
I think when people read this blog, they may wonder where can I get my photographs printed as well as framed or mounted on board, so I will share with you where I typically get them done.
- Brilliant Prints Pro – They are company based in Richlands, Queensland. The best thing is that they are so confident that you will love the end result, they don’t charge you anything upfront. Receive your print in your hands and then pay after if you are 100% satisfied. Otherwise send it back. Wow that’s service!!
- NuShots – A great melbourne based company that specialise in all sort of printing large and small. Although here you pay on order unlike Brilliant Prints Pro. But that’s nothing new we all are used to paying on order.


