

The recipe for getting the Classic Negative look on X-T3, X-PRO2, X-T2, X-T30 or other X-Series where you can save your own profiles and have Classic Chrome simulation. You an apply these settings to emulate the Classic Negative look that is added as new Film Simulation to the X-PRO3.
The recipe is not mine, credit below to original source. But I have found a few extra bits that weren’t mentioned in the original source.
Classic Negative Recipe
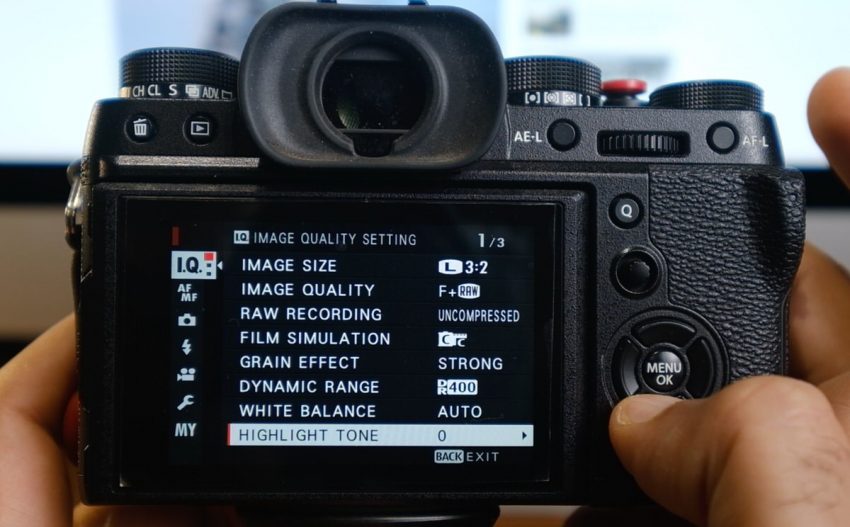
- Navigate to I.Q. – Image Quality Setting
- Film Simulation: Classic Chrome
- Grain Effect: Strong
- Dynamic Range: 400%
- White balance: Auto, R: -2 B: +4 (see tip about this below)
- Highlight tone: 0
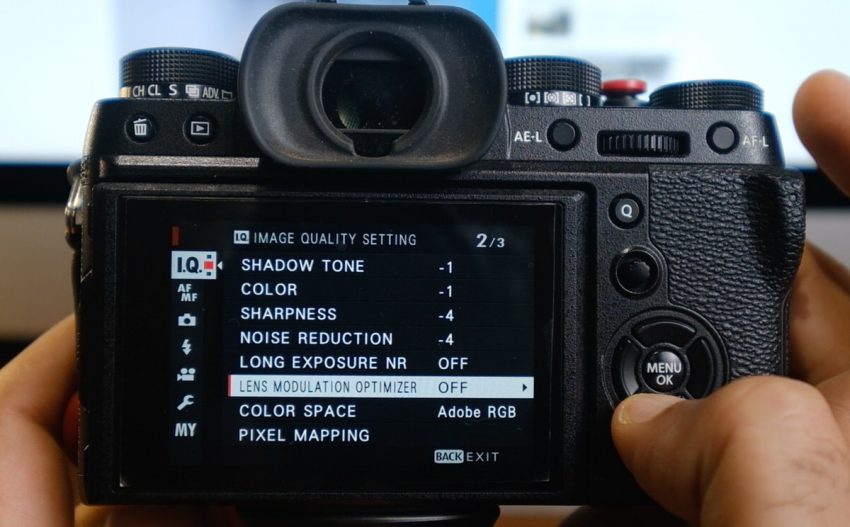
- Shadows tone: -1
- Color: -1
- Sharpness: -4
- Noise Reduction: -4
- Lens Modulation Optimizer: OFF
- Navigate down to Edit/Save Custom Settings
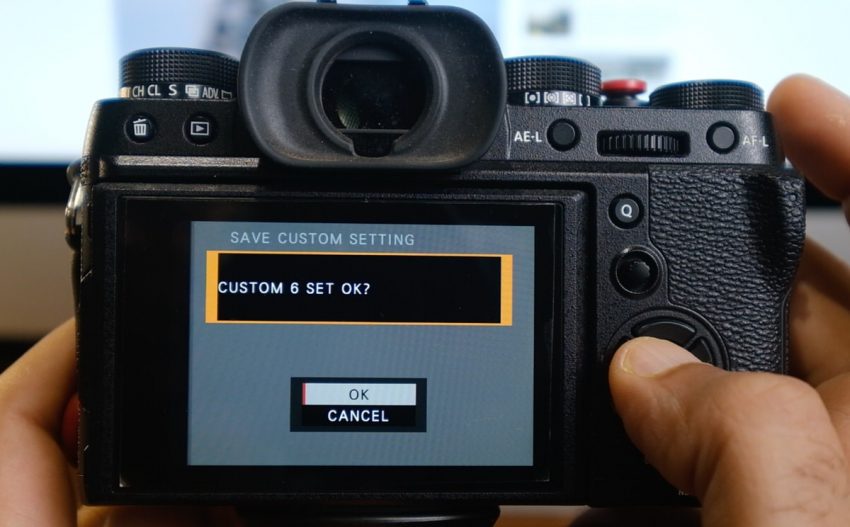
- Choose either one from CUSTOM 1 to CUSTOM 7.
- Select Save Current Settings (This will update all the settings with what you have selected previously)
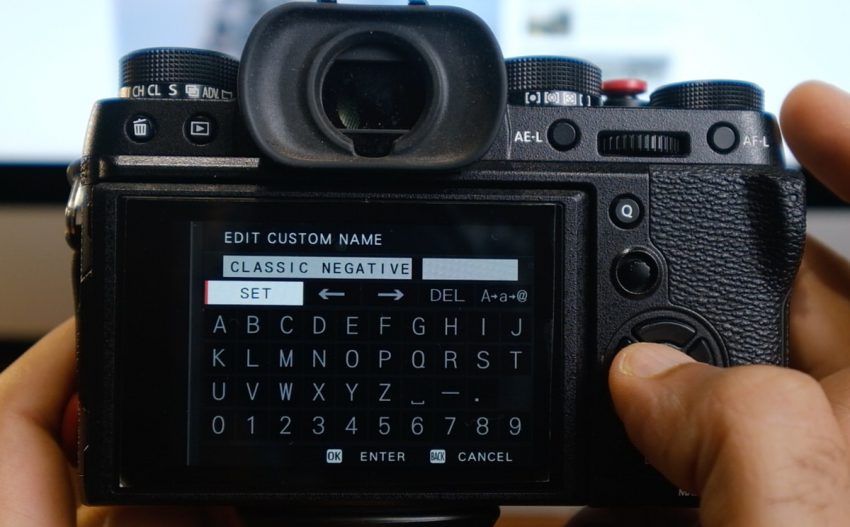
- Edit Custom Name > I used Classic Negative.
- Hit BACK button
- Camera will ask you do you want to Save Custom Setting. Choose OK
Tip about White Balance
Unfortunately the WB adjustment is never saved in the Custom Settings including the R & B adjustment that you make. So you need to remember that White balance must be set to Auto with a shift of R: -2 B: +4.
I have come up with an easy to remember method which is to store this value in the Custom Name > I changed mine from Classic Negative to ClC Neg A-24. Which reminds me that WB is Auto and R: -2 B: +4
Source: DIY PHOTOGRAPHY
Shoot RAW and Capture One?
If you shoot in RAW and are a Capture One user, then you can easily apply the TRUE film simulation to the X-T3 Images shot in RAW (does not work for JPEG). I explain more in this video.
Samples


Thank you for this!