


Quick Look at Raya Pro Blended HDR vs Lightroom HDR
2016
 Harmeet Gabha
[et_pb_section admin_label=”section”][et_pb_row admin_label=”row”][et_pb_column type=”4_4″][et_pb_text admin_label=”Text” background_layout=”light” text_orientation=”left” use_border_color=”off” border_color=”#ffffff” border_style=”solid”]
In this post, I take a look at the results of two HDR images created using two different software: Raya Pro by Jimmy McIntyre and Adobe Lightroom HDR.
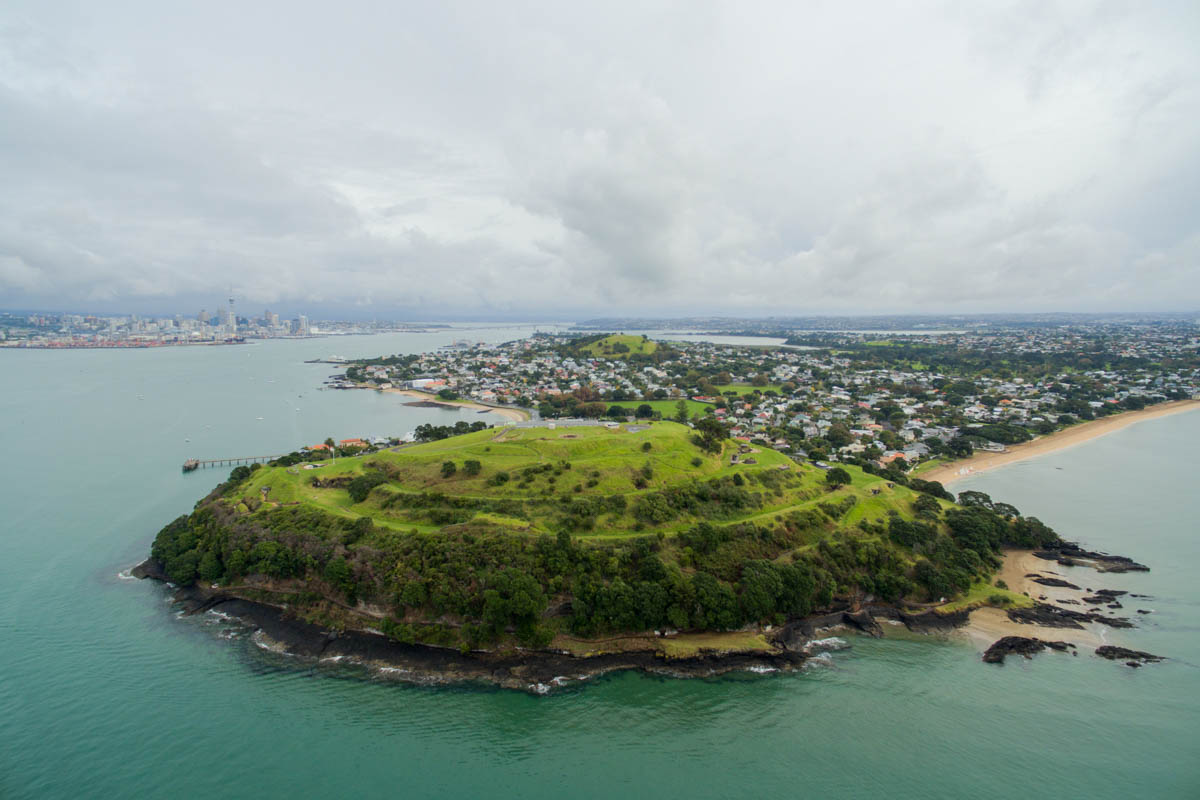
The image I used is from my recent trip to Auckland where I visited the North Head location and captured these images using DJI Phantom 3. The images were 5 Bracketed exposures, 1-stop apart so that was -2, -1, 0, +1, +2.
Of the 5 images, I used -1, +1, +2 exposures as my Dark, Normal and Bright respectively to create the blended final image.
With Raya Pro, I loaded the images in Photoshop CC as layers and did the very simple blending using the Darks and Brights button on the plugin. Then finally finished the image in Camera Raw adjusting various sliders.
[/et_pb_text][et_pb_image admin_label=”Image” src=”https://photoinsomnia.com/wp-content/uploads/2016/04/Auckland-North-Head-Raya-Pro.jpg” alt=”HDR Blended with Raya Pro” title_text=”HDR Blended with Raya Pro” show_in_lightbox=”on” url_new_window=”off” use_overlay=”on” overlay_icon_color=”#f29f1a” hover_icon=”%%51%%” animation=”off” sticky=”off” align=”center” force_fullwidth=”off” always_center_on_mobile=”on” use_border_color=”off” border_color=”#ffffff” border_style=”solid” saved_tabs=”all”] [/et_pb_image][et_pb_text admin_label=”Text” background_layout=”light” text_orientation=”left” use_border_color=”off” border_color=”#ffffff” border_style=”solid”]
With Lightroom, I selected the same 3 images and selected Photo Merge > HDR. Then adjusted the final result in Lightroom Develop module to apply similar settings as the first image edited in Camera Raw.
[/et_pb_text][et_pb_image admin_label=”Image” src=”https://photoinsomnia.com/wp-content/uploads/2016/04/Auckland-North-Head-LR-HDR.jpg” alt=”HDR with LR Photo Merge HDR” title_text=”HDR with LR Photo Merge HDR” show_in_lightbox=”on” url_new_window=”off” use_overlay=”on” overlay_icon_color=”#f29f1a” hover_icon=”%%51%%” animation=”off” sticky=”off” align=”center” force_fullwidth=”off” always_center_on_mobile=”on” use_border_color=”off” border_color=”#ffffff” border_style=”solid” saved_tabs=”all”] [/et_pb_image][et_pb_text admin_label=”Text” background_layout=”light” text_orientation=”left” use_border_color=”off” border_color=”#ffffff” border_style=”solid”]
I think both the results are nice in the end however my preference is the image created with Raya Pro as the distant landscape still remains a bit blurry and low in contrast. This gives a more natural looking result.
While the image created with Lightroom, makes the distant landscape more contrasty and tries to sharpen it up. Which is nice and normal trait of an HDR image.
Which image do you like the best?
[/et_pb_text][/et_pb_column][/et_pb_row][et_pb_row admin_label=”Row”][et_pb_column type=”1_2″][et_pb_cta admin_label=”HDR Advert in Post” global_module=”2945″ saved_tabs=”all” title=”Ultimate HDR Preset Pack for Lightroom” button_url=”http://gabha.photography/buy/presets/ultimate-hdr-preset-pack-for-lr4-and-lr5/?utm_source=PI&utm_medium=Web&utm_campaign=InPost” url_new_window=”on” button_text=”Show me More” use_background_color=”off” background_color=”#00a8ff” background_layout=”light” text_orientation=”center” header_font_size=”26″ body_font_size=”14″ use_border_color=”off” border_color=”#ffffff” border_style=”solid” custom_button=”off” button_text_size=”20″ button_border_width=”2″ button_border_radius=”3″ button_letter_spacing=”0″ button_use_icon=”default” button_icon_placement=”right” button_on_hover=”on” button_border_radius_hover=”3″ button_letter_spacing_hover=”0″]  [/et_pb_cta][/et_pb_column][et_pb_column type=”1_2″][et_pb_code admin_label=”Google Adwords (autosize)” global_module=”2849″ saved_tabs=”all”]<script async src=”//pagead2.googlesyndication.com/pagead/js/adsbygoogle.js”></script> <!– Auto Size 1 –> <ins class=”adsbygoogle” style=”display:block” data-ad-client=”ca-pub-6718175878321769″ data-ad-slot=”8428061439″ data-ad-format=”auto”></ins> <script> (adsbygoogle = window.adsbygoogle || []).push({}); </script>[/et_pb_code][/et_pb_column][/et_pb_row][/et_pb_section]