

Long Exposure photography is a way to capture time and movement in one single exposure. The technique requires that your exposure be anywhere from couple of seconds to a few minutes long. The beauty of such photograph is the ability to show you something that you can’t see with your naked eye. Almost all of us would have seen some examples of such image without realising or not.
The key and essential element for such images is the Filter that you need to attach in front of your lens. These filters are called ND (Neutral Density) filters which vary from dark semi-transparent filter to a completely black, hence The Black Glass, where you can’t see anything through it. The strength of such filters is measured in number of stops of Light they tend to block, commonly starting from 3-stops and going up to 11-stops. The idea is to use these filters so you can shoot in the middle of the day when the sun is bright. Of course images captured in the night without a filter also qualify as Long Exposure images but we aren’t discussing those in this post.

Hoya-NDx400 9-stop Filter
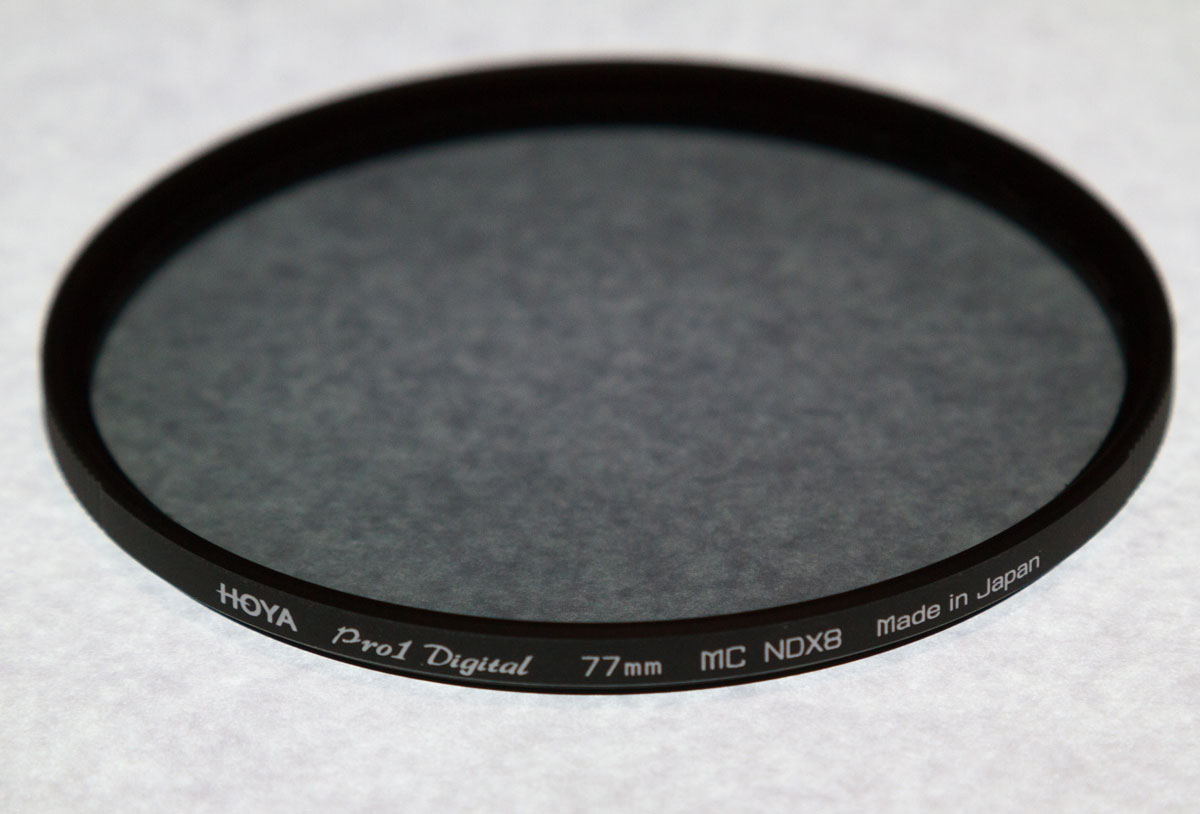
Hoya-Pro1-NDx8 3-stop Filter
Other than this essential element you will need a Tripod because nobody can handhold a camera steady for 1-2 seconds yet a few minutes. As a minimum these are the two things you’d need before you can go out to take Long Exposure Photographs.

You can also stack filters to increase the amount of light. For example, I sometimes screw both of my filters 3-stop and 9-stop to make a 12-stop filter which block even more amount of light.
Soft Fluffy Clouds
In this example above, a 9-stop ND filter was used to get the movement of the clouds captured in the image. The building of course is standing still and the clouds are moving perpendicular to the building which is the newest addition and is occupied by the ANZ Bank.
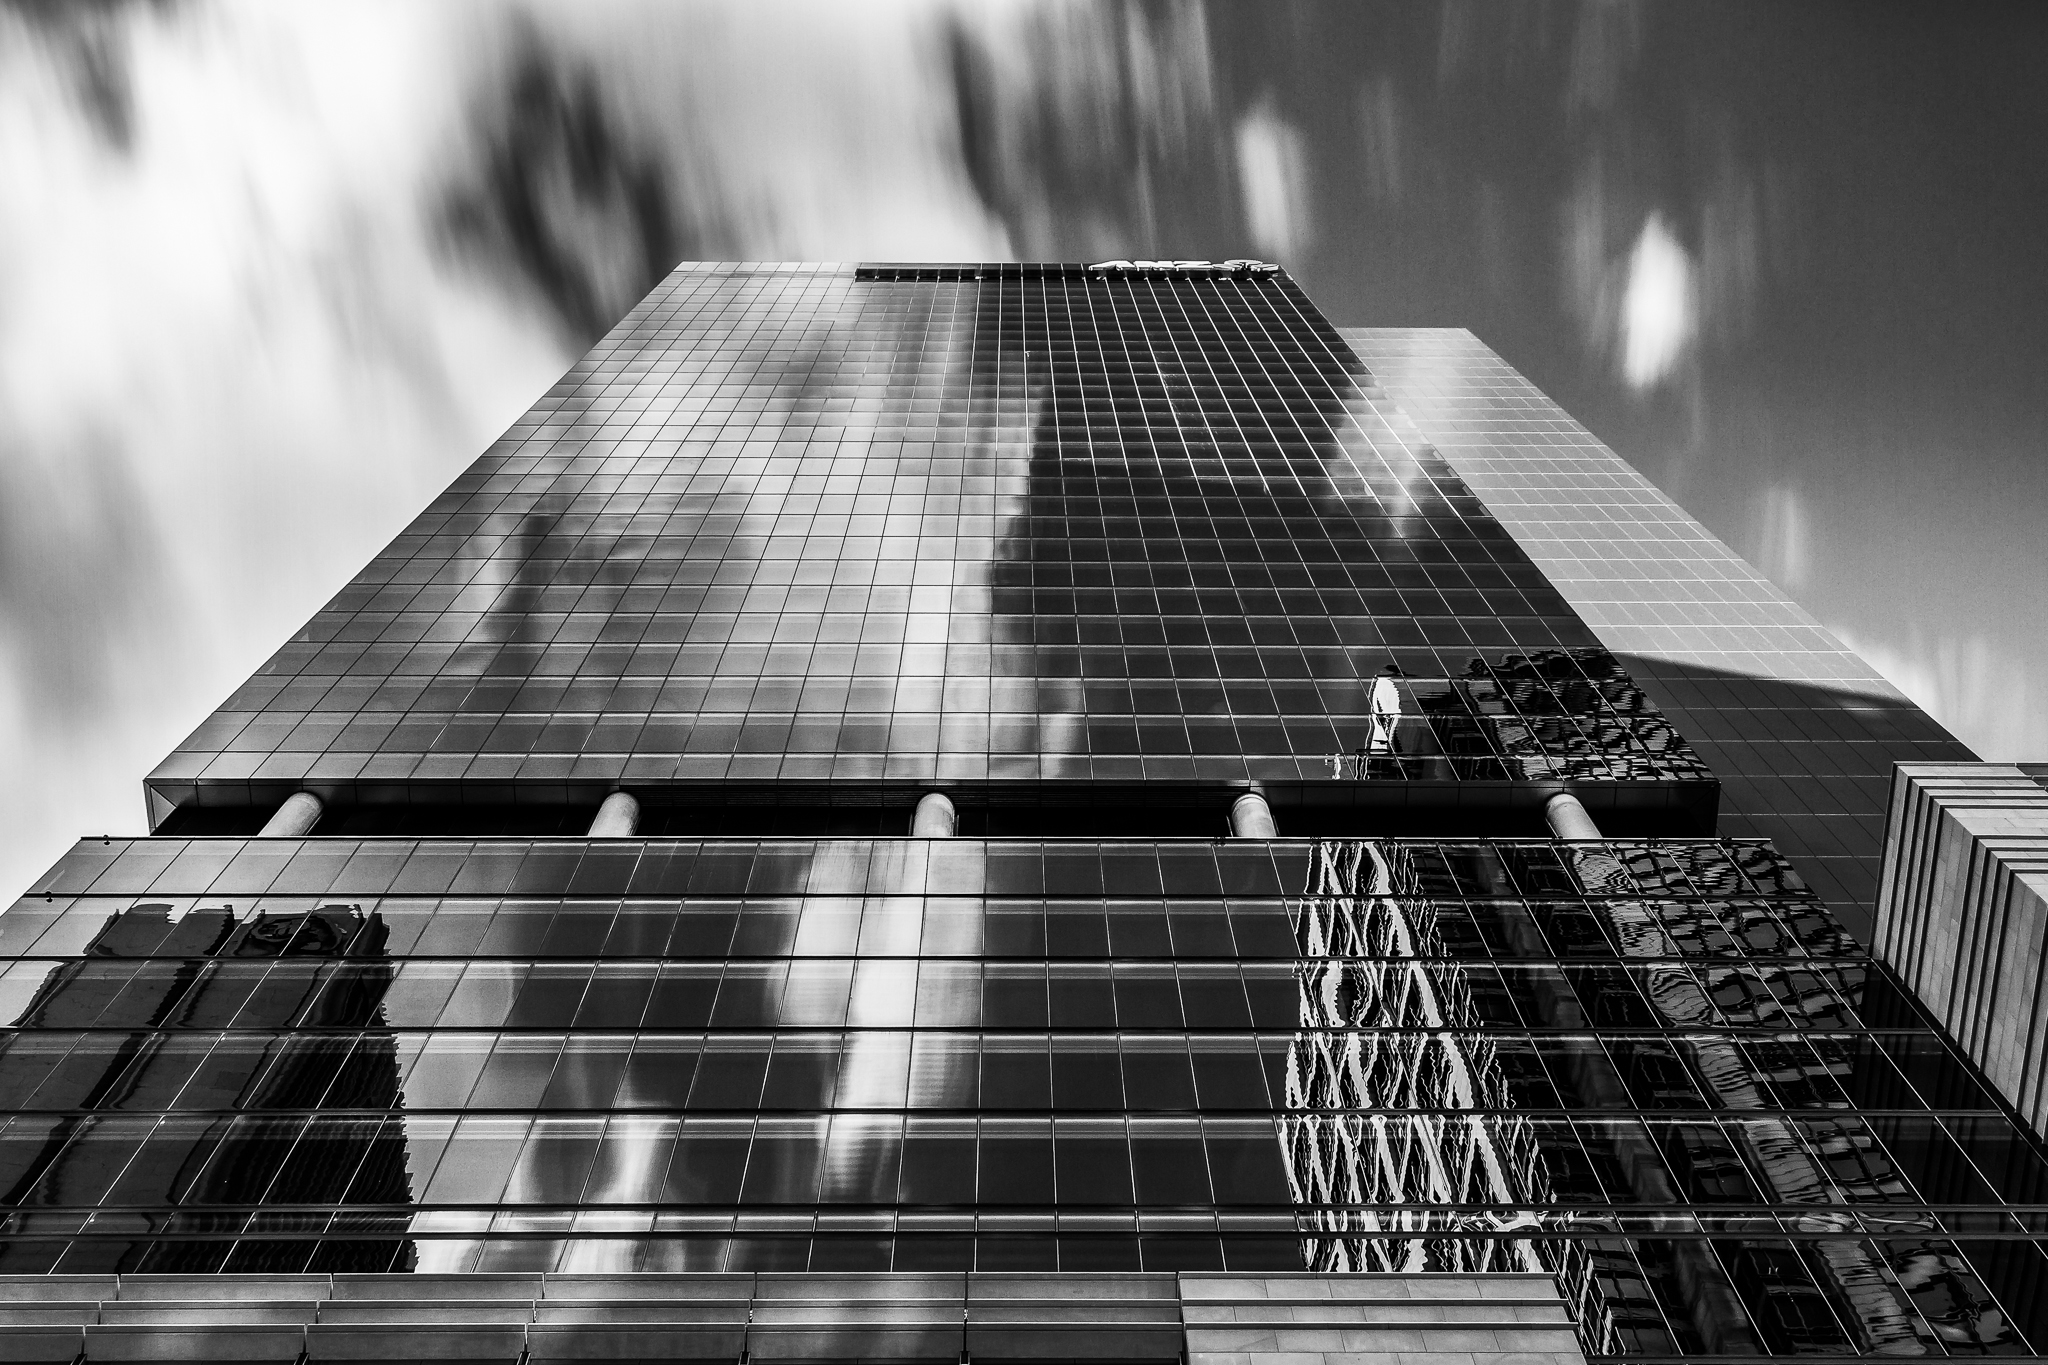
ANZ Bulding, Sydney CBD – F8.0 – ISO 100 – 5.0 seconds
Catching the Waves
In this example below we have the ocean waves and the white wash of the waves captured in this smooth motion as it flows in and out of the bay. A good idea with such an image is to have a foreground element (in this case the boulder) which anchors the viewers eyes.

Fishermans Bay – F16 – ISO 100 – 3.2 seconds
Silky Smooth Water
You can also use the filter to create silky smooth surface of water which gives a glassy feel to the surface. The image below uses a 3-stop filter before sunset to slow the camera shutter down to 10 seconds and therefore all the movement in the harbour water is smoothed off in the final image.
Compare the two images below and you will see
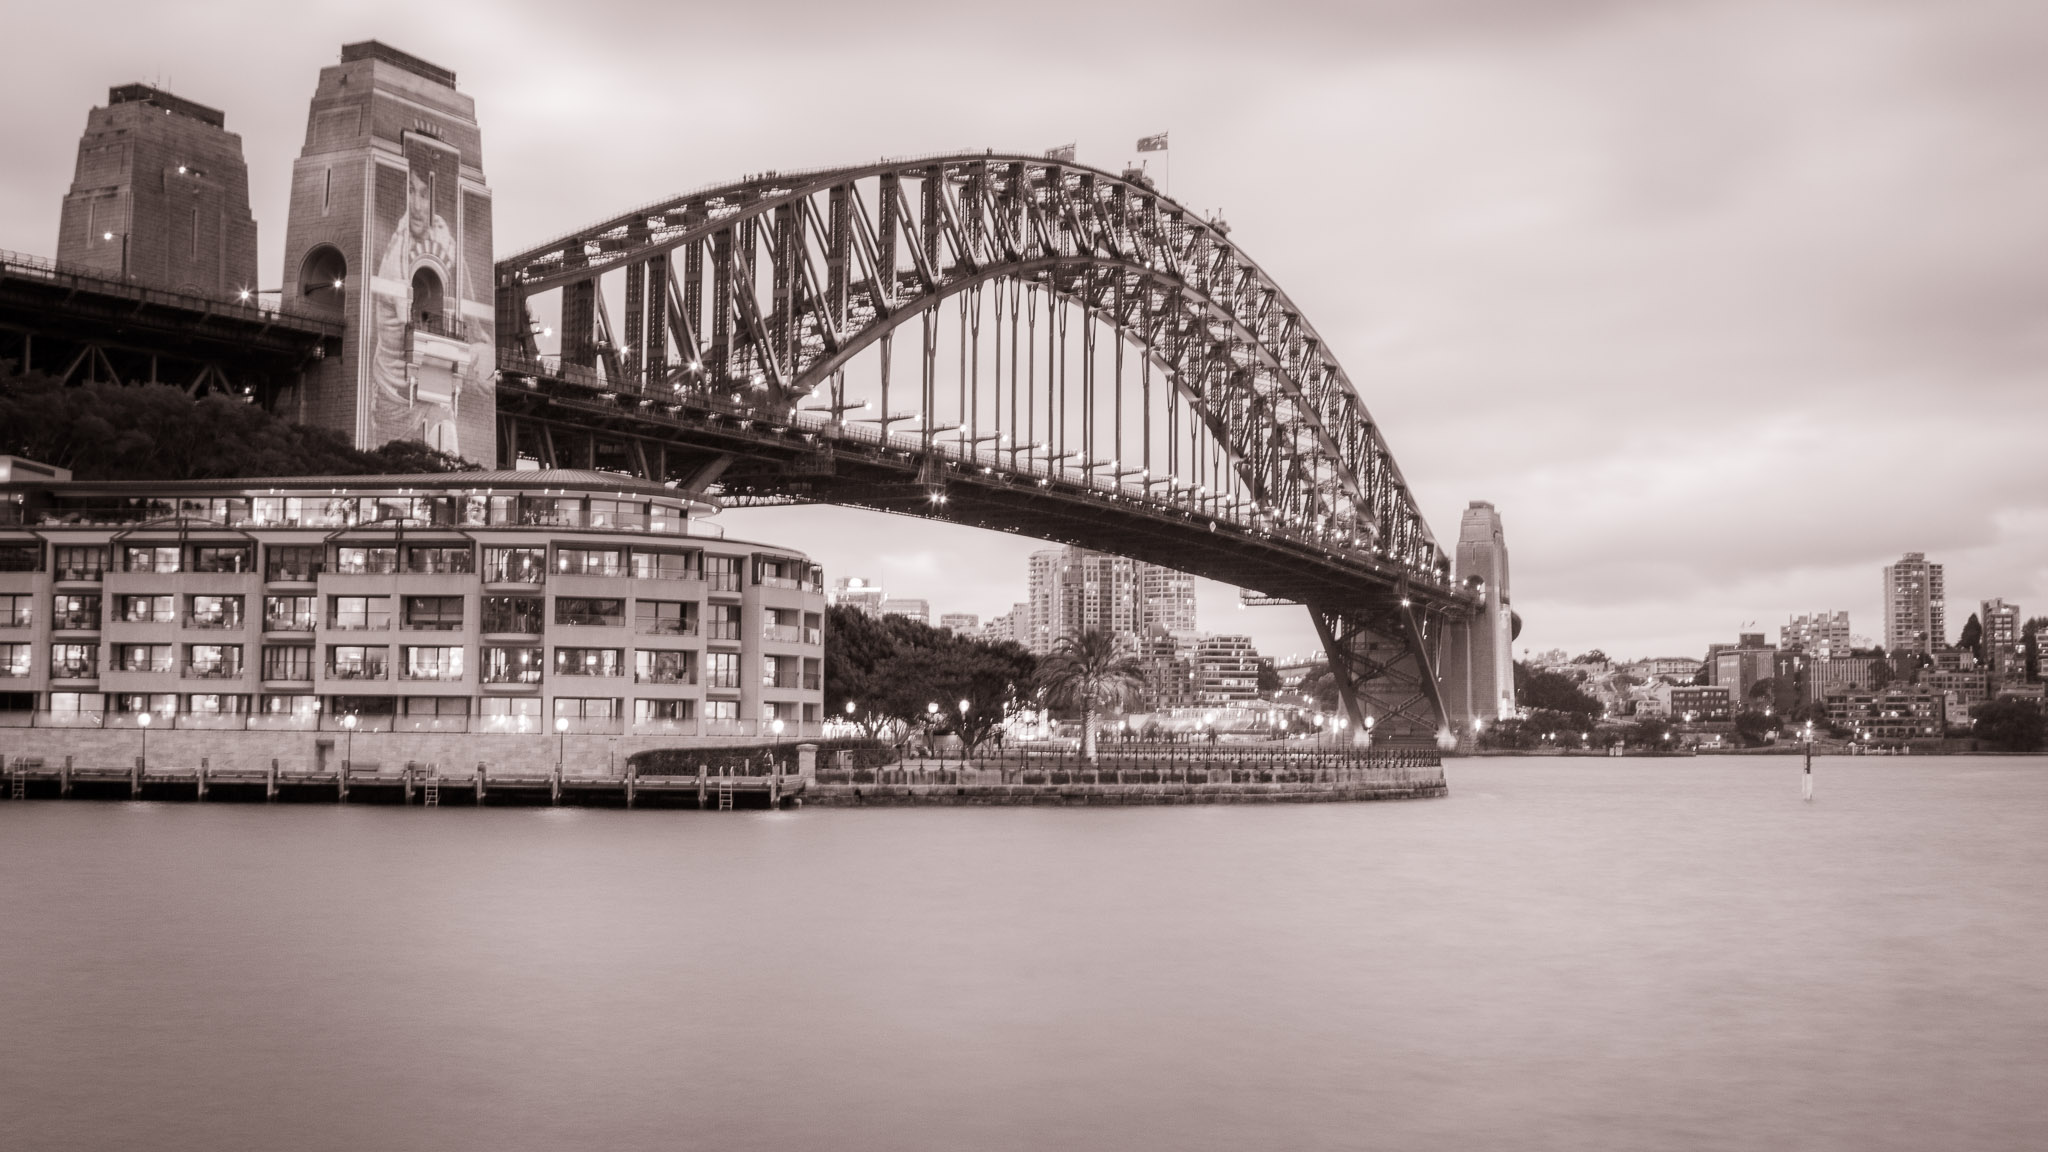
The Coat Hanger with 3-stop filter – F11 – ISO 100 – 10 seconds

The Coat Hanger – no filter – F11 – ISO 400 – 0.3 seconds
Once you get a taste for what this Black glass can do for your photography it almost becomes addictive. These filters are always in my bag and hardly take any room so whenever I need to use them I can get to them. My two favourite lens have the same size lens thread so I don’t need multiple size filters.
- Canon – 24-105mm F4 L Lens – 77mm thread
- Tokina – 11-16mm F2.8 Lens – 77mm thread


Trackbacks/Pingbacks