

Most of us have heard the phrase “Warp Speed” in some shape or form in our life. I remember it from “Star Trek” the original series which I used to watch in the late 80s, others may remember the newer series of this show but I haven’t seen these so don’t know if they are still using these phrase or not. Anyway this post is not about which version of Star Trek series or movies is your favourite but about how to create similar look with your photography.
The technique is quite simple but capturing the result can take some effort. Its all about capturing motion of moving in one direction only.
Ideally you can achieve this in an underground situation where you are travelling in a Metro/Subway or in my case Airport Shuttle. But what becomes tricky is either being at the front of locomotive or at the rear with no other obstruction except a glass window for preventing you from falling out. Where I’m living this is not possible. Most of our Metro runs network above ground and is human driven so both ends of the metro will have driver cabins so no clear access to front or rear of the metro. So even in the small sections where it does go underground you cannot achieve the result.
Camera Settings
You need to control the Aperture and ISO so that your Shutter speed is between 1/10th of a second to 2 seconds so set the largest Aperture ie F number eg. F22 or F30 etc so you want to be in Aperture (Av or A) mode of your DSLR. Half press the shutter to have you camera focus & meter the light and it will show you the shutter speed it is going to use. If the speed is within 1/10th to 2 second you are ready to shoot. If not then use a smaller ISO number eg. 100 or 200, however you don’t want your camera to take a 5 or 10 second image, it will just blur out everything.
Additional when you are getting started, you may want to use AEB (Auto Exposure Bracketing) of -1, 0 and +1 stop. This will allow you to capture three images at different shutter speed and you are likely to get one image that will be keeper. For example if your camera indicated a normal shutter speed of 1/5th of a second (this is the 0 exposure), this means that -1 stop will be 1/10th of a second and +1 stop will be 0.5 second.
The key thing with all this is the camera must be steady and resting on stable platform. If you can’t use a tripod, place it on a window shelf or ledge and gently push down on the body so it doesn’t move. Alternatively you can push the lens up against the glass and fire off a few shots in burst mode.
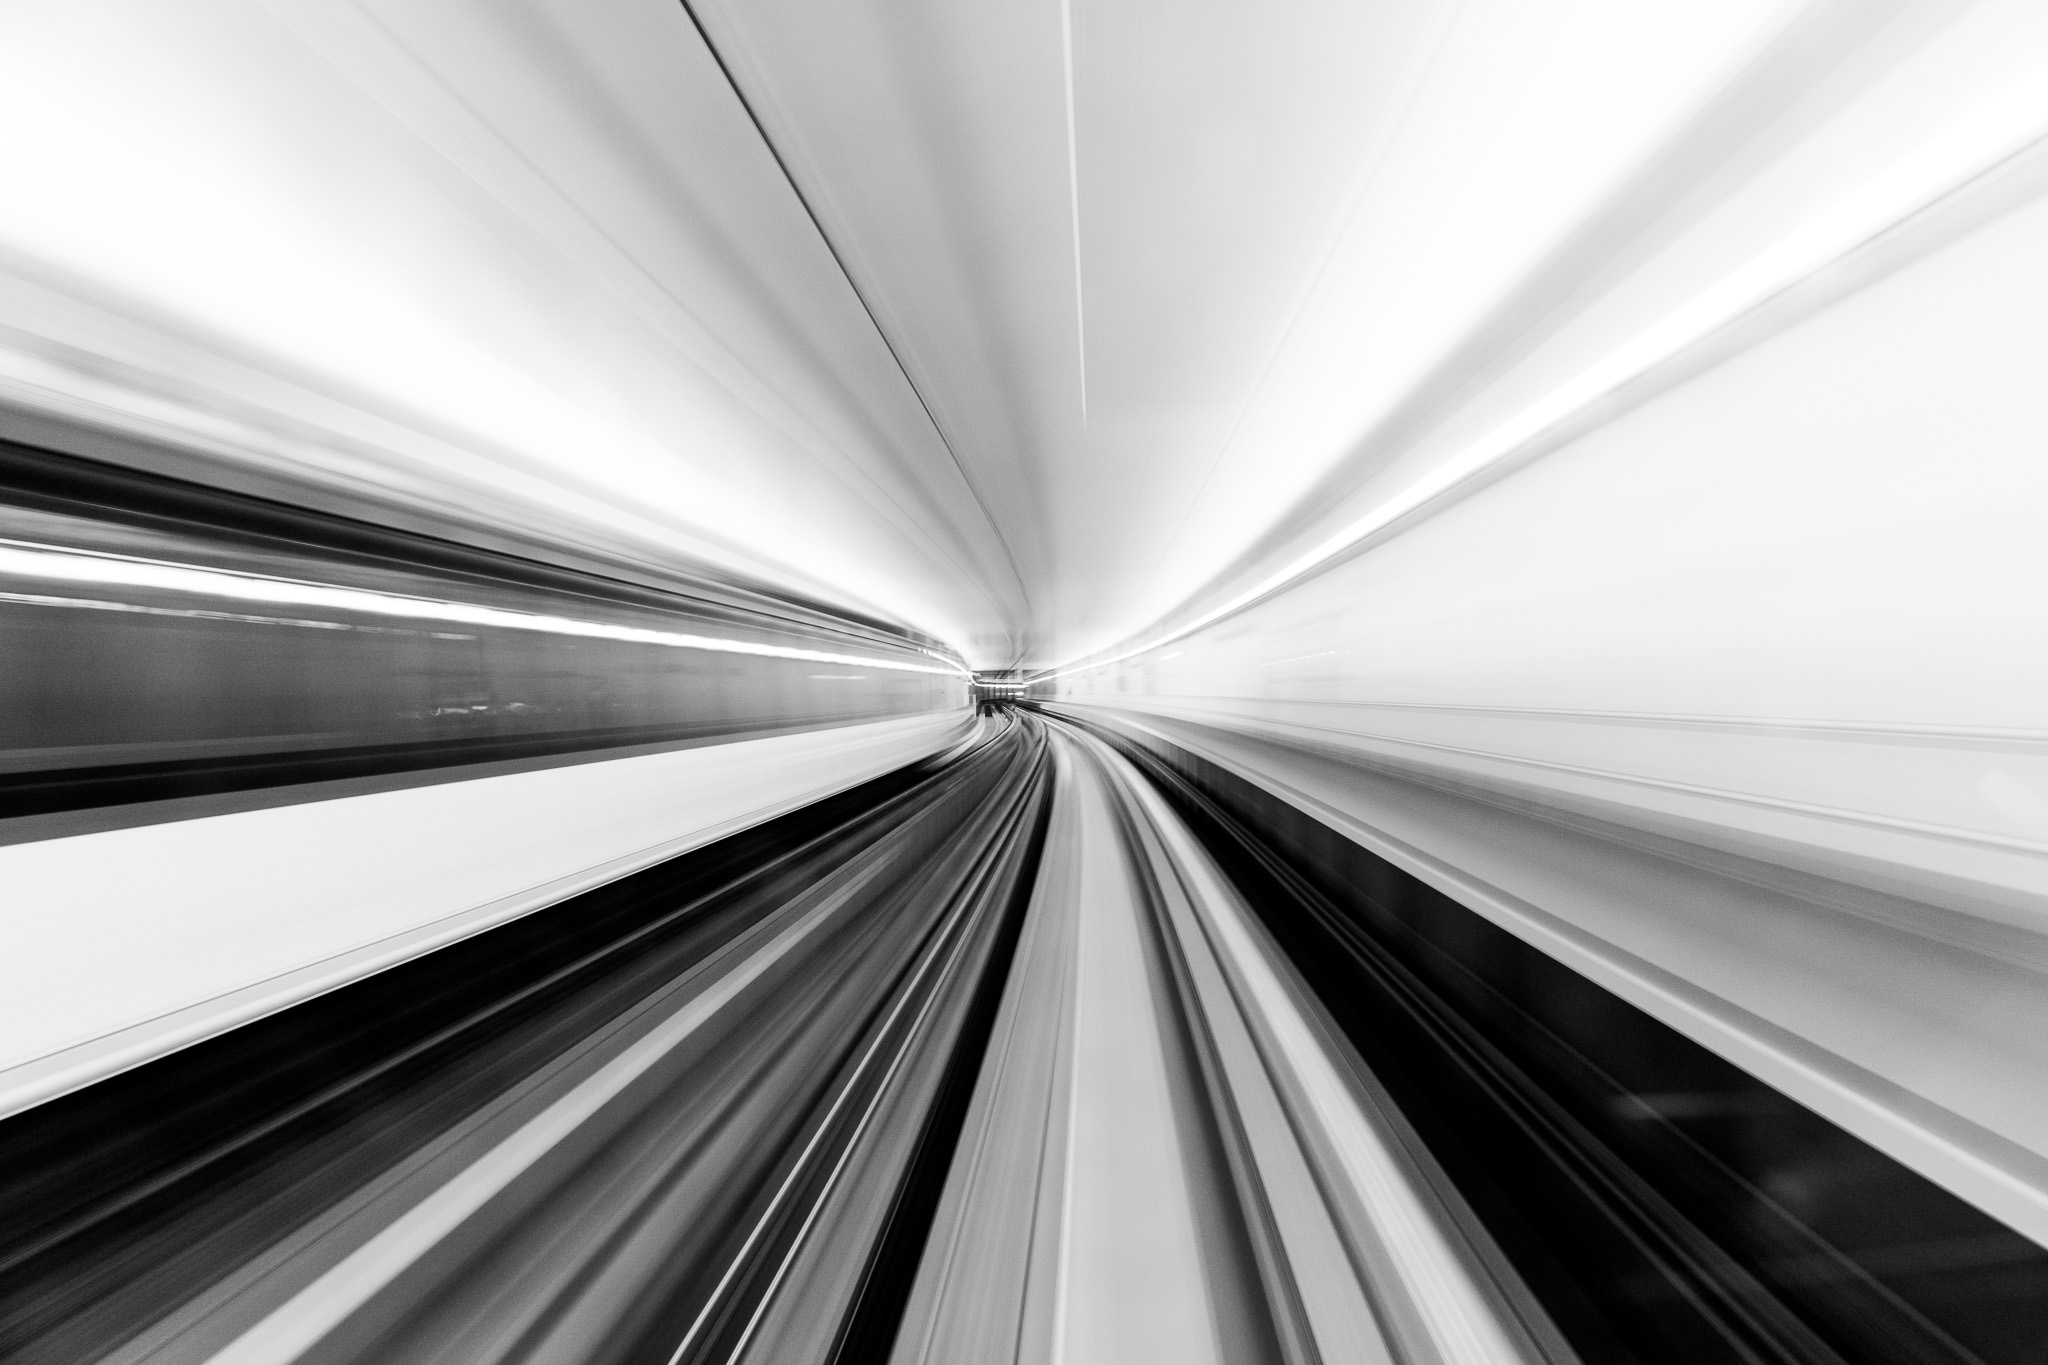
![Aperture F5.6 - Shutter Speed 1/8th of a second - [exif id="2209"]](https://photoinsomnia.com/wp-content/uploads/2015/02/Time-Warp-Dubai-Shuttle.jpg)
Aperture F5.6 – Shutter Speed 1/8th of a second – ISO 250

Aperture F11 – Shutter 0.6 seconds – ISO 400
Aperture F11 – Shutter 0.7 seconds – ISO 400
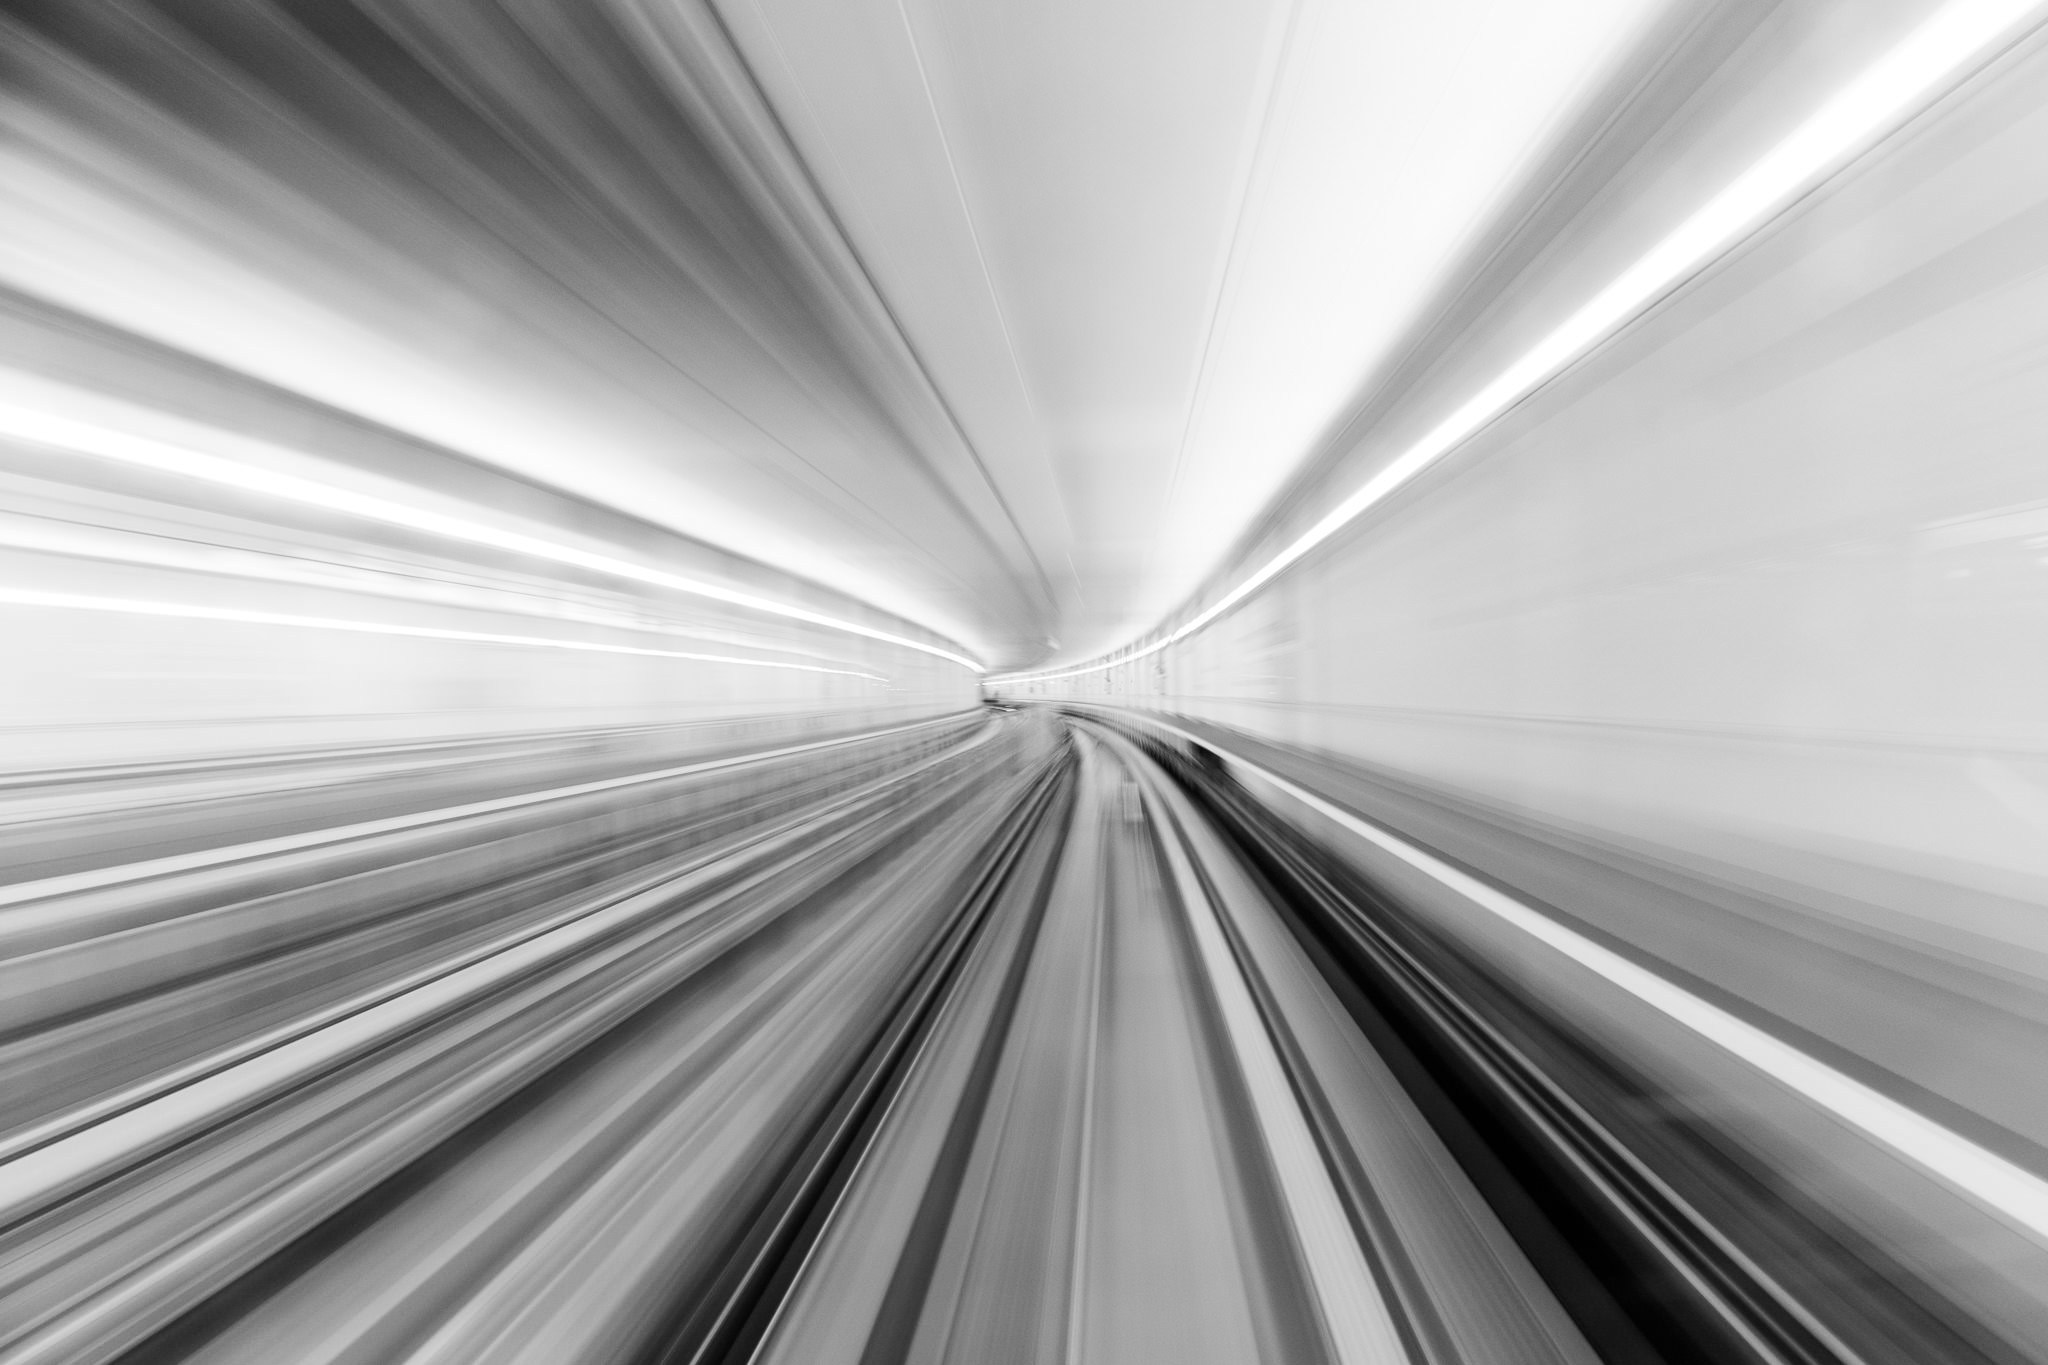
Aperture F11 – Shutter 0.8 seconds – ISO 400
However in the images above you can see that as we start to have longer shutter speed, we start to see the effect become more and more emphasised.
If you liked this post please share with friends on your favourite social network.


