If you’ve been using Adobe Lightroom for quite some time you are aware how slow it can be at importing the images. And ‘No’, having the fastest computer you can’t afford will not make it any better. Why because Lightroom Import process is just slow and Adobe hasn’t done anything to improve this process.
When you start the import from your camera and memory card, you setup the import and just walk away for 30mins to an hour (or hours) depending upon how big the card is you are importing from. Its just the way Lightroom is.
So I’ve been working on what is the best settings combo that will import the images quickly into Lightroom and get me going faster. So here is a bit of my benchmark system:
- iMac 27″ with Maverick OSX
- 32 GB Ram
- 512 SSD Hard disk installed (where the catalog resides)
- 2TB USB3 2.5″ External drive (where the photos are stored)
Below are the steps of how I do a fast import into Lightroom.
Step 1
Create Destination Folder
Start with inserting the card and if Lightroom is open, it will jump onto importing the images. Cancel it!
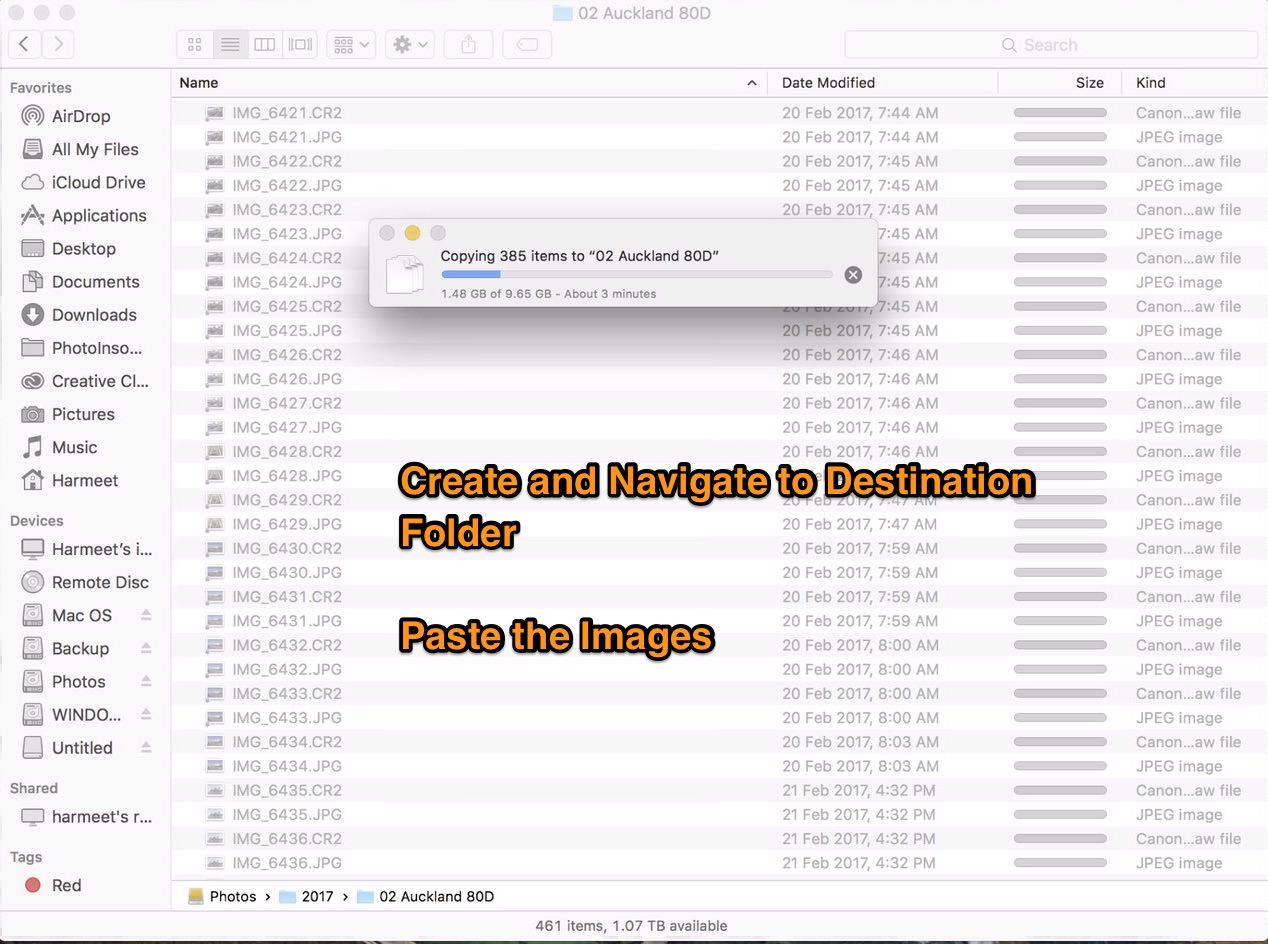
Navigate to the drive where you wish to import the image and create the Destination folder where you want to store the images. Use Finder or Windows Explorer to do this part, its totally outside Lightroom.
Step 2
Copy Images
Navigate to the Source folder on your Camera or Memory Card and then select all the images you wish to import. Again I do this outside of Lightroom using Finder (or Windows Explorer).
Drag and drop the images onto the destination folder. Or Copy and Paste them from Source folder to Destination folder.
This process works faster if you are using compatible devices, such as USB3 Card Reader if you are using a USB3 External drive. Otherwise hardware will be the bottleneck and slow down the import. It will still be faster than native Lightroom import.
I can get good speeds, Import 10 GB in 5 mins which turns out to be 2GB/min.
Step 3
Import into Lightroom
Once the copy process is completed, you can now open Lightroom or switch to Lightroom.
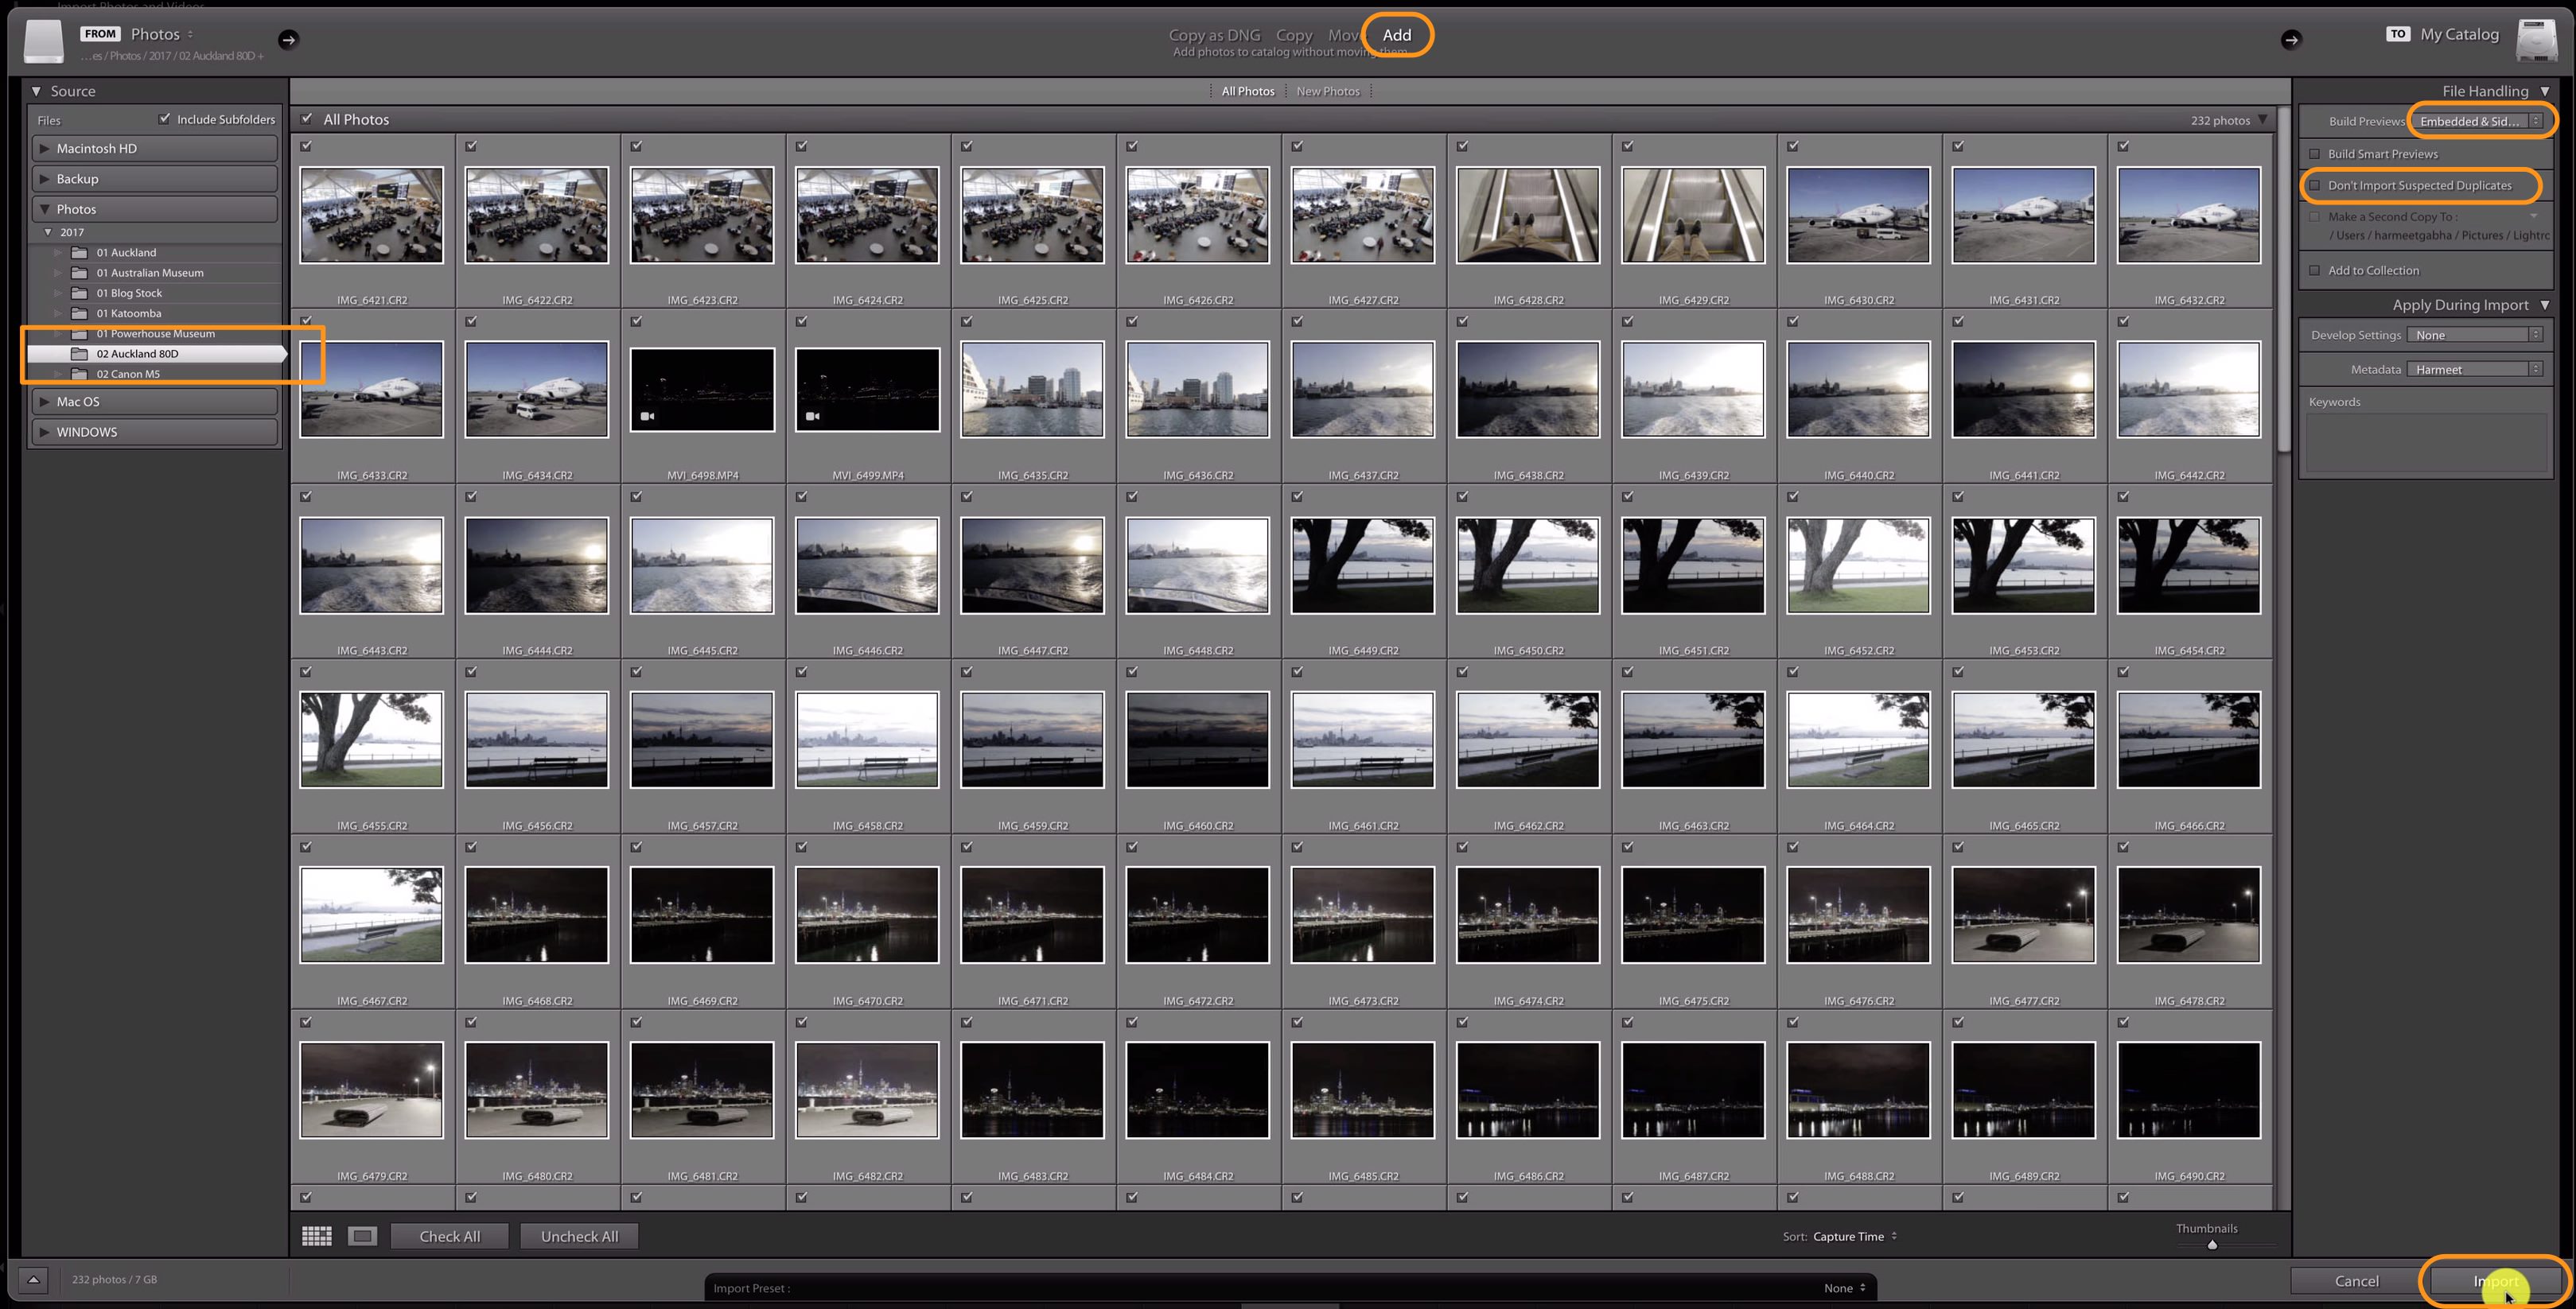
Start the Import Wizard and select the “Add” option, Source should be your folder where you copied the files. We now are asking Lightroom to simply add the images into the catalog and not copy the images to disk while during the import.
- Preview Setting – Minimal & Sidecard
- Duplicate Check – Un-tick this as you know you are importing brand new photos so no need to check for duplicates
- Import Preset – optional, if you have default setting you can apply the Develop Preset of your choice
- Select All – select all images to import
Click Import and watch Lightroom fly and import the images within few minutes.
That’s it!! 3 easy steps to faster import into Lightroom.
Now you can jump into Develop Module and start editing your image. The process is at least 2-3x faster than standard Lightroom import.
Update – 25th June 2017
Since writing this original blog post, I have created a video over on YouTube that shows you this process. Please check it out if you prefer the video version.


This is pretty much how I do my imports, using Windows. I have my photos set up in folders by year and inside each year folder is a “RAW” folder for the images right out of camera and inside that folder are folders for each month (I could also create and name a new folder for each trip or event, but having them by month works fine). Also inside the year folder is a folder for the exported images. When I finish editing a batch of images from a trip or event, I export my final versions to the “Exported” folder for the same year, into a folder with a name that identifies the trip, the event, whatever. It’s super simple and makes it easy to upload to Flickr or Google+ (which I still do by synchronizing with Picasa).
Thanks for sharing your approach Patrice. It’s great to see that you also have found your own way around Lightroom limitations. Clearly this functionality is not at the top of the list for Adobe, to make the import module faster.