

Happy New Year reader (well depends when you are reading this)!! it was the start of new year when I published this. So I hope you are having a great year. As you or your loved ones spoil you over the Christmas and Holiday season, I’m sure there are some of us who have got our first camera or upgraded to that “next” camera you wanted.
So did I!! I bought an Fujifilm X-T3 which was on sale after Christmas and I had my eye on it for quite sometime. Hence I was keen to setup this camera with my own preferences. But this time I decided to document it as a video which you can watch on my YouTube channel.
Shoot without Card
This is one of those settings that will save you from potential disaster. Out of the box the camera comes with the default setup so in the shop you can try the camera and take a few shots without inserting a memory card.
It doesn’t save the images anywhere but let’s you take a single shot and review it on the back of the screen. Once you are done, you can take another shot and so on.
The problem is, which has happened to me a few times, hence this is at the top of my list is when you take the camera out of the bag and take a shot you won’t realise that the camera doesn’t have a card.
And this could be potentially disastrous, so this is first thing a customise on my camera.
Press the MENU button and then navigate to SET UP > BUTTON/DIAL SETTING > SHOOT WITHOUT CARD and turn this setting OFF.
So now when you try to press the shutter it won’t take a picture but alert you you don’t have a card in camera.

Custom File Name
This is a very valuable setting that you can configure to ensure that your images are named in a specific way when you shoot them in your camera.
It can be helpful if you have multiple photographers on a shoot and allow you to know who shot what image. There is an additional setting that helps with this which we will talk about next.
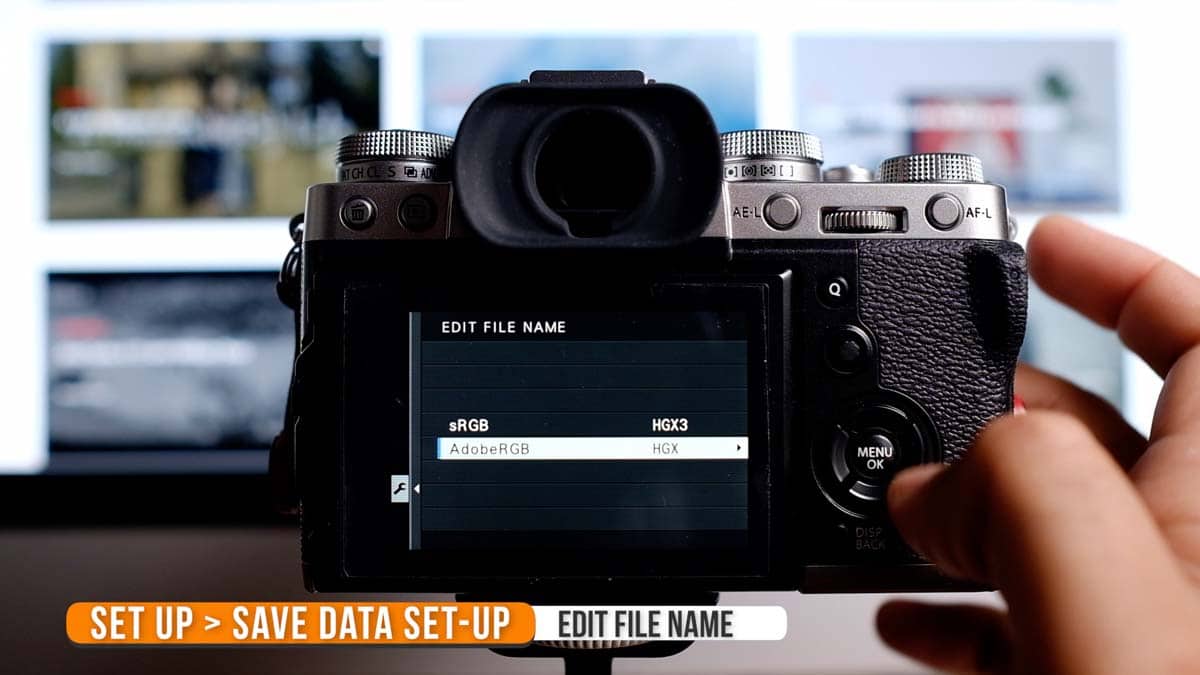
However for now, let’s hit that MENU button again and navigate to SET UP > SAVE DATA SET-UP > EDIT FILE NAME. Here you an give your sRGB and AdobeRGB files your own naming format.
- sRGB – I use HGX3 (HG are my initials and X3 = XT3). This naming format is a 4 letter option
- AdobeRGB – I use HGX (HG are my initials and X = XT3). This naming format is a 3 letter option
Copyright Information
In addition to applying your own filename, you can also setup Copyright information which is embedded into IPTC settings of each image taken with the camera. You can define two parameters: Author and Copyright.
Hit the MENU button and navigate to SET UP > SAVE DATA SETTINGS > COPYRIGHT INFO. Configure the Author and Copyright options to your liking.
- Author – I put my name here, so its Harmeet Gabha
- Copyright – I put my Website address here
This helps if someone sees your photo online and wants to reach out they can easily find out.

Release/Focus Priority
Release v Focus essentially defined what will you camera try to do. Release, ie. fire the shutter to take the photo or Focus, to ensure that the subject is in focus before the picture is taken.
In the AF (Auto Focus)/MF (Manual Focus) Settings menu there is the option to for shooting modes AF-S and AF-C where S stands for Single ie single shot and C stands for Continuous ie camera continuously focuses on a moving subject.
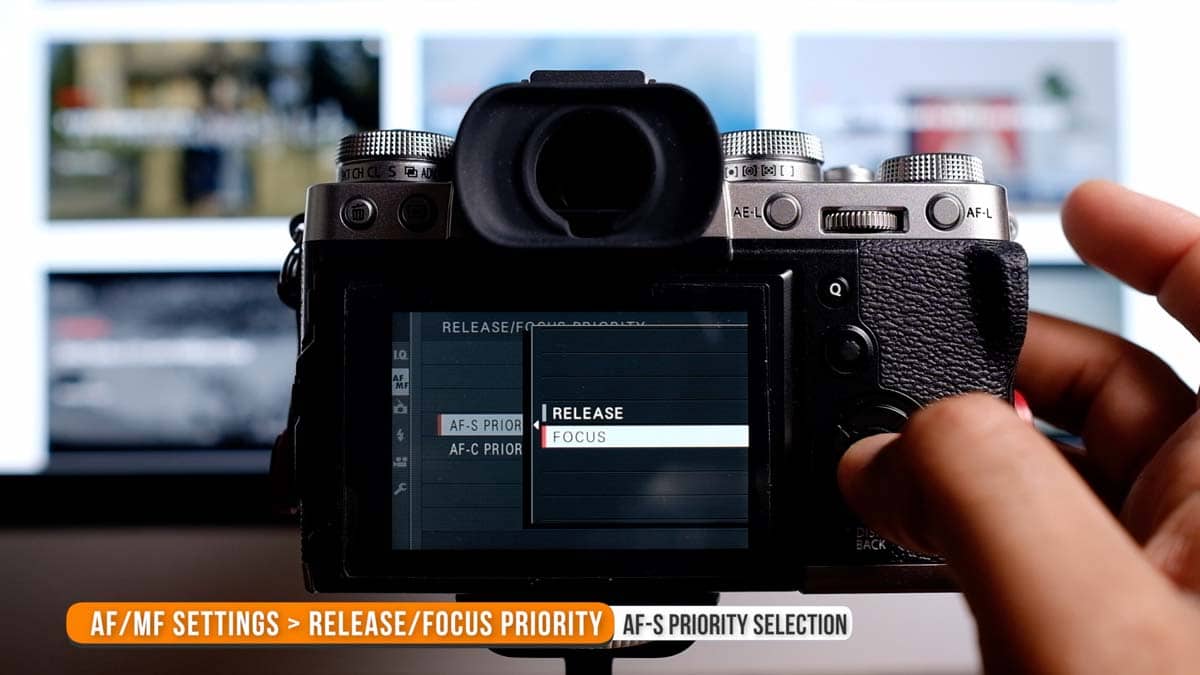
For some reason the default for AF-S is Release which means the camera may still take the shot if proper focus has not be achieved. For me this is a wasted shot and a photo that I wouldn’t ever use. So my personal preference is to change it to FOCUS.
Press the MENU button and then navigate to AF/MF SETTINGS > RELEASE/FOCUS PRIORITY > AF-S PRIORITY SELECTION and change the setting to FOCUS.
This will ensure that camera Focuses first before taking the shot in AF-S mode. I normally leave the AF-C settings to RELEASE (as default) which is a mode for continuous shooting predominantly so that you capture the image you want of a moving subject.
AE Bracketing
AE Bracketing is something that allow you to take different shots with different exposures. This is typically done for blending multiple images together or creating High Dynamic Range (HDR) images.
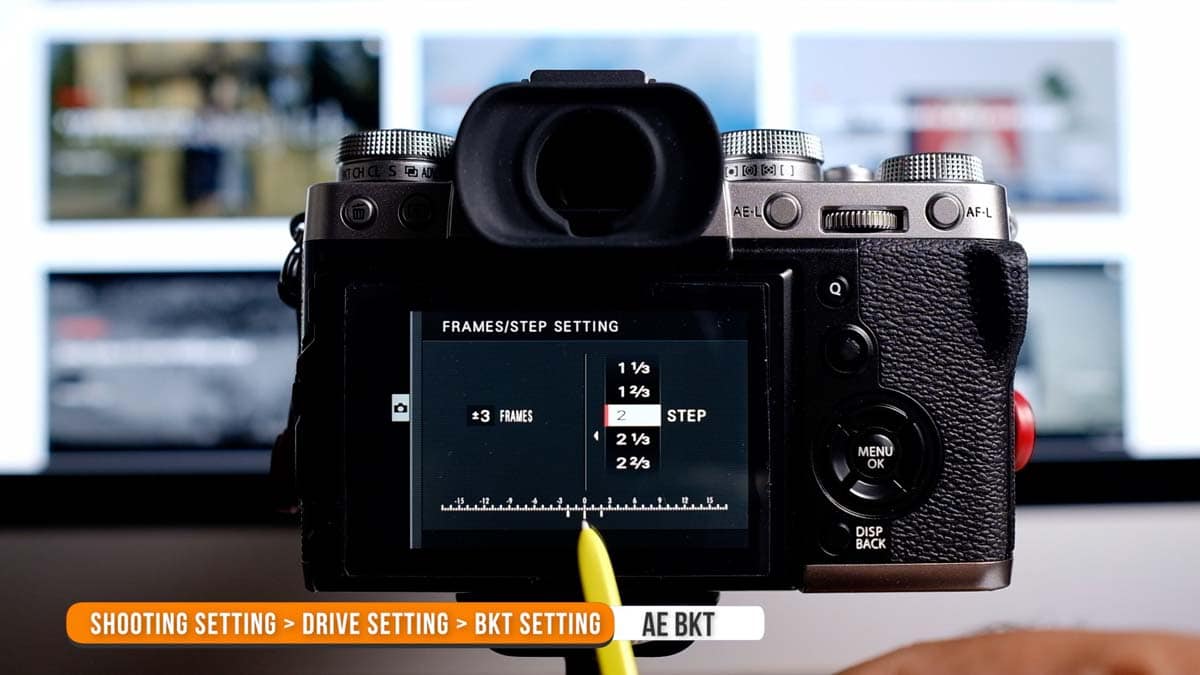
I do enjoy this quite a lot so I like to set up the settings that work for me. I like to take THREE exposures which are 2-stops apart.
Press the MENU button and navigate to SHOOTING SETTING > DRIVE SETTING > BKT SETTING > AE BKT and change the number of FRAMES from 1 to 3 FRAMES and change the STEP from 1/3 to 2 STEP.
Now your camera will take 3 shots -2, 0, +2 when you shoot in the BKT mode.
Electronic Level
Electronic level is a very handy aide to have activated that will help you ensure that your shot is leveled horizontally. The electronic level shows up as horizontal line on the screen which turns green when you are leveled.
Press the MENU button and navigate to SET UP > SCREEN SETTING > DISPLAY CUSTOM SETTING. Activate the ELECTRONIC LEVEL option which is not activated.
This will show the Electronic Level on the screen and on the electronic viewfinder.
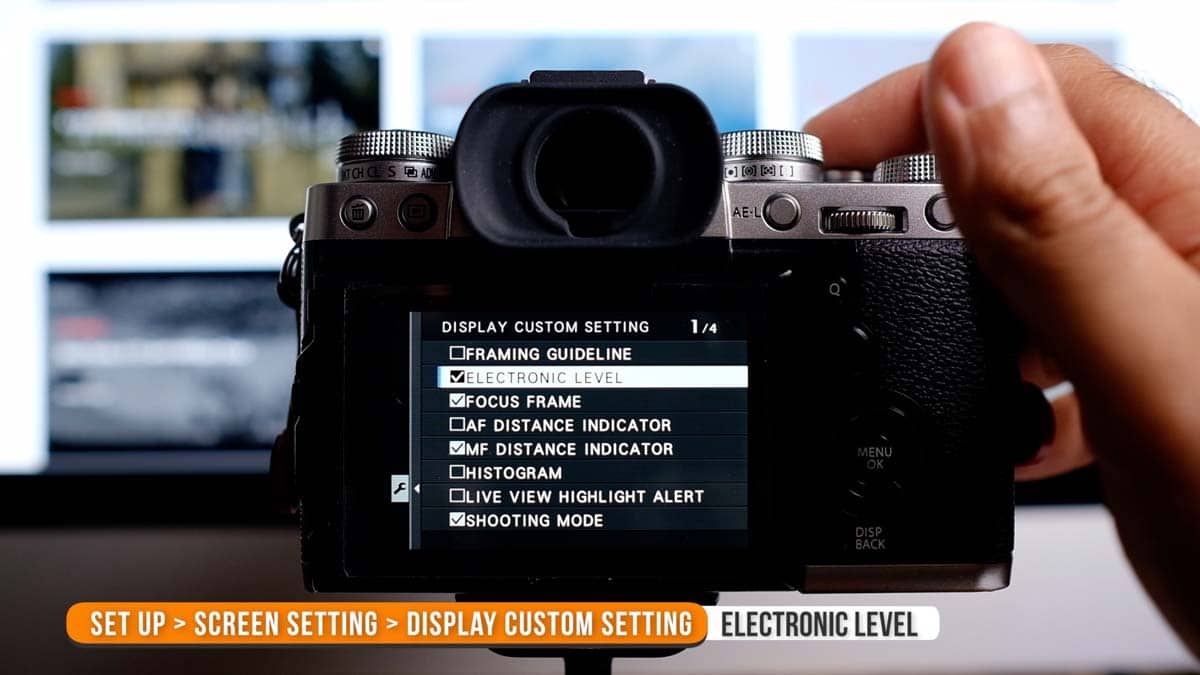
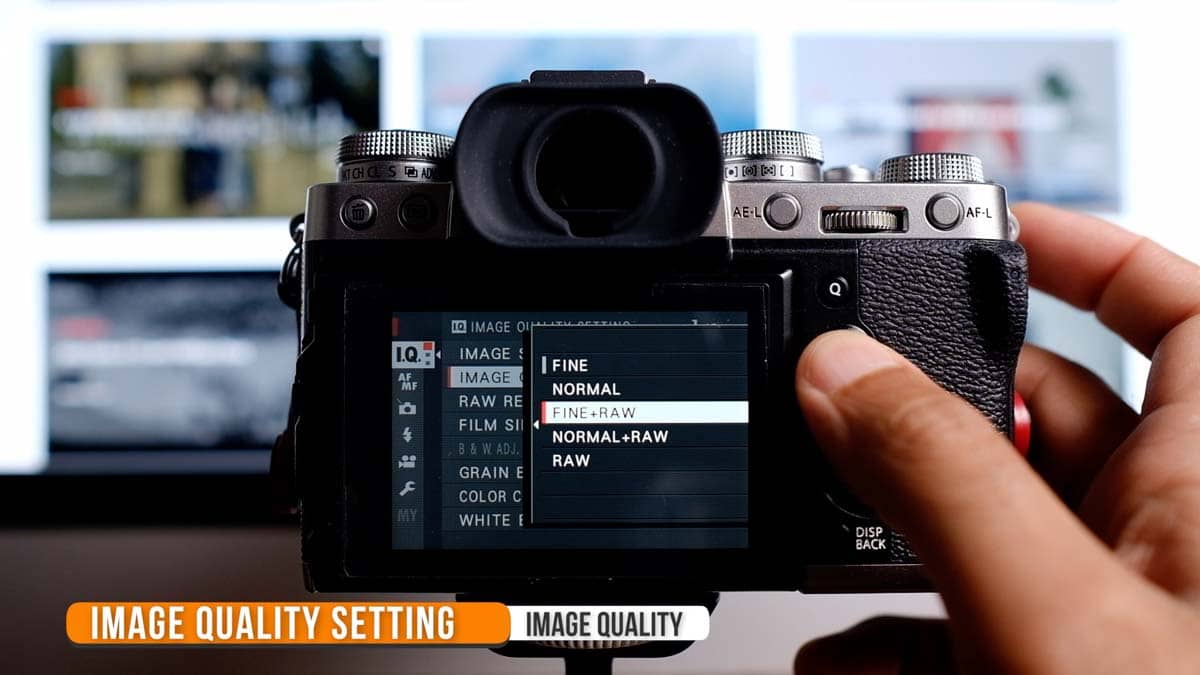
Image Quality
Disk space is relatively cheap so I prefer to shoot in JPEG and RAW both. Plus I have ample of storage since I moved to the Drobo 5N2 system. This gives me flexibility to quickly share JPEGs online or with friends while I can take my time editing RAW images in my own time using Lightroom Classic or Luminar 3 (check the side bar for discount offers on Luminar).
Press the MENU button and navigate to IMAGE QUALITY SETTING > IMAGE QUALITY and select FINE + RAW. This option gives you highest quality JPEG image while RAW while is also saved on the card.
Film Simulation
On top of setting the Image Quality, I prefer to setup my default Film Simulation. This defines what kind of colours and rendering the JPEG image will get when it is created in camera. Fujifilm have been know for their great quality films in the day of Film and 35mm SLR cameras and they have kept that alive in the digital age as well.
Their Film Simulations imitate those old film looks so you get the same results with your digital images. My preference is to use ASTIA/SOFT which I like.
Press the MENU button and navigate to IMAGE QUALITY SETTING > FILM SIMULATION and choose the look you want.

Bluetooth
X-T3 has Bluetooth capabilities that can stay on and connected to your phone to transfer images as well as capture GPS co-ordinates so it can save this to your image.
Personally, I don’t prefer to have this ON as I am concerned the small battery of the camera will drain even faster. So I turn this option OFF.
Press the MENU button and navigate to SET UP > CONNECTION SETTINGS > BLUETOOTH SETTING and set it to OFF so this is not active.
You can go back and activate it by following the same steps in case you want to sync GPS coordinates with your phone.

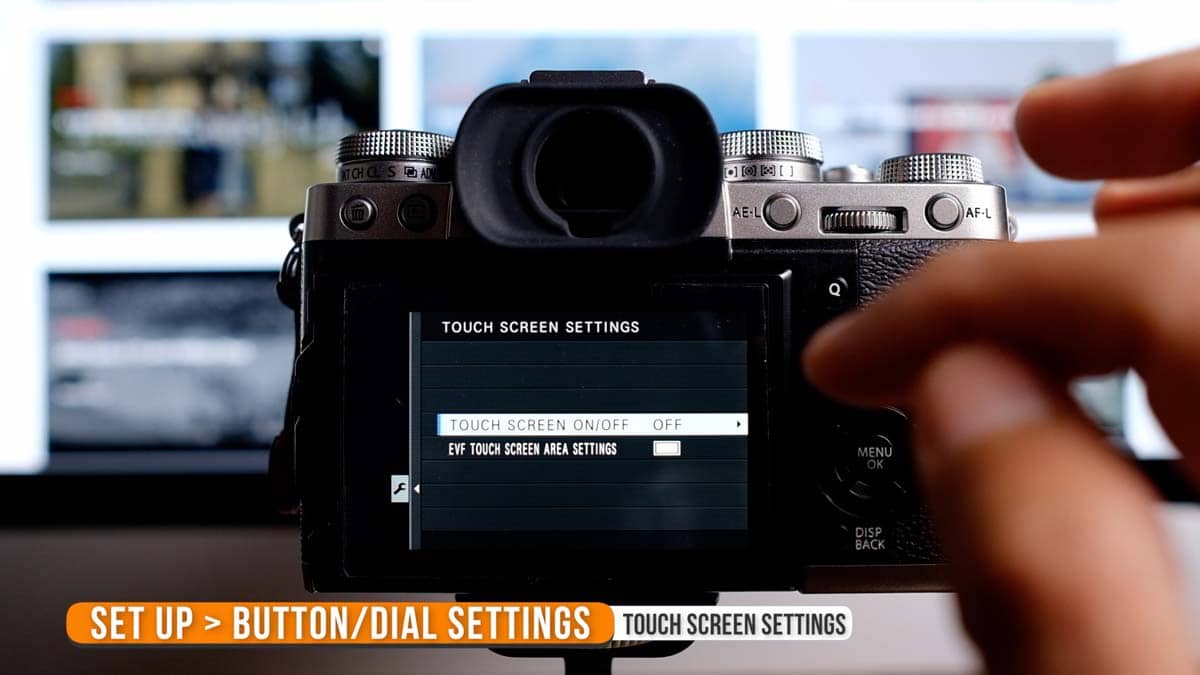
Touch Screen
This was not available in the earlier X-T1 or X-T2 but now there is somewhat of a touch screen available on the X-T3. It also has gesture capabilities so swiping in either of the 4 directions will adjust and action certain settings.
I used this for about 5 mins before I decided to turn OFF this touch screen. In my case I don’t want accidental movement or touch changing something in the camera. Touch Screen is OFF by default so you don’t need to change anything but if you want to have a go at using it then this is how you do it.
Press the MENU button and navigate to SET UP > BUTTON/DIAL SETTING > TOUCH SCREEN SETTING and select OFF or ON depending upon your preference.
As I said before I turned this OFF.
Conclusion
So I hope you found some of these settings useful in setting up your X-T3 or X-Series camera. Its certainly something that I go through with each of my cameras to personalise them and set up in a way that works best for me.
If you have other settings that you customise and set up on your camera please don’t hesitate to share these in the comments below. You can also check out the complete video I did on setting up these preferences on my camera below.

3 Comments
Trackbacks/Pingbacks
- A Very Useful Tip for Long Exposure Photos - Photo Insomnia - […] change the settings on your camera and don’t get restricted by this setting. I also wrote a blog post…


There are buttons and dials galore on the X-T3, each of which can be customized for quick access to your often-used features and settings, so you’ll lose less time to the camera’s menus. You won’t find a mode wheel here like you would on most digital cameras. Instead, Fuji’s dials on the camera give you direct control over shutter speed, ISO, and exposure compensation (and you can set aperture with the front or back dial if you don’t want to use the ring that’s available on most Fujifilm lenses), letting you manually prioritize any of them and letting the camera do the rest.
That is so true. The dials and buttons will ruin you for using a standard DD LR ever again. They are so intuitive that so will find it hard to use any dslr ever.
Hi, i tried to set the bracketing in my xt20 but there isn’t a setting to change the number of frames.Can you advise me please?.. complete novice here.
regards
susan.