
Luminar is a photo editing software by Skylum Software and has grown over the years to become real competititor to Adobe Photoshop Lightroom. From one perspective, it is more than what Lightroom can do alone and provides many more features, while from another perspective you may want to use Lightroom.
In this post I want to compare some key features and share my thoughts on which I believe is better at certain capabilities. At the end of the day both software are means to an end. You need to use the tool that is right for you.
So with the comparison below I hope to provide enough information for you to be able to decide which is right for you. Luminar is one of my favourite tools when it comes to being creative with my photos and has become an integral part of my editing workflow.
Compare
VS
Luminar
Lightroom Classic CC
6/10
9/10
Catalog
9/10
8/10
Presets
9/10
7/10
Speed & performance
8/10
0/10
Artificial Intelligence (AI)
9/10
4/10
Layers
0/10
9/10
Mobile editing
9/10
7/10
Price
Catalog
Luminar
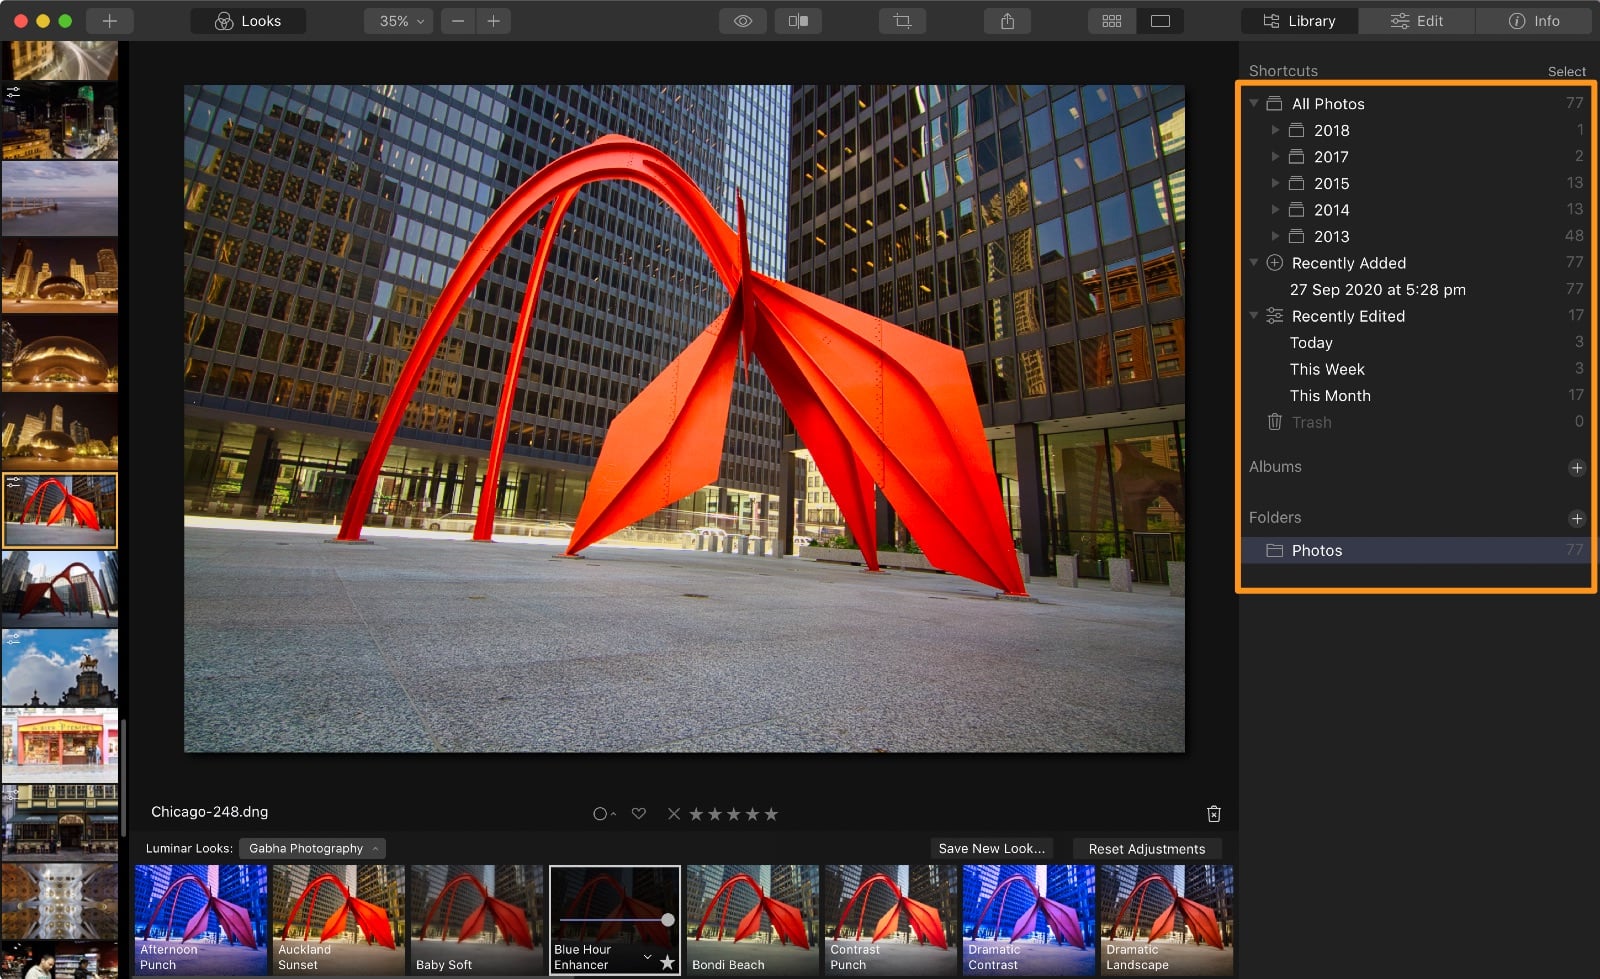
Although Luminar has had image management capabilities it does not match up to what Lightroom can do.
You can easily see images grouped by year as there is automatic search folders created as you import images by Year.
You have a Favourites folder as well as Import folder but that’s about it. You cannot create any Smart collections that will dynamically filter and find images for you. You also cannot force a refresh on a folder, this seems to happen only when you start Luminar each time.
This is one of the drawbacks for me and I really hope that they provide an easier way in future versions of Luminar that allow you to refresh a folder.
Lightroom
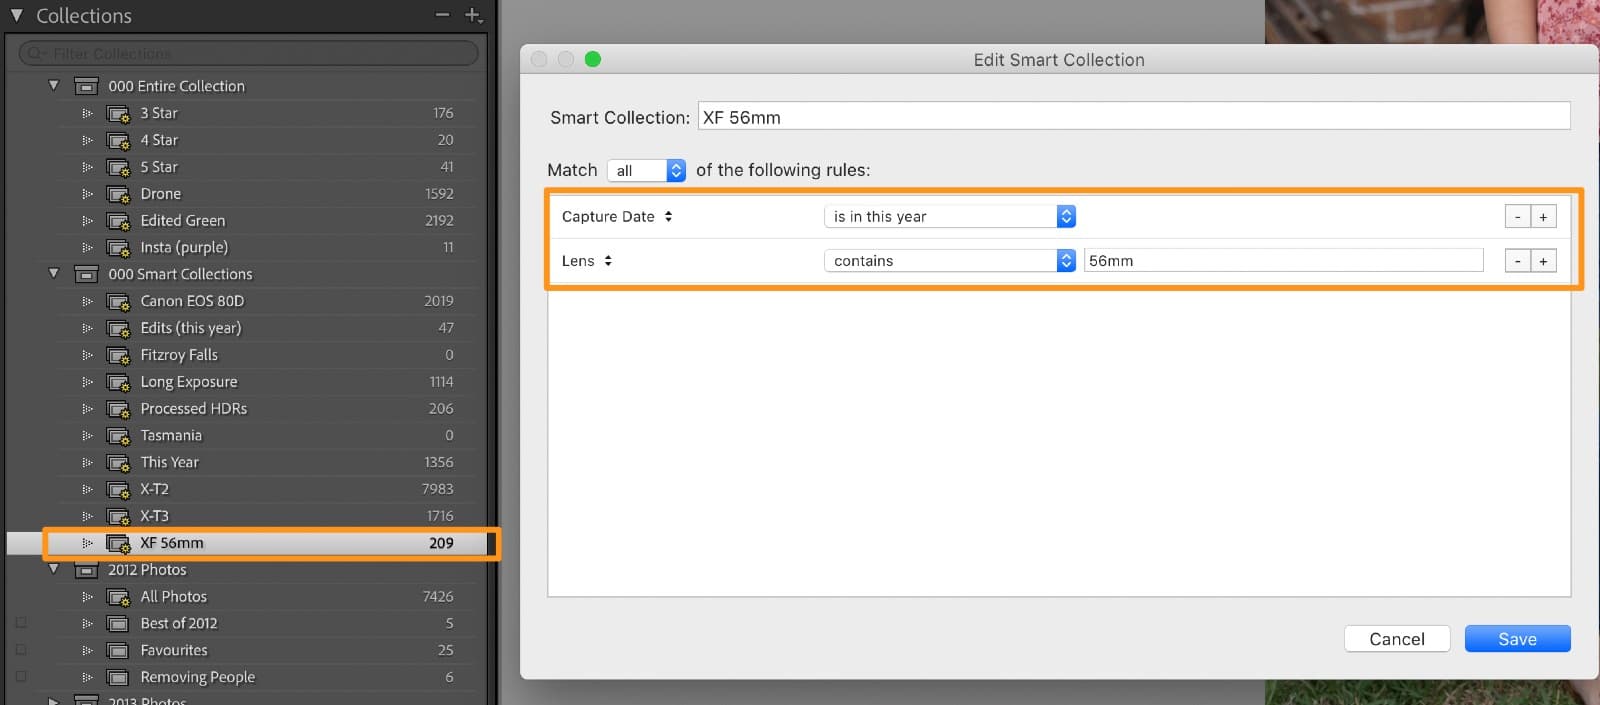
This is something Lightroom was built for, not just editing but cataloging your images. So it does this very well and probably has a huge edge over Luminar. There are many capabilities that allow you to organise your images, filter by Camera, Lens, Year or any other metadata that can be related to images.
You can create Smart collections that will display images that match selected criteria and new images will automatically add to these collections when they match the defined criteria.
You can also synchronise folders after they have been added to Lightroom, by simply right clicking on the folder name and selecting Synchronise. This will re-scan the selected folder and import or remove any folders added or deleted from the folder.

Conclusion – Lightroom Wins
Lightroom is much better at image management but let’s face it, because it has been at it for longer than Luminar. So in this case Lightroom wins hands down with its advanced capabilities to sort, organise and manage your images.
However, if you are only need to organise folders as in there original folders then you can certainly get by with Luminar.
Presets
Luminar
Presets are called Looks in Luminar and they are many looks available in Luminar out of the box.
One thing that Luminar does better than Lightroom is that it shows you a preview in form of each Look in preset panel at the bottom. Even though its a small thumbnail it still gives you a great idea of how your image would look so you can decide whether to use it or now.
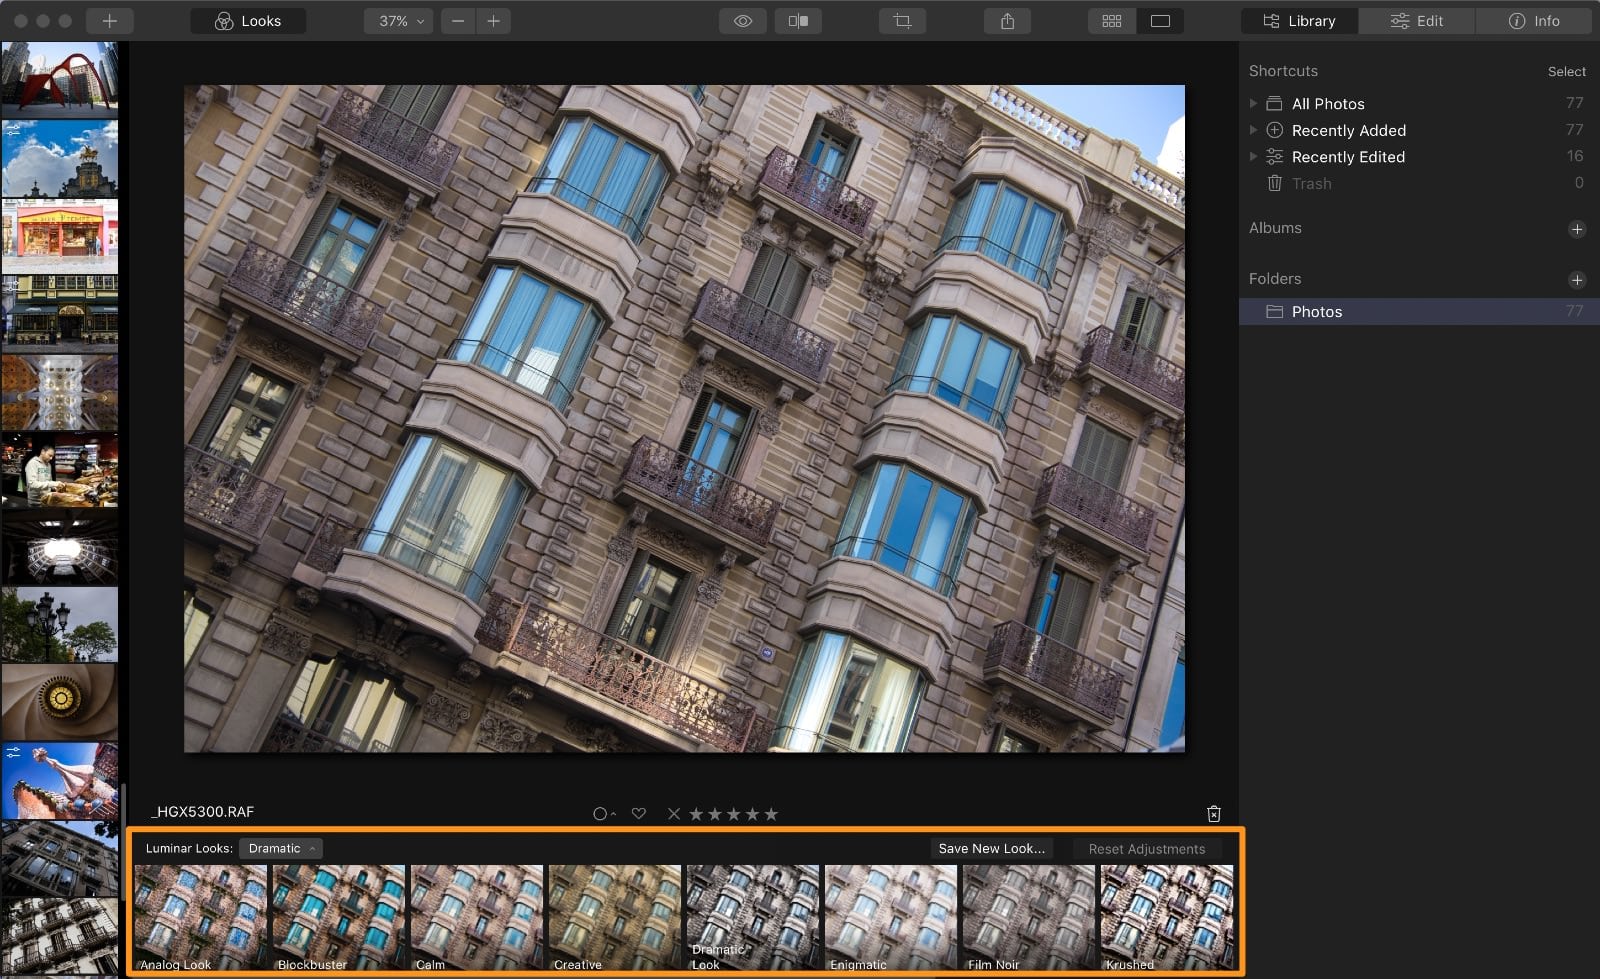
Once you decide to select the Look you want, you also have the ability to dial overall strength of the Look from 100% down to 0%. You can also Layer different Looks on top of each other and create something unique, which can be quite satisfying in itself. The trick is to not overdo it though.

Lightroom
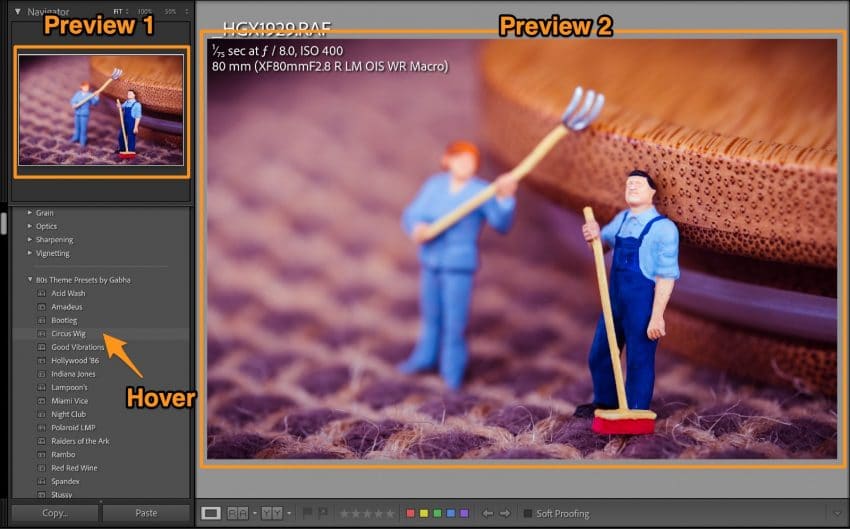
Presets are plenty for Lightroom, you can download many of them for free and also buy them online from your favourite artist or store.
However, one fundamental difference between Luminar and Lightroom is that each preset is just a name until you hover over it to see the preview which is provided in the Navigator and main Develop window. So you really need to scroll across all the presets till you find the one you want. There is no way to see what that preset will do until you however over it.
Conclusion – Luminar Wins
Lightroom has been the leader in this space for long time but there are many other software that have leaped miles ahead. Luminar is certainly miles ahead in regards to Presets ie Looks. Combine it with the capability to layer different presets, you can create some amazing results when it comes to editing your photographs.
Speed & Performance
Luminar
Luminar is amazingly faster than Lightroom, the preview generation and import is what you’d expect to be. No need to start the import and go away for a long cup of coffee, you can start editing images right away while the rest of them are being imported.
Image previous is wonderfully quick and adjustment on any of the sliders are immediate. Now I have to add that my catalog in Luminar is nowhere as near as big compared to Lightroom but I find that Luminar is still heaps faster on a 7 year old Macbook when compared with Lightroom.
Luminar 4 is now able to use GPU (Graphic Processing Unit) to make it even faster in terms of performance.
Lightroom
Lightroom is notorious for being slow, whether it comes to importing photos or exporting photos, this process seems to get slower with each update. No matter if you are using SSDs or NAS drives the performance is something that you have to compromise on.
While editing and processing images is okay, but you will certainly notice this slow down as you build a large catalog of your photos. Adobe has tried to use GPUs to process images faster and render previews but I was often getting black preview generated when using GPU both on my MacBook and iMac, so I stopped using it.
Conclusion – Luminar Wins
Luminar with its speed and performance in rendering your image wins this battle hands down. Although I still use Lightroom for cataloging majority of my photos I have compromised with the speed at which it works.
Artificial Intelligence (AI)
Luminar
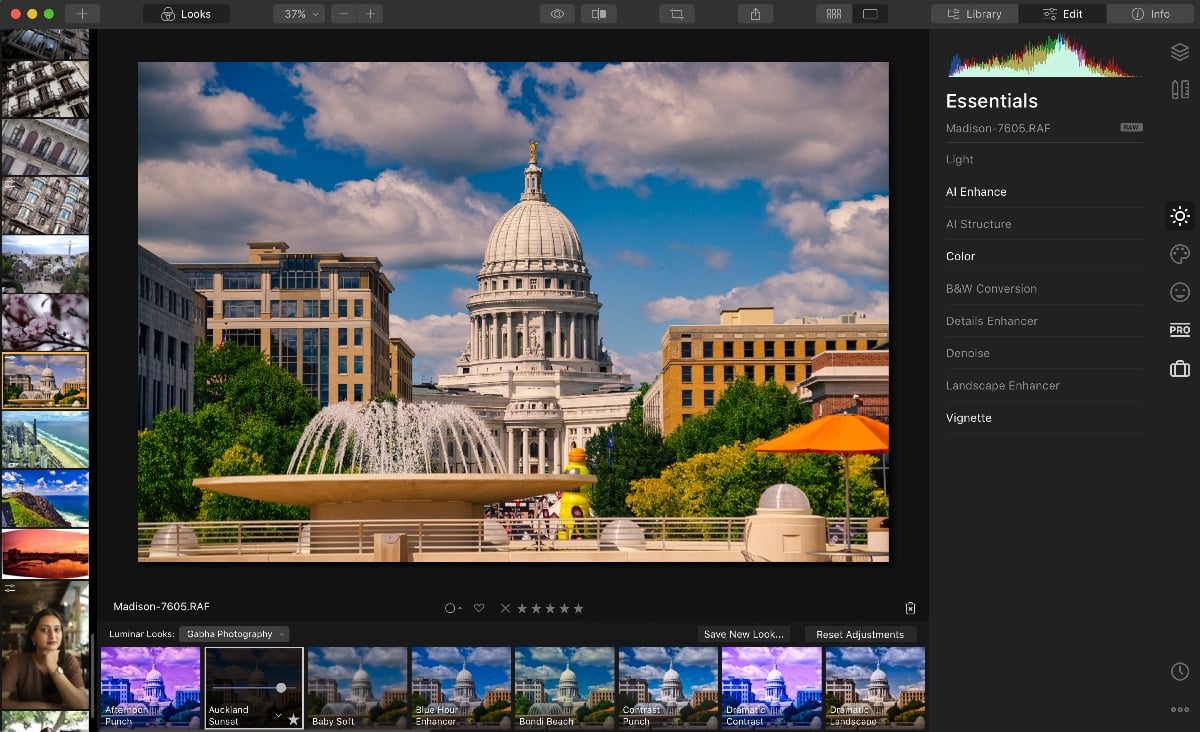
Luminar is jam packed with AI driven smarts that make editing your photos a breeze. There are various AI components in Luminar:
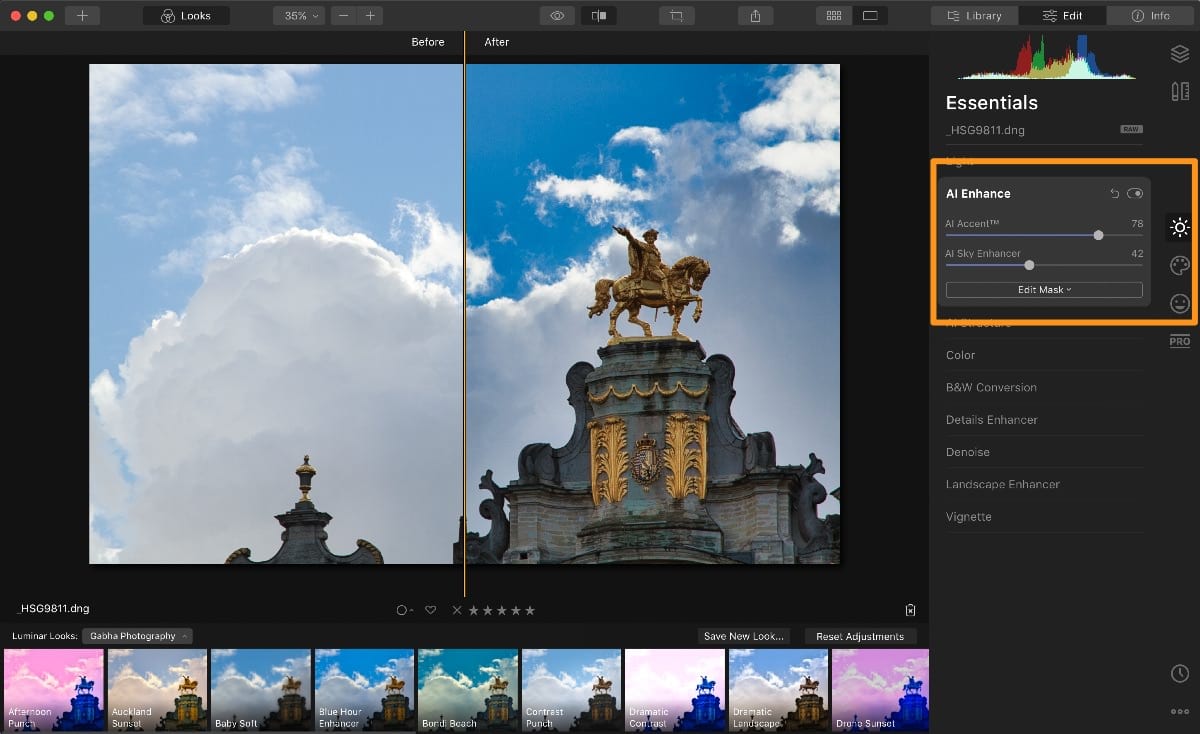
- AI Enhance – enhance the lighting, contrast and colours of your image to create a nice overall exposed image with good amount of depth. It also includes a Sky Enhancer slider will is like putting a polarising filter in front of your camera lens.
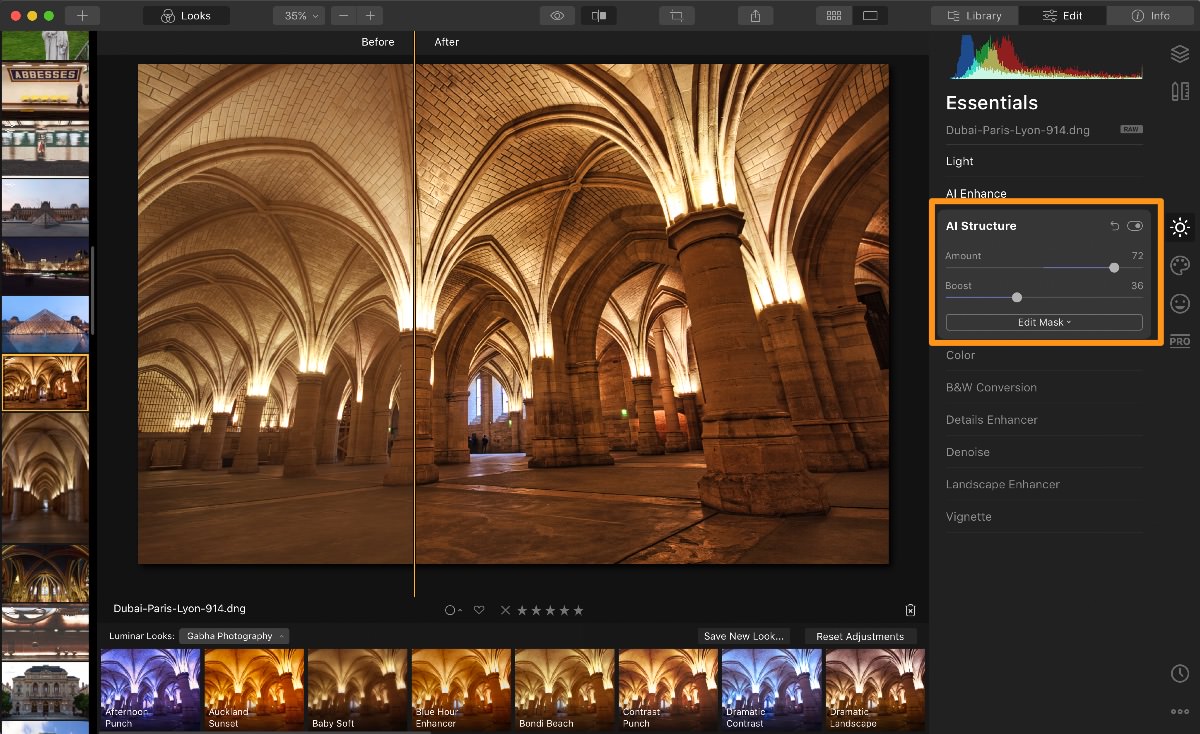
- AI Structure – accentuate the structures of the image to make the details pop.
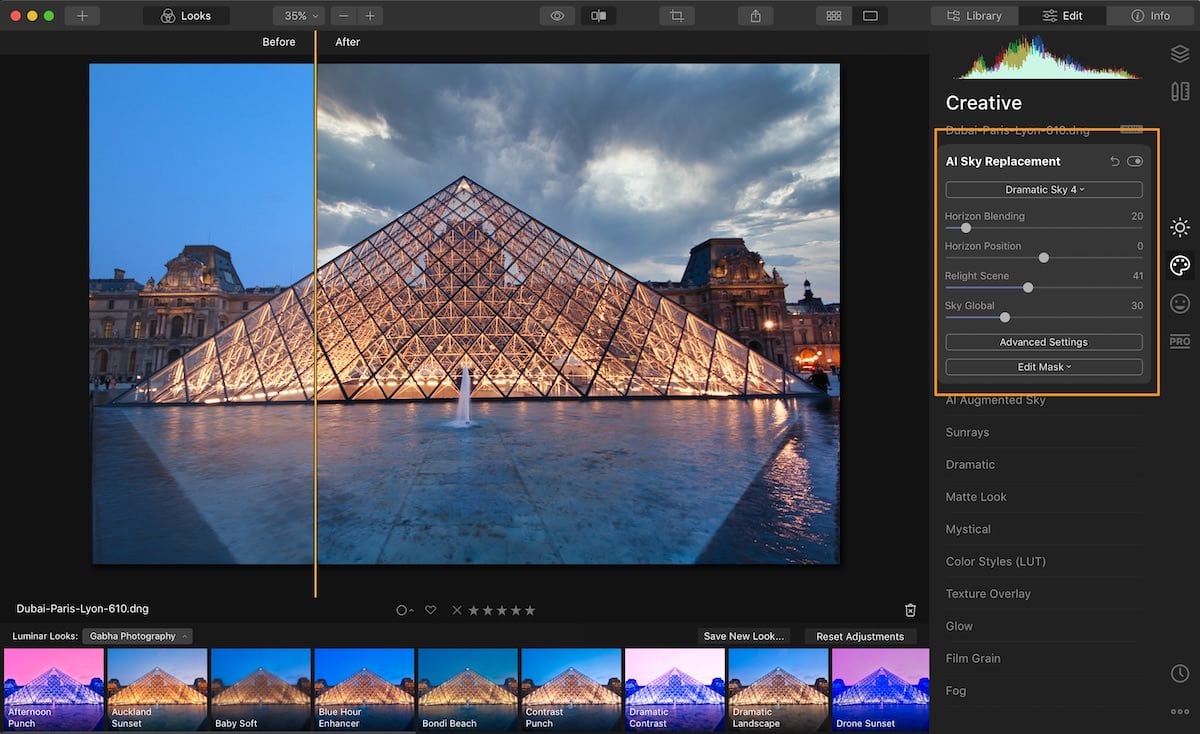
- AI Sky Replacement – go to a great location, setup and get ready to take a shot but realise that the cloud gods are not on your side. A blue sky looks okay but when you add some dramatic clouds to the scene they become even more powerful. So don’t despair you can still turn your nice shot into an amazing shot but adding different kinds of Clouds, Sky effects. You can even use your own images if you don’t like any of the presets.
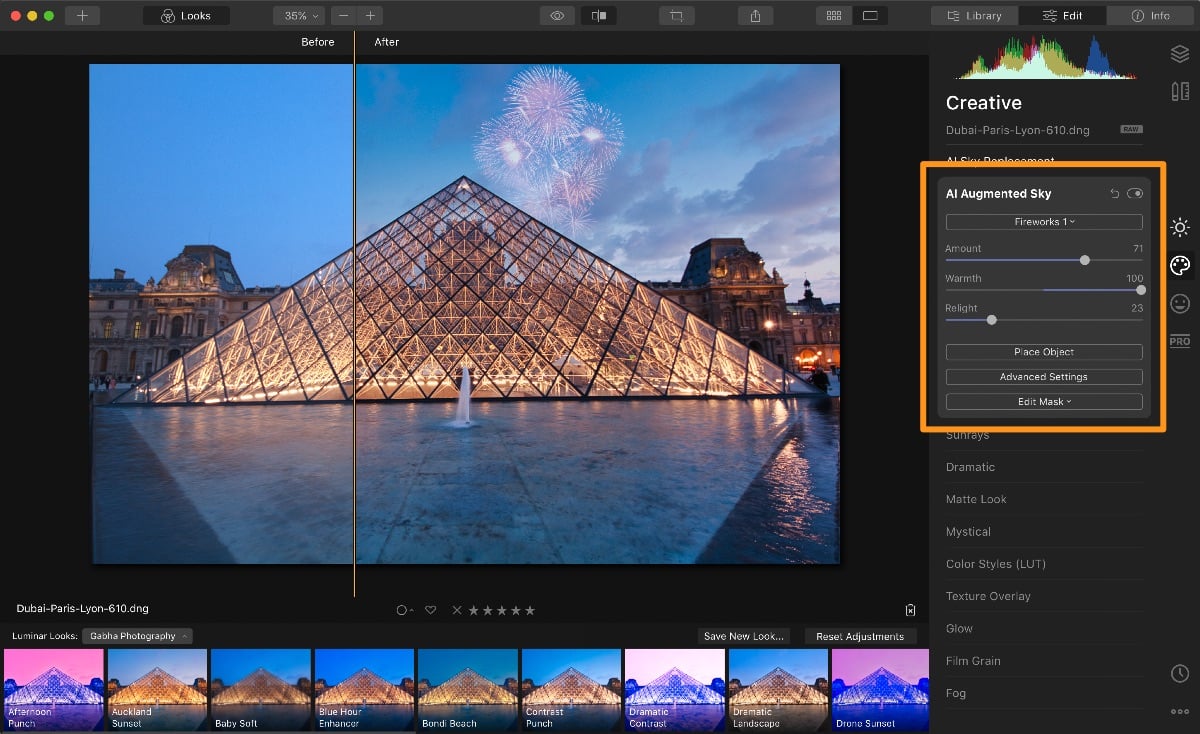
- AI Augmented Sky – I have to admit this is more of a gimic than anything else but if you want to get really crazy creative with your images you can add Fireworks, Lightening, Moon and many other objects to your image.
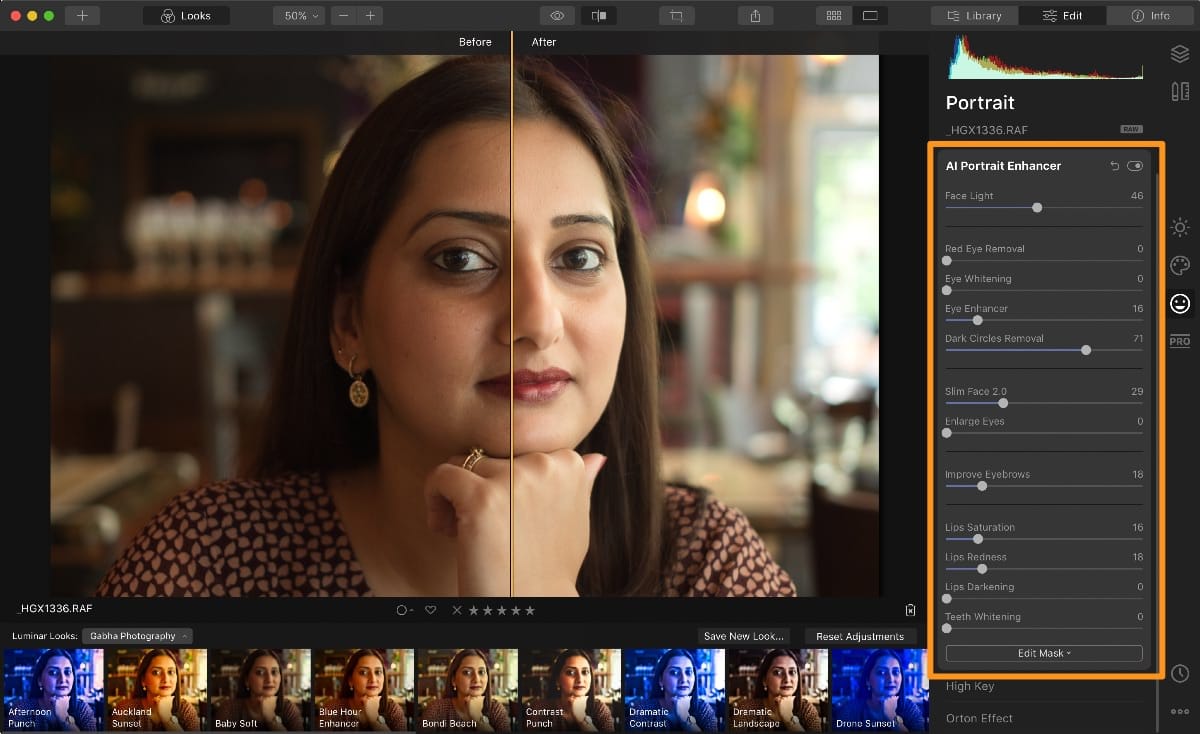
- AI Skin & AI Portrait Enhancer – This feature is simply “unreal” and has some really powerful results when you adjust the many sliders. It can light up the face, clean out the skin of any imperfections while retaining detail (its not running a blur effect on the skin), You can do so much to re-touch a portrait without actually re-touching the portrait. Its absolutely amazing actually!!
Lightroom
Lightroom has little to no capability when it comes to AI. In a time when AI is available to us in our smartphones, Adobe isn’t doing much when it comes to introducing any features that are AI driven into Lightroom.
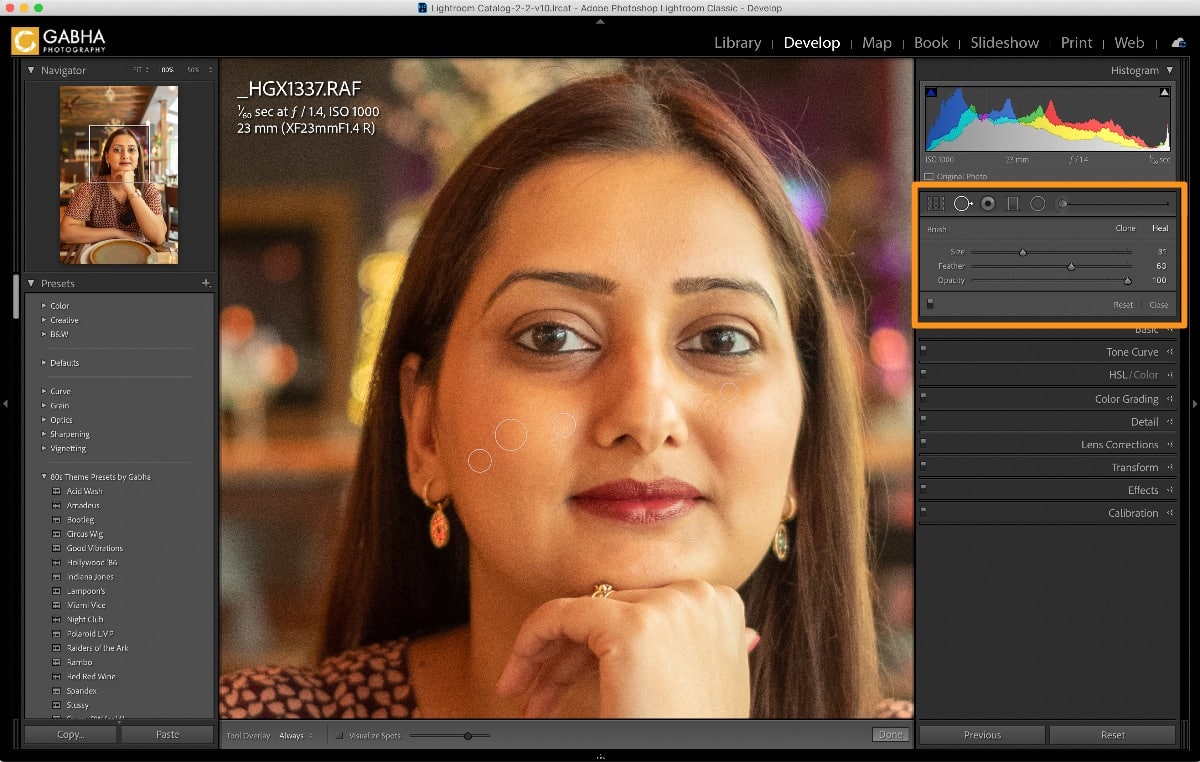
At the time of writing this post (October 2020) there is only basic content aware features like Healing and Cloning in Lightroom but these are not AI driven just algorithm based.
Conclusion – Luminar Wins
Compartive to Lightroom Luminar is light years ahead when it comes to using AI to improve or add creative touch to your photographs. They continue to work on ensuring that post-processing is easy and fulfilling as opposed to timeconsuming and tedious. They are also releasing their next version of Luminar called Luminar AI which I have not tried but considering the name, I think it will bring more power of AI to all of us.
Layers
Luminar
In Luminar, you can layer as much as you like and you can use all the tools that are available for each layer you create. You can also apply Looks to each layer and stack them up with different opacity but only with different blend settings.
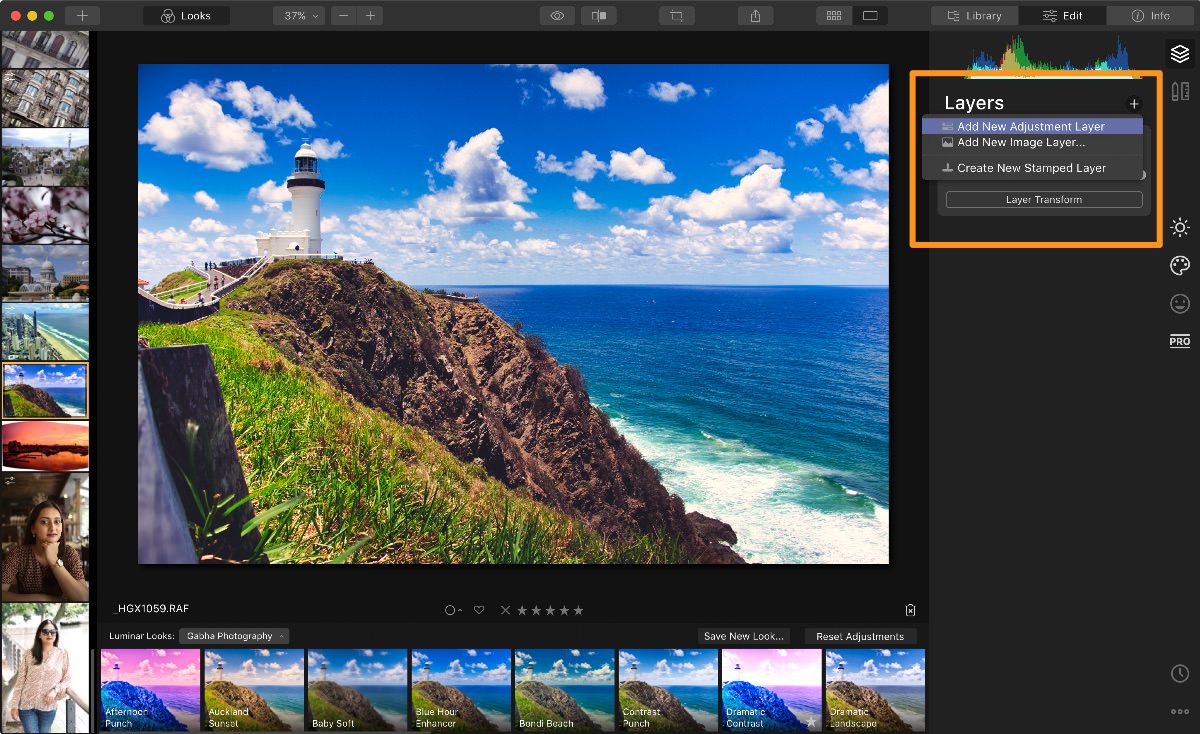
It replicates the same functionalities that you would have been used in Photoshop or other photo editing tools. You can further apply custom masks to your layer via Brush, Radial Mask or Gradient Mask to fine tune the area that will have the effects of the layer applied.
You can even use different Blend modes as well when applying layers to your image.

Lightroom
As Adobe sells Photoshop, it’s unlikely they would ever cannibalise their own product by introducing Layers in Lightroom. You have Adjustment brushes and tools that you can layer on top of the image (kind of layers but not exactly) to accentuate or edit certain parts of the image but there are limited features available in them.
So you do need to venture into full blown Photoshop from Lightroom when you do need to use layers and do further editing of your images. Like I said above, I don’t think this will ever be provided in Lightroom which is why Adobe sell the Lightroom and Photoshop subscription as a bundle.
Conclusion – Luminar Wins
True layers capability is well established in Luminar and its quite easy to use so you will not need a doctorate to figure out how to use Layer. There for Luminar is the clear winner in this space.
Mobile EDITING
Luminar
Luminar does not have any capabilities in terms of Mobile Editing. There is no sign of anything they may be developing on their roadmap either.
Lightroom
Lightroom has now had Lightroom Mobile for quite some time. I recall my very first video that I did on it was back in 2014 when the very first version was released. It has improved so much since then that you can work primarily on a tablet for most of the edit. All of the photos are synchronised back in the cloud and on your desktop when you connect.
Lightroom Mobile is now pretty much full featured replica of its Desktop brother. You can do all the same edits on the mobile as you would on the desktop.
Conclusion – Lightroom Wins
For the past 6 years, Adobe has pushed for mobile editing and we are at a stage now where Tablets are pushing their capabilities with hope to replace full Laptop/Desktop capabilities. As Luminar doesn’t have any such capabilities it remains purely a desktop software.
Price
Luminar
Luminar 4 offers a one off license which allows you to install the software on one computer only. However the price is very attractive at AU $89 one off fee. You can updates on the software included. However to upgrade to new version you do need to pay an upgrade fee.
But its a perpetual license, which means you pay once and can use forever (literally). If you are interested in buying Luminar 4 make sure you use coupon code “PHOTOINSOMNIA” at checkout to save 10% off the order.
Lightroom
Adobe Lightroom Classic is only offerred in a subscription model which cost AU $14.29/month. There are two options available:
- Photography – Includes Lightroom Classic and Photoshop with 20GB of Cloud Storage.
- Lightroom – Includes Lightroom Classic only but with 1 TB of Cloud Storage.
Adobe do however release quarterly updates to Lightroom Classic which often include new features, bug fixes and update on camera support.
Conclusion – LUMINAR Wins
Comparing the two you can see that within 6 months (6x $14.29 = $85.74) of equivalent subscription of Adobe Lightroom Classic, you can purchase Luminar 4 for the whole year.
So in a single year you paying equivalent of 2x License of Luminar 4 while using Adobe Lightroom Classic.
You can see that there are many reasons to choose Luminar 4 over Adobe Lightroom Classic. In the end it depends on your needs as a photographer which software you will use. Hopefully with the above comparisons I have helped you see the key differences therefore making it easy to decide which is the right one for you.
If you found this post useful please do share it with your friends. Let me know if you have any questions in the comments below.


