Luminar Neptune – A New Way to Edit Photos
Harmeet Gabha, Editing
16 June 2017
Luminar Neptune is the latest release from Macphun which has many new features included and is a FREE upgrade for everyone who is already using Luminar.
I happened to be lucky enough to get an early copy from the great team at Luminar and was able to check out the latest version.
These features are:
- Accent AI Filter – A magic wand filter that edits your photos with just a single slider
- Quick access workspaces – to get started quickly with editing
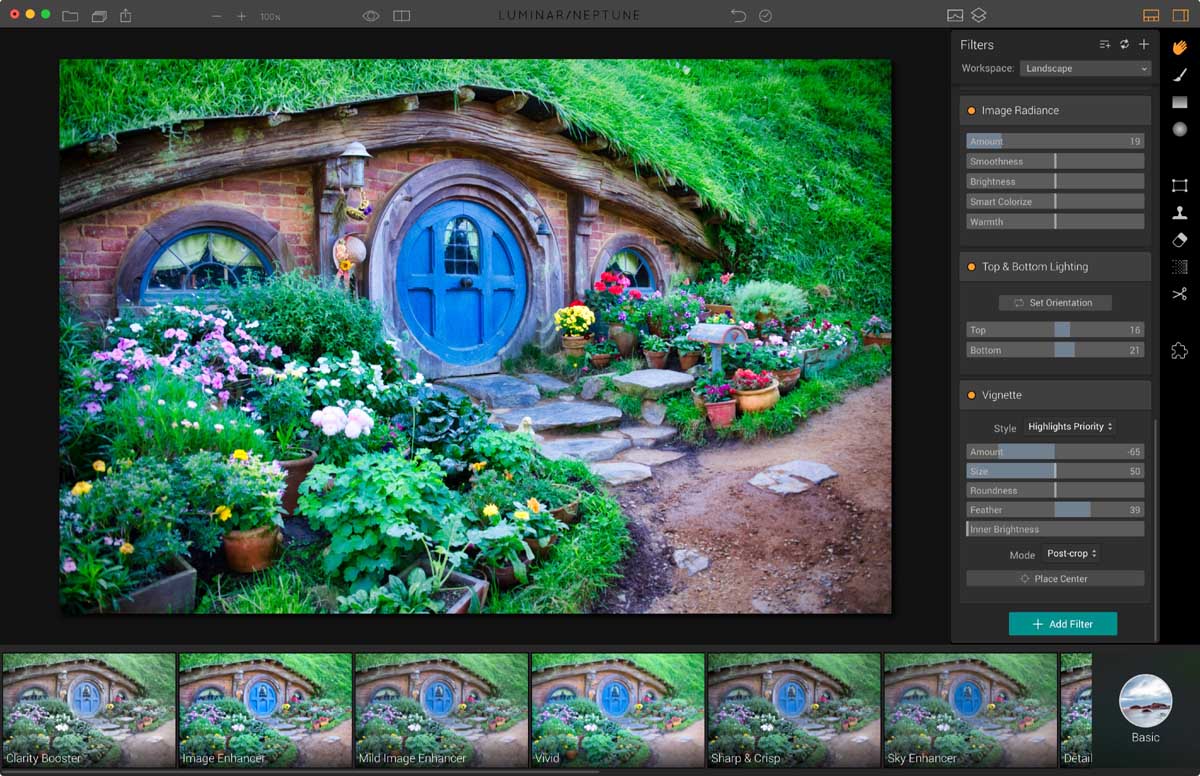
- Vignette Filter – Now you can define pre/post crop vignette and also define the Centre point
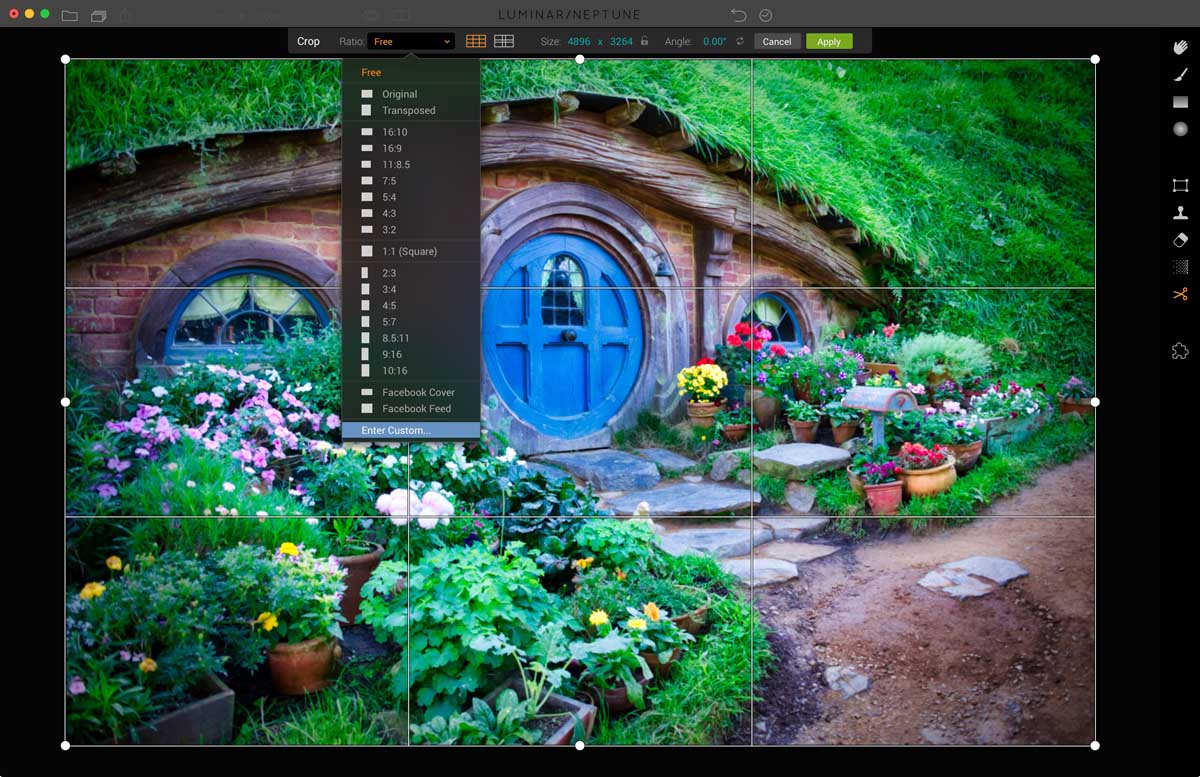
- Custom Crop Ratios – Create your own custom crop ratios and use them again
- Faster Performance – Overall the software runs much faster than before
Accent AI Filter
With this one slider, you can have some AI (Artificial Intelligence) analyses your image and apply some magic recipe on your images to enhance it from its original state.
The filter is now available by default in following Workspaces:
- Quick & Awesome Workspace
- Essentials Workspace
- Portrait Workspace
- Street Workspace
If you want to add it to your Custom workspace you just click on the “+ Add Filter” button and its the first filter in the list. Simply add it to your workspace and save the workspace for future use.
Move the Slide to see what this Accent AI Slider can do!!
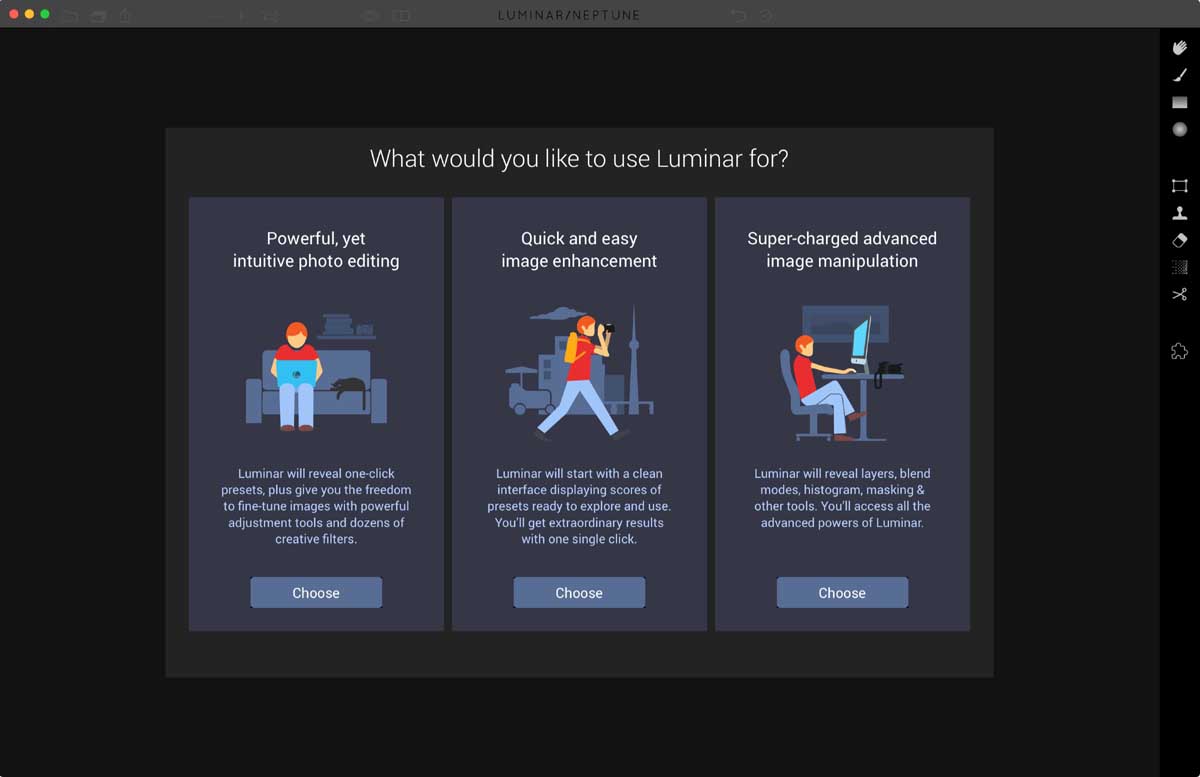
You also get a new option which lays out the interface for you to help you get started quickly. You can choose from:
- Quick and easy image enhancement – use presets only to edit your photos
- Powerful, yet intuitive photo editing – use presets and adjustment filters to fine tune your image without the need for layers
- Super-charged advance image manipulation – a full featured interface with all the editing capabilities such as presets, adjustment filter and layers to apply multiple adjustments or blend multiple images.
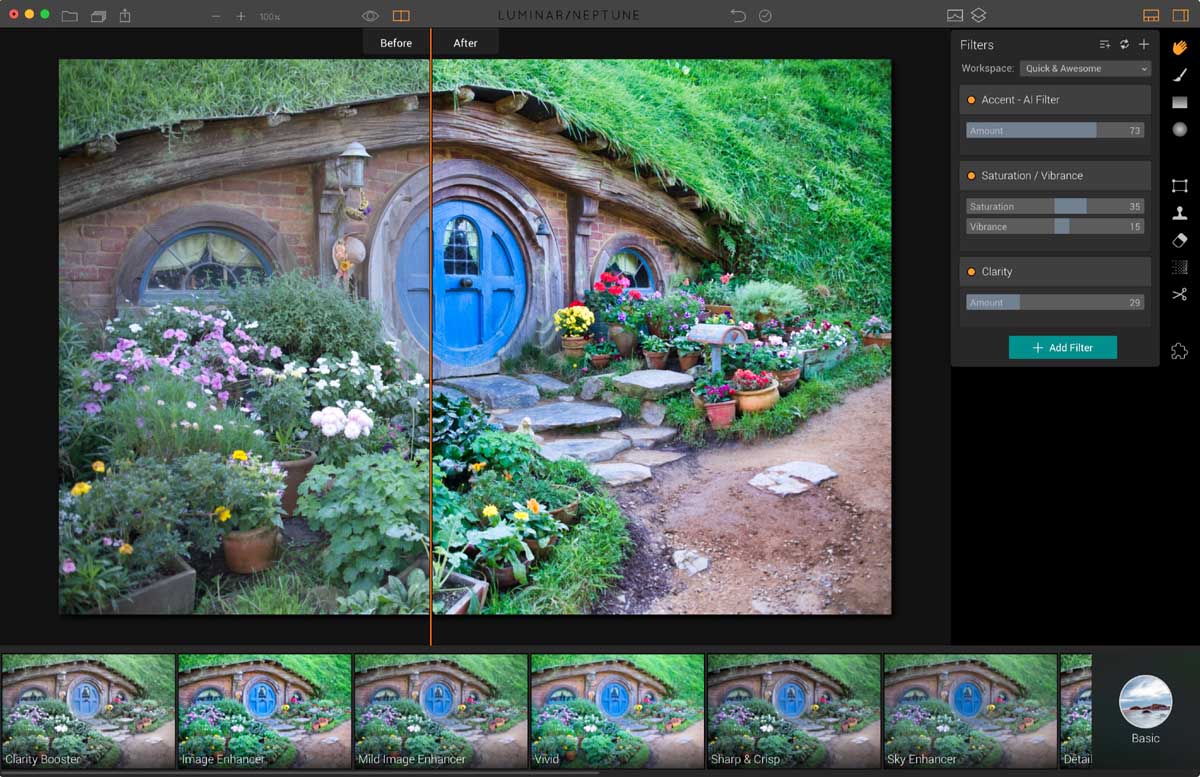
Quick & Awesome Workspaces
This new workspace does exactly that. You get a very clean workspace which has only the three very essential filters so you don’t really need to understand all the mambo jumbo about all the photography lingo.
Just get in there and start adjusting the image. Use the Accent AI filter, adjust Saturation/Vibrance and/or Clarity.
Vignette Filter
The Vignette Filter has been improved and now you can define if the vignette applied is:
- Post-Crop – The vignette is applied to the final image with the defined settings whether you crop the image or not.
- Pre-Crop – The vignette is applied in it current state and if afterwards, you edit the image the vignette remains in its original form and doesn’t re-apply to the new crop.
Mostly you will find that you use Post-Crop and not Pre-Crop. I always use Post-crop.
You can also define the center point by selecting “Place Center” and clicking on the image to indicate where the center of the vignette should be.
Custom Crop Ratios
You can see that there are a ton of crop ratios available out of the box and most of the standard ones you will want to use will be there but for example if you want to create a Cinematic Crop you can now define your own crop ratios.
Performace Improvements
If you are like me and just sit down to hammer through an Edit session where you edit a bunch of images in one sitting then you would have experienced that when you have more than 6-8 image open in Luminar it would start to get a bit slow.
Luminar Neptune has been improved and I found not only the Rendering of the single image was faster in this version but also having multiple images open didn’t really slow down the software.
Conclusion
There are many new improvements incorporated in this latest version of Luminar that will make its, even more, easier for a beginner to get started with using Luminar.
If you are already a seasoned user of Luminar you will find that the added new improvements will benefit your workflow.
Wanna get your hands on Luminar?


